I have recently learned how to make a “needle/syringe lighter”
(slang may vary in different geographical areas) by a friend and fellow
tweaker. All credit goes to him for patiently showing me the procedures
involved and explaining each step in this cigarette lighter
modification. However, I have to admit that my first reaction when he
described what a needle lighter is was sheer incredulity. Why would
someone want to drastically reduce the flame output of a lighter?!?
To tell you the truth, I’ve never even heard of such a contraption
before. My friend learnt about how to make a needle lighter from the
locals in Kota Kinabalu, Sabah, during the time he spent there. It
seems that the difficulty and/or hassle of acquiring injecting
equipment, coupled with the high bio-availability of smoked syabu/shabu
(methamphetamine) leads to Sabahans thinking up innovative ways to
smoke methamphetamine. Malaysia Boleh! 😉
Anyway, I later realized that there are various applications where a
needle lighter would be much more preferable to an unmodified lighter.
veritas will be posting about one of the common uses for a needle
lighter in his blog, since the content is more suited to that site
instead of this one. This post is meant as a general interest article
and a step by step guide to making your own needle lighter. It’s not
hard to make, except for the “needle” bit. I must reiterate that I do
not take illicit substances, but I’m always interested in “new”
(meaning different) methods of administration, thus, I was there to see
how needle lighters are made.
Needle Lighter shopping list:
One cigarette lighter
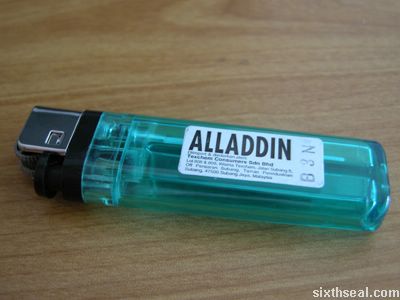
Just get the cheap RM 1 ones, like Alladdin. It’s important that you
get the transparent ones where you can see a single white pipe going
into one of the chambers, instead of the solid color ones. A lighter
with flame intensity control (most of them have it) would be nice.
Scissors or equivalent
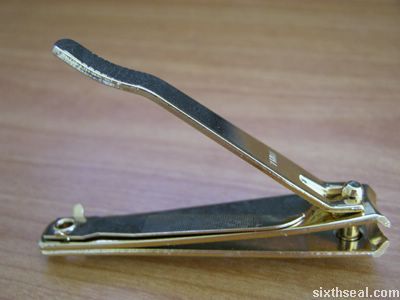
You probably already have one at home. I don’t own one, so I used nail clippers instead. It’s just for cutting excess foil.
Aluminum foil

These three items can be easily found in your local supermarket.
Heck, you probably could find all of them around the house somewhere.
Please note that the items stated above are the required items that is
necessary to make a needle lighter.
Steps for making a needle lighter:
1. Cut off the “starting bit” (the jagged end) if it’s a new roll of aluminum foil.
2. Fold the strip of aluminum foil back about a size of a pencil
(roughly 1.5 – 2 cm). Please ensure that there are NO creases or any
defects. Repeat till you get a mint condition strip of foil. Ensure
that the foil has a nice firm side so you can rip it off the rest of
the roll without ruining it.
3. “Flatten/straighten” the piece of foil by running it through a
business/name card (or something equivalent) which is folded into half.
This can be easily done by holding on to one end of the strip with one
hand and apply firm pressure while quickly pushing the folded business
card along the length of the foil with the other hand. Repeat several
times until it’s very straight, no defects should be visible to the
eye. Don’t worry about it if the strip of aluminum foil snaps while
you’re doing this, you’re not likely to use the whole thing anyway – if
the longer part of the two is about a cigarette lighter’s length, you
can still use it.
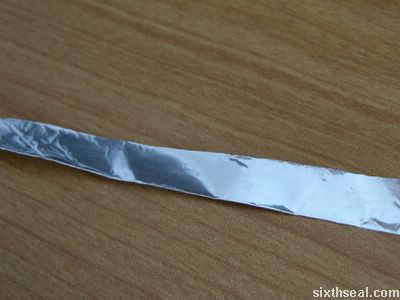
It should look something like this, but yours had better be crease free. 😉 This is just a fudged strip.
4. This is the hard part…start by folding one end into something
like a triangle (folding in) and then start rolling TIGHTLY, with
pressure maintained all the while to ensure a solid construction. The
“glossy” side of the aluminum paper should be “outside” when you’re
rolling it. The beginning you started with should be the smallest in
diameter, VERY SLOWLY increasing in diameter. The end should be bigger
than the beginning, but only VERY SLIGHTLY. The “needle” should be so
tightly wound that it would look like a single wire when it’s done. I
just pulled out a couple of my hairs as reference and it shouldn’t be
more than 5 human hairs, but this is so variable due to the differences
in hair diameter amongst humans. Just look at the line going into the
cigarette lighter from the bottom and ensure that your wire is thinner
than that. Remember that the wire you’re making is supposed to have a
hollow core despite the tight binding you did, due to the triangle
shape you folded before starting to roll. The hollow center would
probably not be visible to the naked eye if you binded it tightly, but
the outside will look like a spiral design if you look closely,
indicating that the rolling has been done correctly.

5. Please note that you can make a wire as short (though at least 5
cm is recommended due to the place the wire would be placed) or as long
as you want (though longer wires may have a tendency to have a blockage
somewhere). You can fold up the whole strip or just a bit. It’s up to
your preference – I like short ones so it’s closer to the lighter and
easier to use. Use scissors or another sharp object to cleanly sever
the end when it’s reached the length you want.
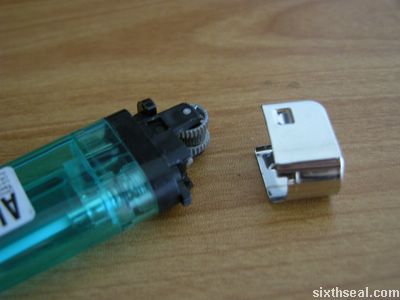
6. Now that the hard part is done, remove the metal or plastic cover
from the lighter top. It’s the piece that begins after the gas release
button and covers the round flint spark thing. It may seem unyielding,
but you can actually remove it with very little pressure. Look for a
little ledge above the lighter flame settings and use a fingernail to
flip it up.
You don’t need to keep the cover, unless the activities you’re going
to do with the needle lighter is short. The cigarette lighter will run
out of fuel if you use it constantly in less than an hour.

7. You should see something like a valve…it’s the thing that has a hole and looks like a mini volcano.
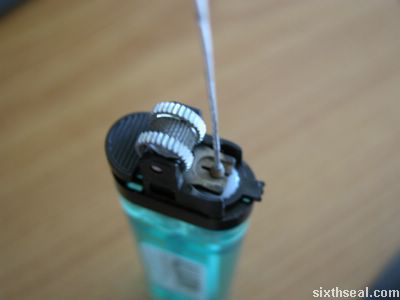
8. Insert your needle wire, smallest end first, into the hole.
You’ll have to redo the whole thing if it’s too big to fit in there…

9. When the needle is inserted, depress the gas release button.
Don’t worry, it won’t explode and kill you or something absurd like
that.
10. Observe how far up the lever opposite the gas release button
thing goes up. We need to force the lever to release the gas by pushing
it up.
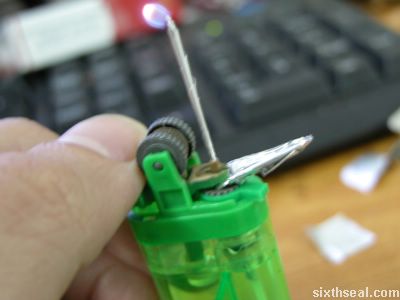
11. Use folded up aluminum paper, or whatever’s around to keep the
gas flowing by stuffing the area between the lever and the lighter
flame controlling nub. Basically, you’ll see the lever rise when you
depress the gas button. Stuff the area in between when the lever goes
up, and keep that wedge there – it will provide a permanent gas flow,
and thus, a flame that’s only limited by how long the gas lasts. You
have the option to pull the wedge out if you want it to last longer.
12. Test your needle wire by using another lighter to light the gas
coming out from the top of your own wire. If all goes well, a flame
will automagically appear at the top of the wire you made. Otherwise,
something went wrong in your process flow. It would be necessary to
start from the beginning.
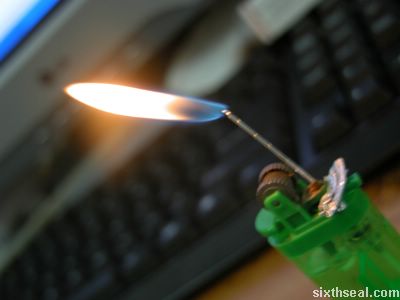
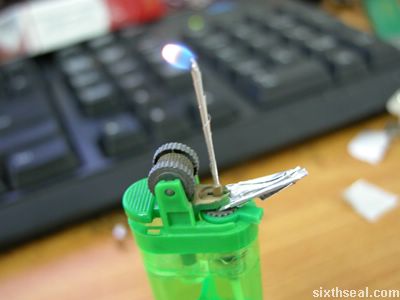
13. If you see a flame appearing on top, congratulations! You’ve
made a needle lighter. It’s not very hard per se, it’s just the
aluminum foil folding that usually causes problems. My first few
attempts were all duds – they didn’t draw gas up, it wasn’t hollow. I
was never good at origami anyway. But you get the hang of it after a
while though. You can change the flame intensity using the dial
control, but you might have to remove the wedge which is responsible
for supplying constant gas first and putting it back again. You’ll
probably be disappointed if you’re hoping for a large plume of fire,
this contraption is not meant for that.
It is called a “needle” lighter due to the abilities of some experienced people to make their aluminum foil wires very
tough – it feels like a real needle and it can really piece the skin,
though it’s likely to be a papercut type wound. Basically, the needle
lighter is just a normal lighter which had its fire delivery system
replaced manually with a smaller, easier to control and handle
“chimney” that won’t extinguish unless you expel air (that’s a
pretentious word for blow ;)) at the top of the wire or remove the
wedge. It’s relight-able, of course. Just use another lighter to light
the top of the wire.
However, this DYI permanent lighter would probably be nothing to
write home about for most people. I like lighters that burn fast and
hot myself. It would appeal to certain people using it for specific
activities though. The good thing about the needle lighter is the
always on flame, which Zippo already has, but a Zippo flame is hardly
suitable for most things. Now, this needle lighter, it has finesse! It
can be set to the lowest settings to automatically produce a steady and
continuous delivery of heat, unlike normal lighters.
New and related post on castitas.com:
Needle lighters reduce wasteful excess smoke while smoking methamphetamine (or heroin) on foil [castitas.com]
Warning: It’s a little dry compared to the usual veritas posts. I suppose you could already tell that from the title. 😉