The journey to scale Mt. Kinabalu begins with a one
and half hour drive from Kota Kinabalu to the base of Mount Kinabalu at
Kinabalu Park. There are a lot of scenic views during the ride – the
peak of Mt. Kinabalu is visible at one point.

The road traverses through the mountainous area around Mt. Kinabalu
and the ambient temperature cools down noticeably during the ride to
the base of Mt. Kinabalu. The road actually goes above the lower cloud
cover that usually shrouds Mt. Kinabalu, and if you’re lucky, you can
get a magnificent view of the great mountain.
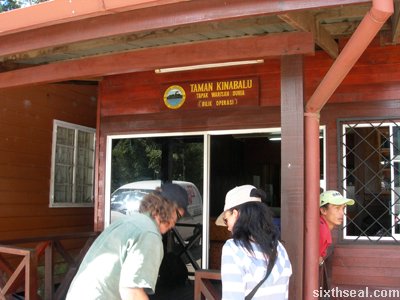
There is an Operations Room at the base of Mt. Kinabalu and it’s managed by Kinabalu Parks, Sabah.
This is where you register your presence (so they’ll know if you fall
off the mountain instead of finding your skeletal remains 3 years later
;)) and get a guide to bring you up to the summit.

Mount Kinabalu is a World Heritage Site (the first such designated area in Malaysia) and the highest point is Low’s Peak at 4095.2 meters.
It used to be 4101 meters but the summit height seems to change from
time to time, which I find interesting. Mt. Kinabalu is the highest
mountain in South East Asia.

The park wardens at the Operations Room will issue out tags for each
individual – the tag has the climber’s name on it, as well as the date
of registration. There is a short 4WD (SUV) ride to the proper base of
the mountain and that is the point where the climb up Mt. Kinabalu
begins.

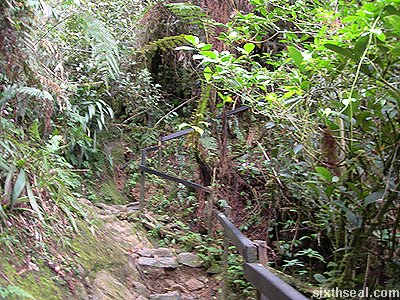
The summit trail begins at Pondok Timpohon where
there is a locked gate to keep out non-mountain climbers (the ones
without a valid pass). It is a 6 km climb (6.5 km to be exact) from
here to the halfway point accommodation that we booked for the night.
This is the easy part of the journey as most of the Summit Trail is
relatively well paved.

This is a photo of me beside the Summit Trail sign
– I was inappropriately attired coz I didn’t know that we had to climb
to the half-way lodge that day. The “walking stick” can be purchased at
the Pondok Timpohan gate for RM 3. It’s quite useful for hiking up
rough terrain. A torch is also essential for the summit climb, as well
as a suitable (enough for you to drink, but not too heavy for you to
carry) supply of water.

The first kilometer of the Summit Trail is relatively tame, with
(usually) well defined paths and a less punishing incline. The flora
and fauna at this point is similar to what you’ll find at altitudes of
below 1000 meters.

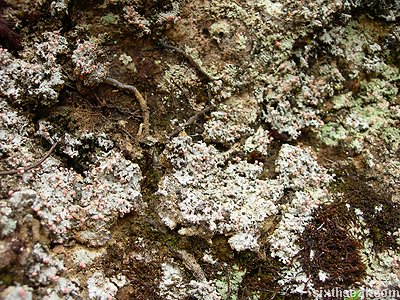
There is a rest hut at about 1000 meters from the start of the summit trail – it’s called Pondok Kandis (Kandis Hut) and there are toilets and untreated (read: undrinkable) water supplies at each rest point.

The rest points (huts) have a short description of the place or an
interesting snippet and also distances to the next rest point, both
ways. Pondok Kandis has the distinction of being located “on the
youngest granite pluton in the world”.

This is a photo of the pluton which is only half a million years
old. I realized the reason Kota Kinabalu is called Api-Api by the
locals then – it’s coz it used to be a volcano.

The next kilometer is more demanding, with more rough terrain and
sharp inclines. The path also starts to become more rocky and harder to
navigate.

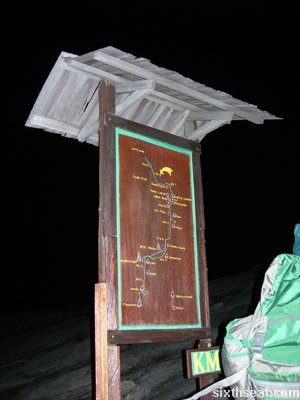
There is a Summit Trail progress sign at every kilometer with a
drawn trail path to show the progress you’ve made so far. It can be a
pain in the ass at times. 😉

The view starts to become more interesting…the mountain range can
be seen through the trees beside the trail and the ambient temperature
changes subtly as you walk up the summit trail.

The next rest point is Pondok Ubah (Ubah Hut) at 2081.4 meters above sea level.

The sign states: Moses and ferns grow well in the damp conditions
here and grows luxuriously on the trees here. As you climb the
mountain, the weather gets colder and the soil gets thinner. Fewer and
fewer plant species can survive in these harsh conditions.

Sure enough, we saw moss. Moss that grows on trees.

Green, furry moss.
White, fungi-like moss.

Heck, there’s even moss that seems to grow on the banks of soil that flanks the summit trail…

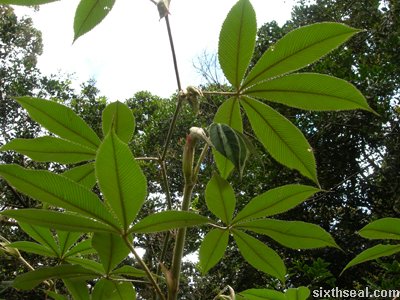
There is also a variety of interesting ferns growing along the summit trail as well.

The terrain on the summit trail gets rockier with rougher edges cut
into the mountain at the 2 km point with a similar drop in temperature
to reflect the higher altitude.

We seem to reach the cloud cover just before the 3 km stop point.
It’s a very interesting experience to watch the clouds float by before
you and into you before dissipating…

The next hut is called Pondok Low II (Low’s Hut II
– no idea where Low’s Hut I is) and one notable experience of climbing
Mt. Kinabalu is the friendly people you meet while going up and coming
down. It’s customary to greet fellow climbers with a warm “Hello!”.

It seems that the summit of Mt. Kinabalu is named after the first
person to reach the highest point of the mountain – Huge Low, 1951.

The large (huge – pun not intended) ferns dominate the flora at this point.

The summit trail is covered by a “fern canopy” of sorts, which shades the climber (though at this altitude, it is hardly warm).

It seems that the fern canopy is made by fern trees! Jesus, I didn’t know ferns can grow like a tree…
The trail also tapers off into unpredictable and narrow stone paved paths…

It starts to become more challenging to navigate the summit trail at
this point. I was thankful I had the walking stick to avoid unplanned
face first falls into the stony ground.

I found an unnaturally large transparent earthworm. I didn’t think it was animate at first…

…until I touched it and saw it retract into its segmented body length at the contact. It looked like a gross penis.

The summit trail keeps on ascending and fungi and other strange plants starts to dominate the plant sphere.

Pondok Mempening (Dizzy Hut, an appropriately named rest point) lies in the mist shrouded upper echelons of Mt. Kinabalu.

Stranger and stranger plant life forms started to make itself known…

…and vacuum sealed packets of crackers protested against the
altitude and pressurized, threatening to literally burst. It’s useful
to bring crackers and energy bars (or high energy candy bars like Mars
and Snickers bars) to eat during the climb.
Plants that look suspiciously like cannabis sativa was also spotted during the summit climb.

Orange fungi seem to dominate the KM 3 point.
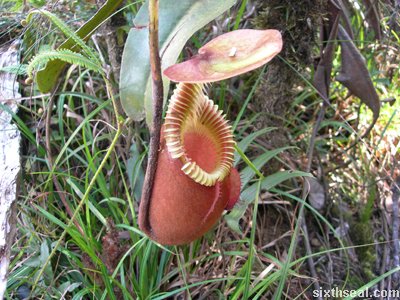
I also took photos of the pitcher plants that grow here. Here’s a
rather nice looking pitcher plant. It looks like a nut sack (to call a
spade a spade) with its furry exterior and sticky liquid material
inside. This one’s for lolanto.

The higher parts of the summit trail starts to become uneven rocky
terrain. I know I’ve mentioned this many times, just think of it as
getting harder and harder the higher you climb up. :p

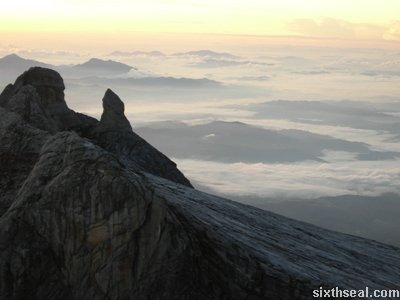
The peaks of Mt. Kinabalu is visible as we pass the canopy cover –
it’s majestic, watching the cloud cover roll lazily past, revealing the
ancient beauty of the mountain.
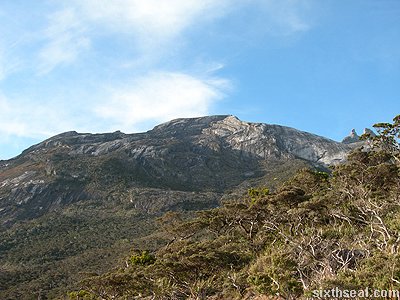
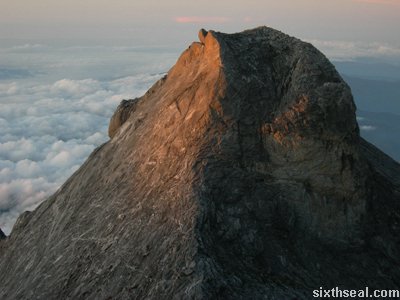
The higher altitude also makes the plants smaller and hardier. The
mountain at the backdrop looks absolutely beautiful. It was tough to go
up the summit trail but the sight of the mountain peaks makes it worth
the effort.

The sight of the moon rising as we ascended the summit trail also provides an ethereal quality to the experience…
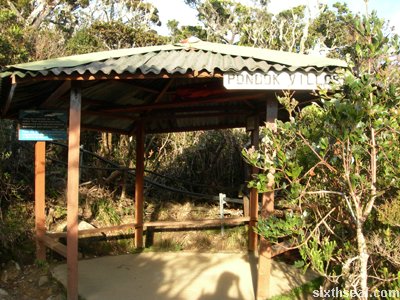
Pondok Villosa (Villosa Hut) states that the strong
wind and the poor soil causes the trees to become dwarfed and gnarled
here. It also states that the despite the gnarled and small look that
the trees have, some of them are several hundred years old.

The gnarled trees are a main feature of the landscape before we reach Pondok Paka.
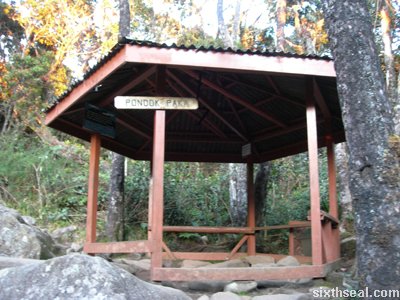
Pondok Paka (Paka Hut) is the last rest point before the first halfway house at Laban Rata.

It was getting dark and I got separated from the group coz I wanted
to go faster (the others could not climb that fast and were slowing me
down) so I decided to go ahead. It was a bad idea as I got altitude
sickness a little while after that and I got confused, dizzy and sleepy
(!). I had to sit down and I honestly thought that I was on the wrong
path and the chilliness of that altitude would make me die of
hypothermia.

I managed to stumble along, hoping that I was on the right path (it
turns out that there is only one path, but it’s hard to tell when the
path is rocky and narrow and I didn’t have a torchlight at night), and
I almost rejoiced when I saw lights at the Raban Rata lodge, except I
was too tired and dizzy and just plain sick (felt like throwing up real
bad).
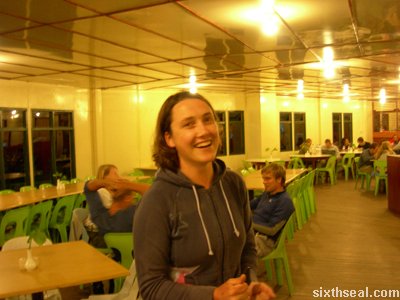
It’s thanks to Mel from Canada that I managed to get to the Raban Rata
lodge. Much props to her for guiding me up the right path. It’s just
400+ meters, but having altitude sickness is like having a Dramamine
trip – it just fucks up your perception of spatial relationships. I’m
not ashamed to admit that I feared I had lost my way and gone down the
wrong path before Mel came out with a torchlight from her lodge (a
little down from Raban Rata).

Thanks should be given to the Australian couple James and Emily as
well, for being concerned with my well being as I stumbled into the
Raban Rata restaurant, disorientated from the altitude sickness. They
brought me warm water and offered to bring me to their lodge to rest
while I get used to the altitude. Mel also gave me some herbal mints
(that may or may not work, and I didn’t need to take them if I didn’t
want to) which I took (she must have mistaken my nausea for
apprehension at being given pill like mints from unknown origin, not
knowing that I take pills for recreation ;)) and she offered me some
rose scented aromatherapy thing which DID make me feel better. Cheers!

I opted for the buffer dinner (RM 22) at Raban Rata (though I could
only pick at my food) and waited for the rest of my group to catch up
(it took them the better part of an hour). I started to get used to the
altitude and gave my thanks to the friendly and helpful folks there
that night (was too sick to do so earlier).
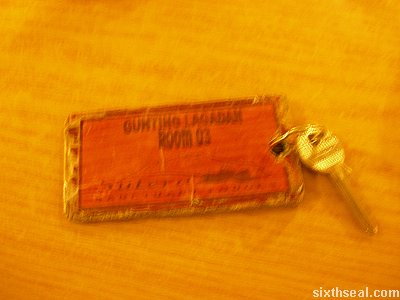
I checked into our room at Gunting Lagadan while waiting for the
rest of my buddies to catch up. Gunting Lagadan Hut is located about
500 meters (that’s a lot at this altitude, so I wasn’t raring to go)
above the Raban Rata restaurant and the hut can fit about 50 people in
rooms of 4 persons each (two double decked beds). It’s about 6.5
kilometers from the base of the mountain.

I finally took the hike up to the Gunting Lagadan Hut when my friends came up with the guide,
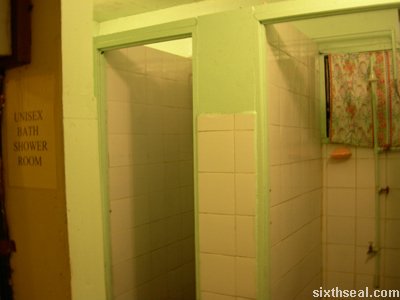
took a quick (cold!) shower,

and climbed into the bed with my climbing gear ready for the 0200
wake up call from the guide for the final summit climb at 0230 hours.
I was raring to go. 🙂