Guide to making rojak

rojak

Rojak is a local variant of the fruit salad that is usually served with thick, dark sauce and topped with coarsely ground peanuts. It’s a very popular dish for snacking on and Bintangor rojak is one of the most famous rojak concoctions out there, much like Klang bak kut teh. Keing managed to get hold of the rojak sauce from her trip to Bintangor and we decided to make some rojak at Joyce’s house.

The sixthseal.com Guide to Making Rojak:

You will need:
Cucumbers
Pineapples
Potato cakes
Tofu
Rojak sauce
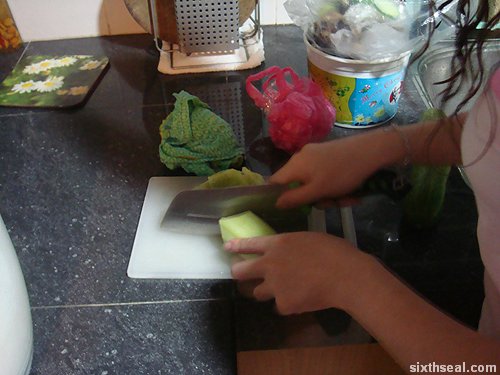
slice cucumber

Slice some cucumbers into coarse chunks. You can peel the cucumbers beforehand if you don’t like the skin. It is important to slice both ends of a cucumber first and use the ends to rub the cucumber – this somehow attenuates the bitterness of the cucumber through reasons unknown to modern science.
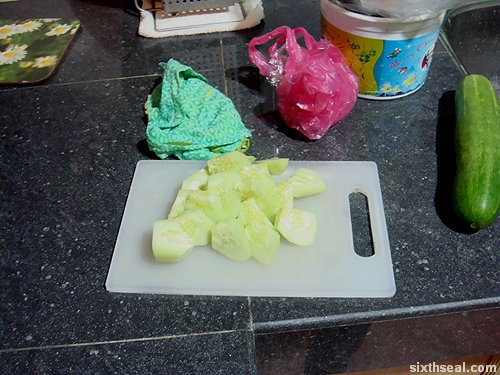
diced cucumbers

The cucumber should be processed to be roughly angular chunks instead of pure circular slices for authenticity. No one slices cucumbers into rojak – slicing cucumbers is better suited to sandwiches and eye masks.
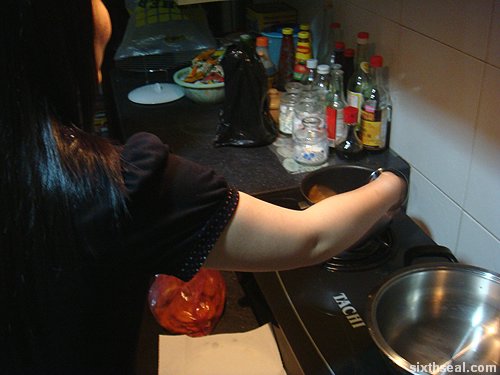
heat oil

The next thing to do is to heat up some oil in a frying pan. This is for the tofu and sweet potato fried in batter (optional).
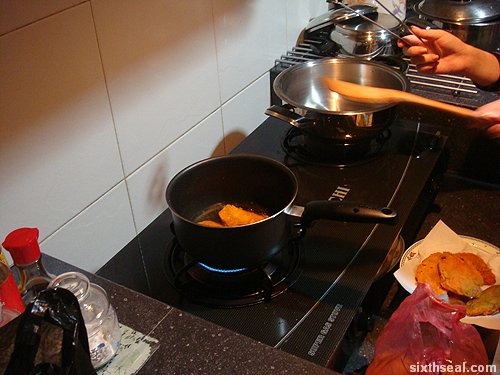
sweet potato

The sweet potato slices in batter can be bought from your friendly neighborhood kueh vendor for RM 0.30 per piece. This can be fried (basically reheated) later for the rojak.
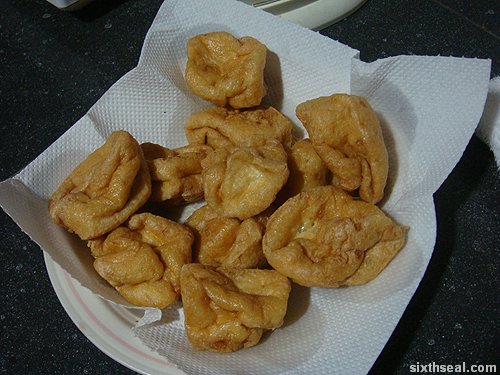
tofu

The tofu should be fried whole instead of being sliced. This is so the frying process only imparts a certain crunchiness to the tofu while maintaining a soft and sauce absorbing interior when sliced.
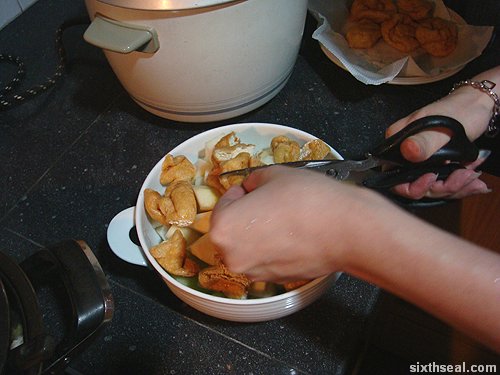
cut tofu

Joyce tells me that fried tofu should never be sliced – it flattens the entire thing. The proper method is to cut it using sharp kitchen scissors.

build up

The build up of ingredients should be contained in a large base serving dish for easy tossing and mixing.
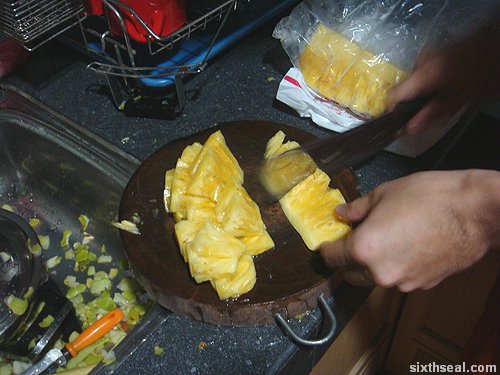
pineapple

Next, the pineapples. Now, dealing with pineapples can be a bit of a prickly problem. This is due to the circumference of  “thorns” on a pineapple (which is one of the naturally occurring Fibonacci sequences in the world). The trick is to slice in an oblique direction down the entire length of the pineapple to cut out the “eyes”. The de-thorned pineapple can then be further sliced into appropriate lengths…
(Or you could just do it like us normal folks and get the pre-sliced pineapples)
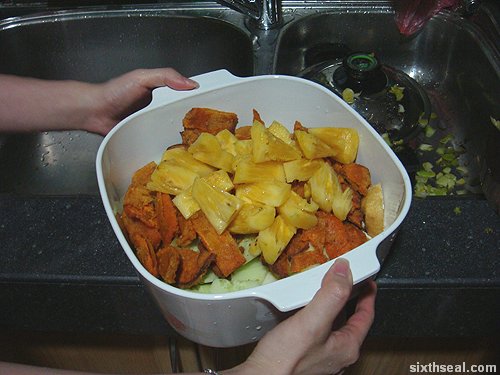
pineapple chunks

…and then chunks. Pineapple must be present in rojak despite the hassle involved. It’s not rojak if there’s no pineapple in it.
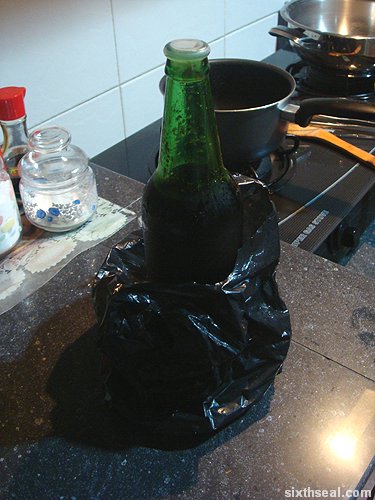
rojak sauce

The essential ingredient in rojak is undoubtedly the rojak sauce. This is acquired from the famous stall in Bintangor and has a thick, gooey consistency. It’s RM 7 for a bottle of the sauce.

ground peanuts

Ground peanuts is an optional but highly recommended ingredient. You can get it pre-ground in hypermarkets and other supermarkets or just do it yourself in a food processor/mill.
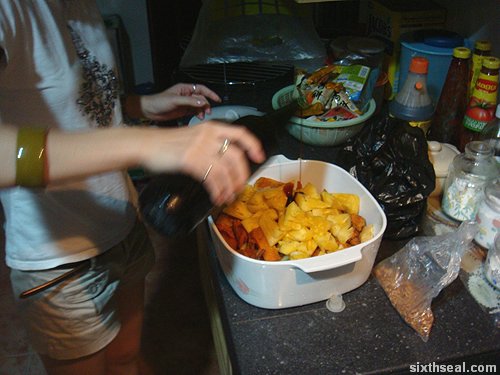
add sauce

Heap all the ingredients into the bowl and then add in the rojak sauce to taste. The rojak sauce should completely cover and saturate all the ingredients until it puddles down at the bottom of the bowl.
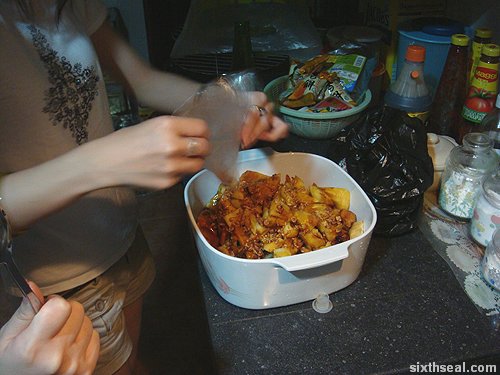
add peanuts

Sprinkle ground peanuts over it…

mix

…and mix it well. Don’t toss it like a regular fruit salad, the pineapples are fragile and would likely bruise. Just mix it carefully, blending in all the sauce into the ingredients.
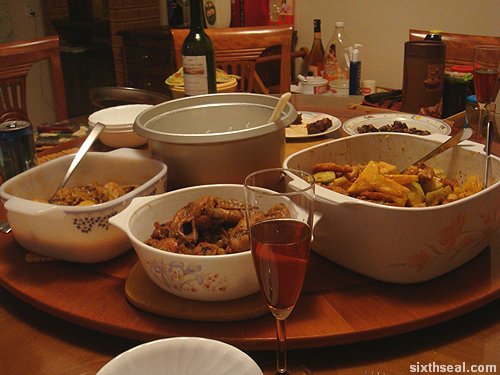
meal

We also had Coke chicken, prepared by Joyce earlier in the day. It’s awesomely tender, the meat practically falls off the bone! It tastes great too. Katherine’s mom also cooked some curry chicken, and she brought a pot of it over and made it into a meal.
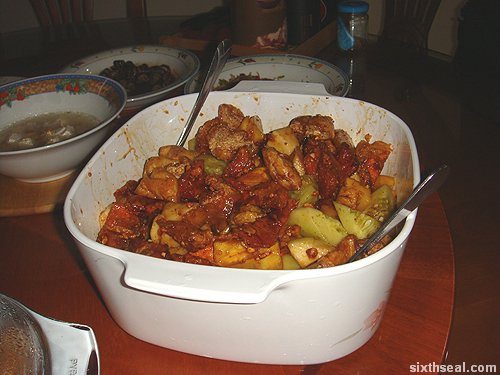
rojak done

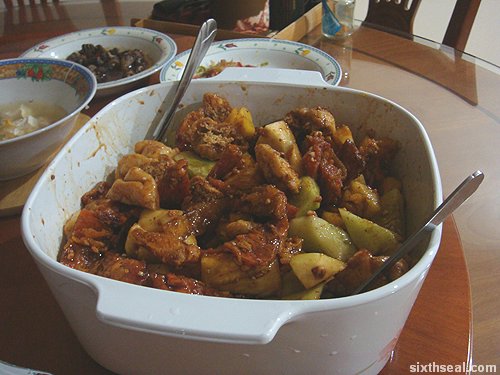
Here’s a closer look at the finished rojak.

Project Blender: The Ultimate Juice

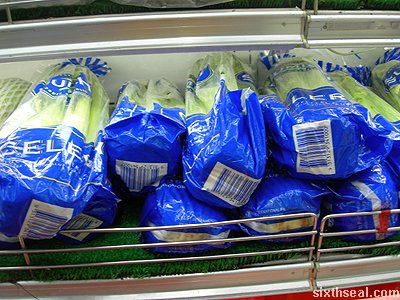
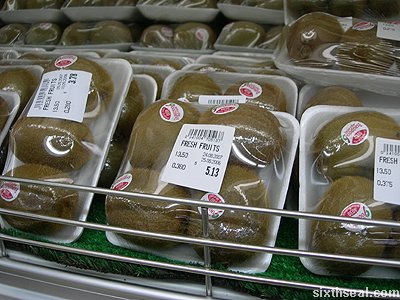
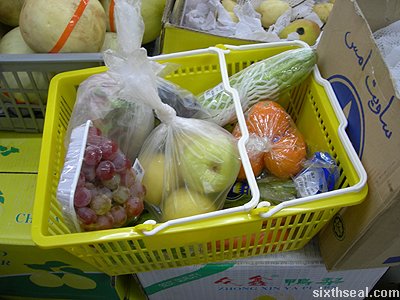
Project Blender: The Ultimate Juice is the quest to achieve V8 quality vegetable and fruit juice. It requires the below: apple Green apple pear Pear bitter gourd Bitter gourd broccoli Broccoli carrot Carrot dragon fruit Dragon Fruit oranges Oranges grapes Grapes plums Plums orange Banana celery Celery fruit Kiwi fruit groceries I went grocery shopping with my mom and bought the vegetables and fruits for about RM 50. That’s a lot of quasi V8 juice. πŸ™‚ container One plastic receptacle was used to store the sliced and diced fruits and vegetables before going into the blender. prep The fruits and vegetables were prepared and put into the awaiting receptacle. ready This is what it looks like when it’s done – there are 12 different items in there! blender The blender (it’s a juicer I found Googling for a list of the top juicers actually) does a good job at producing juice out of all these weird and zany combinations (although the banana got stuck coz it’s too mushy). You just have to put them in one by one. mugs.jpg To my surprise, the blender only had enough juice for two mugs. The one on the left is the original one (which tastes great and healthy) and the mug on the right is added with milk. It also goes surprisingly well with milk. I shall go forth and find zanier and zanier ingredients to put into our juicer coz it’s fun!]]>

Project Best Way to a (Wo)man's Heart: Macaroni and Cheese with bacon and caviar

maca cheese ingredients

Project Best Way to a (Wo)man’s Heart was instantiated in the sixthseal.com kitchen with the intention to cook macaroni and cheese with bacon and caviar (Super Premium macaroni and cheese) with the ingredients below:

Kraft Macaroni & Cheese Dinner (two packets)
Lurpak Butter pack
Farmhouse Fresh Milk
Betty Crocker’s BacOs Bacon Bits
Emborg Lumpfish Caviar
Sara Lee Apple Pie
Walls Vanilla Ice Cream
Angove’s NINE VINES Grenache Shiraz Rose wine

Let me introduce the other two cooks in the project:

maca cheese two cooks

Cherie and Joanne. They have come to wreck havoc in my kitchen, much to my dread.

maca cheese cheesiest

The main course in this project is the Kraft Macaroni and Cheese Dinner packs. It was pre-made, alas, since we didn’t know how to make bona fide macaroni and cheese. It was appended with “The cheesiest original flavor” which made me very happy.

maca cheese boil

One pot of boiling water was set to boil and the Kraft Macaroni and Cheese dumped in with a little McCormick Onion Salt.

maca cheese boil cherie joanne

The other two chefs stirred the mixture constantly while it cooked for 7 minutes…

maca cheese strainer

…and the macaroni was transferred into a strainer once it’s done.

maca cheese butter

The macaroni was put back into the pot after straining and ten (10) packs of individually wrapped butter were added in.

maca cheese butter cheese

The Kraft Macaroni and Cheese cheese powder sachet (we used two packs) was emptied into the same pot.

maca cheese butter cheese milk

Cherie emptied a quarter cup of milk into the mixture as per the instructions.

maca cheese stir

The pot containing the macaroni and cheese mixture was put back on low heat and stirred for three (3) minutes.

maca cheese oregano

The macaroni and cheese were transferred into serving bowls and sprinkled with McCormick Oregano Leaves

maca cheese bacon

…and liberally garnished with Betty Crocker’s BacOs Bacon Bits.

maca cheese ode

Cherie even made an ode to sixthseal.com.

maca cheese caviar

Caviar was heaped on the macaroni and cheese to add a touch of flair.

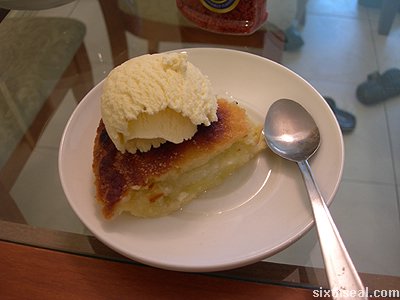
maca cheese apple pie

Apple pie a la mode (a pretentious term for apple pie with ice cream) was had for dessert.

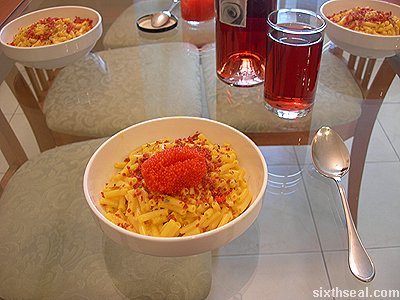
maca cheese served

The macaroni and cheese was served with Angove’s NINE VINES Grenache Shiraz Rose wine for the meal.

]]>
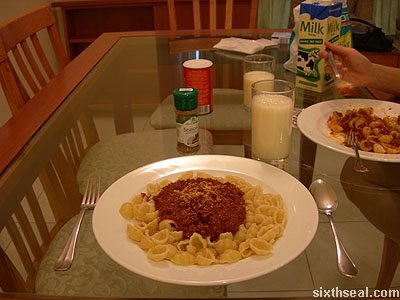
Project Bachelor Breakfast – Bacon omelet with Edam cheese

This is a recipe for a 12 egg bacon omelet (serves one) that requires the below:

bacon omelet ingredients

1 dozen eggs
200 grams of bacon (about six strips)
Fisher Sunflower Kernels
Edam cheese wedge
Bertolli CLASSICO Olive Oil
McCormick Oregano Leaves
McCormick Onion Salt seasoning
Kahlua coffee liquor
Farmhouse High Calcium Low Fat milk

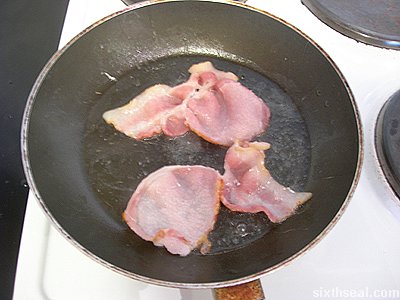
bacon omelet bacon fry

The first thing that needs to be done is to fry the bacon. Use olive oil as an additional fat source to coat the pan and fry the bacon.

bacon omelet bacon crispy

It doesn’t matter whether its crispy bacon or soggy bacon, it’s up to your taste. I like soggy bacon.

bacon omelet bacon done

The bacon needs to be transferred to a plate once all of the bacon is cooked.

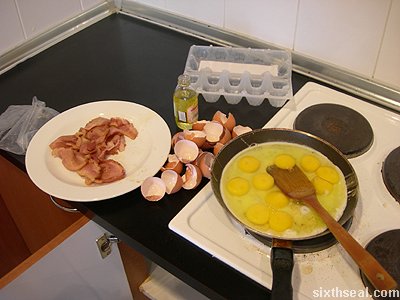
bacon omelet eggs

Crack 12 eggs into the bacon fat and olive oil mixture and let it simmer on low heat. Your kitchen space should look as messy as this if you followed the instructions.

bacon omelet egg yolk

Mix up the yolks into the egg white to make an omelet.

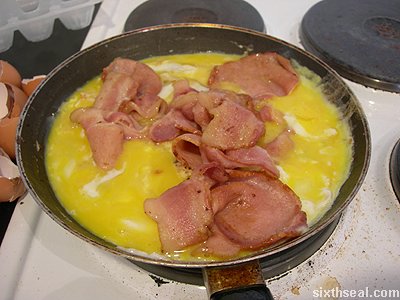
bacon omelet eggs bacon

Add in the cooked bacon into the omelet.

bacon omelet sunflower

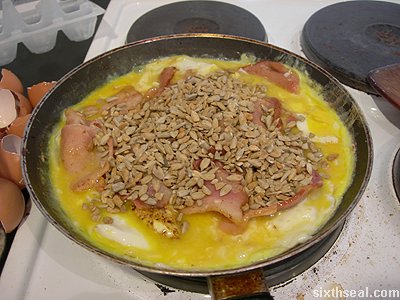
Open up the Fisher Sunflower Kernels (the secret recipe) and add about half the container into the omelet mix.

bacon omelet done

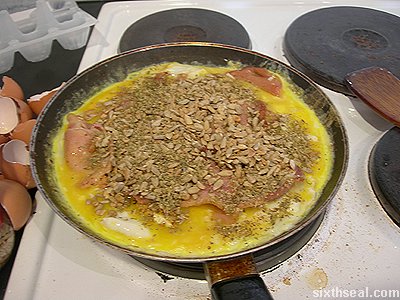
Generously heap on McCormick Oregano Leaves and season well with McCormick Onion Salt.

bacon omelet serve

Serve the 12 egg omelet with the wedge of Edam cheese. It serves one (1) if you mix the Kahlua liquor in a 1:1 ratio with milk.

The sunflower kernels soaks up the bacon fat really well, and it adds a new dimension of texture to the omelet. It’s a great, hearty breakfast.

P/S – People with high cholesterol levels are advised to make drastic changes to the recipe.

]]>

Project Pasta: Bloody Gnocchi

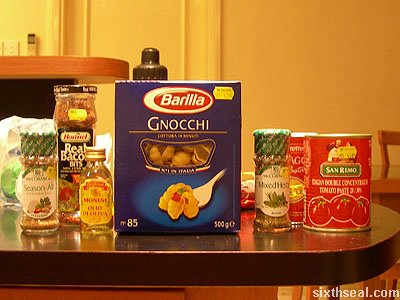
gnocchi ingredients

Project Pasta was instantiated this evening on an impulse with my girlfriend. We decided to go to Ting & Ting – a local import specialty shop – to get the ingredients to cook gnocchi (it’s a pretentious Italian word for conk shaped pasta) at the sixthseal.com kitchen.

Bloody Gnocchi recipe:
Barilla Gnocchi
Hormel Real Bacon Bits
500 grams of ground beef
Monini Olio olive oil
San Remo Italian Double Concentrate Tomato Paste
duChef Tomato Puree
Grozette Formaggio da Pasta (cheese)
McCormick Season-All salt
McCormick Mixed Herbs

gnocchi sauce bacon

The sauce was prepared using my gf’s secret recipe of Hormel Real Bacon Bits sautΓ©ed in hot olive oil. McCormick Mixed Herbs was also added into the mixture and stirred for about a minute.

gnocchi sauce fry

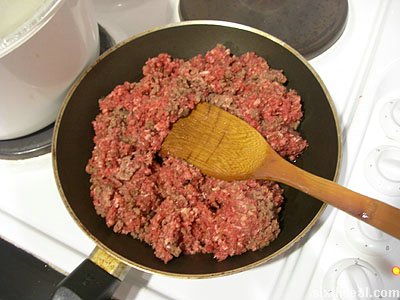
The resulting olive oil, bacon bits and herb mixture was transferred from the ceramic pot into a frying pan and the entire 500 gram bag of local Ting & Ting ground beef was added and cooked until the beef turned brown.

gnocchi sauce look

This is what the olive oil, bacon bits (the secret to the taste), herb, and ground beef sauce base should look like after cooking with a spatula. It should be noted that constant agitation is necessary to allow even heat to permeate the, er…meat.

gnocchi cook pasta

Meanwhile, another ceramic pot was filled with boiling water and added with salt (McCormick Season-All Salt) in preparation to cook the gnocchi. The gnocchi takes about 14 minutes to cook so it is advisable to do this first if it hasn’t been done already. πŸ˜‰

gnocchi sauce tomato

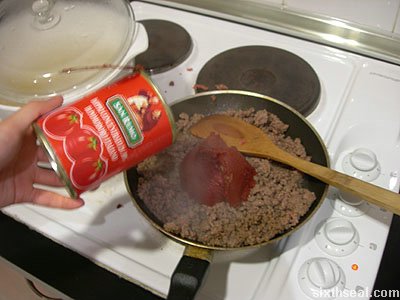
Back to the sauce, San Remo Italian Double Concentrate Tomato Paste was added to the ground beef mixture in the frying pan and mixed thoroughly. The ground beef should be slightly brownish at this point if you left the heat on.

gnocchi sauce done

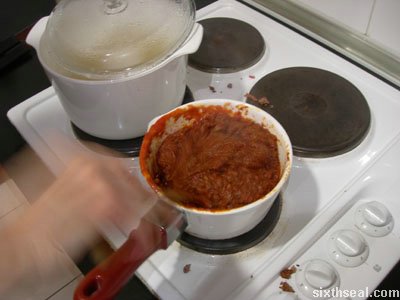
Next step involves the transfer of the ground beef and tomato paste mixture back to the ceramic pot and the addition of duChef Tomato Puree (which she told me is different from tomato paste – to be honest, I can’t tell the difference). The sauce is mixed thoroughly until everything is blended evenly.

gnocchi scoop

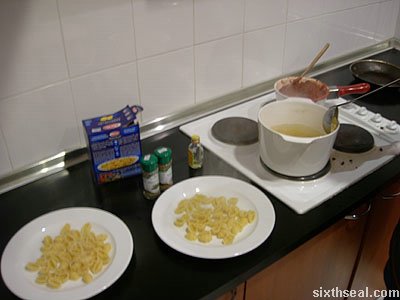
The pasta should be cooked at this point so we scooped up the gnocchi into two plates…

gnocchi scoop sauce

…and added the sauce on top.

bloody gnocchi

This is what the gnocchi looks like when it’s done – there is cheese sprinkled on top of the sauce (to taste).

gnocchi end

It was dubbed Bloody Gnocchi and we had it for dinner just now with skim milk. It was delicious!

…and it’s really fun to cook too. πŸ™‚

]]>

The art of garlic

garlic main

Finely chopped garlic is usually a mainstay in banquet style Chinese
restaurants. I’ve recently been introduced to an unorthodox but
delectable method of extreme garlic consumption from a dining
companion. He is truly the undisputed sifu of garlic consumption – the
man eats bowlfuls of garlic and I don’t mean the sauce sized ones…I mean the soup sized ones.

garlic peanuts

The art of garlic consumption applies to the peanuts Chinese
restaurants serve when everyone is seated. Before I was enlightened by
the ways of the garlic, I used to eat the salted peanuts as is…just
like everyone else. I have discovered a innovative method of peanut
enjoyment via excessive garlic consumption and I’ve never looked back.
I feel that it’s my duty to pass on the gastronomic garlic kung fu
before all knowledge of this art is lost. πŸ˜‰

garlic prep

The first thing to do is to fill the sauce bowl with garlic. The key
to a successful mixture is to pile the finely chopped garlic into the
sauce bowl. As a reference, please crosscheck the first picture with
this one. I took all that garlic. It should look like a mountain (or at
least a small hill) by the time you’re done.

garlic vinegar

The garlic mound should then be doused with vinegar. It’s the one of
the far right. Garlic mountains are always made with vinegar. Soy sauce
is a big no-no. Go with the vinegar love.

garlic soak

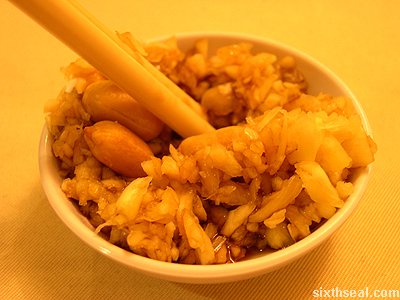
The next step is to soak (marinate) several peanuts in the garlic-vinegar concoction for at least several minutes.

garlic eat

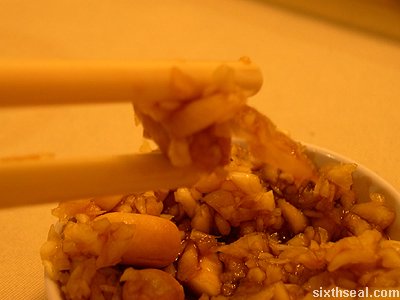
The peanuts in garlic are ready to eat after that. It is extremely
essential that chopsticks are used. Each peanut should be scooped up
with an excessive amount of garlic and the whole portion should be
chewed thoroughly to allow the garlic flavors to propagate through the
palate.

Trust me, it’s good. I’m an extreme garlic convert now. πŸ˜‰

garlic main course

It also helps to pass the time before the main courses arrive…

The Devil’s Kiss

the devils kiss

This afternoon was baking day at the sixthseal.com bakery. That, of
course, is just really my girlfriend’s kitchen – she has more baking
stuff than my kitchen does, coz my family doesn’t spend time doing
things like baking. We made a Devil’s food cake which I’ll like to call
The Devil’s Kiss. Yes, it was from a cake mix, but we customized it
(er…kinda), so there. :p

Recipe for The Devil’s Kiss:

moist devils food
One Duncan Hines Moist Deluxe Devil’s Food cake mix

hersheys kisses
One pack of Hershey’s Kisses

dairy whip
One can of Dairy Whip whipped cream

dunhill old master
One Dunhill Scotch Master “Finest Scotch Whisky”

and the things that the cake mix requires, which wasn’t much – 3
eggs, 1 1/3 cups of water, and 1/2 cup of vegetable oil. Nothing you
would be hard pressed to find in any kitchen (even mine).

cake mix water

We started out by pouring the cake mix into the mixing bowl and
adding in 1 1/3 cups of water. I don’t know the exact empirical figures
for “cups” so we didn’t bother with conversion to SI units like litres,
and just poured in (literally) one full cup and another filled a third
up.

cake mix oil

Next, we added in the vegetable oil. I was a bit doubtful when I
read this…a recipe that calls for cooking oil instead of butter for
cake seems kinda dodgy. However, that’s what it says on the package, so
that’s what it’s going to be. My girlfriend handled the huge cooking
oil bottle while I took a photo – we did not bother with cups because
that would mean more things to wash up after we’re done. πŸ˜‰

It should be noted that more than 1/2 cup of vegetable oil was
poured in…the oil container is as unwieldy as it looks, and while I
sat on the frontlines to monitor the pourage (meaning, I sat on my ass
while I watched her pouring it), too much oil got into the mix. I was
going like “yeah, that looks about right, you can stop now, thanks” and
my gf was still going at and I was like “OMG, stop!” and she was still
going at it and when I finally put the digicam down and took the
cooking oil bottle away from her (it’s dangerous in her hands), I
guesstimated that more than one cup of oil landed into the mix. Oh
well…

cake mix eggs

Anyway, three large eggs were cracked into the mix after that. It’s
noteworthy to say that all these preparations took a long time and we
did not follow the recipe religiously, and spent ample time doing other
stuff while the mix was lying there. I also added about 6 shots of
Dunhill scotch whisky into the mix. I was considering whether to go for
Chivas Regal or this one, and decided on this one, because it tastes
better than Chivas.

drinking makes baking fun

I also took the liberty of adding some whisky into myself at this
point. The recipe calls for 30 seconds of stirring, and I felt that
having a drink in my hand would make the task much more pleasurable. πŸ˜‰
One does get sick of cheap alcohol, so this premium scotch is a very
welcome drink instead and makes the baking process much better. It goes
very well with clonazepam too, but don’t add that into the baking mix,
for Christ’s sake.

cake mix stir

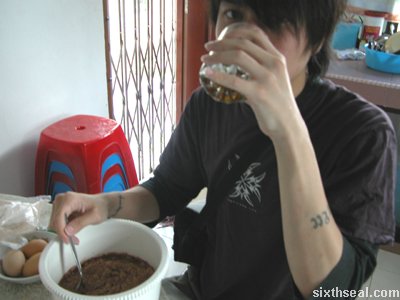
Thus, I stirred the mix for about 30 seconds (or until I was tired of stirring, didn’t know which came first, really).

prepped cake tin

Now, we realized that we need to find an appropriate receptacle for
our cake mix, so we searched for one. The candidates were: a small
circular cake tin, a long bread mould tin and a square cake tin. We
chose the last one and used butter to grease the inside and finely
powdered it with flour as per the cake mix instructions.

cake mix beat

The cake mix, which now contains the original Devil’s food mix,
three large eggs, water, vegetable oil, and scotch whisky was processed
with one of them cake mixers for two minutes or so. The box said two
minutes anyway, we did not time ourselves, we just looked at the very
hypnotic swirls until we shook ourselves and realized that the cake mix
seems to be smooth.

unkiss kisses

I then proceeded to prepare the Hershey’s Kisses by unwrapping it
from the foil and pulling out those damned liners. I like to call this
“unkissing the kisses”.

cake mix pour

The cake mix was poured into the cake tin…

cake mix kisses

and Hershey’s Kisses were dropped into the mix at random spots. I
used up the whole packet, there is bound to be one in every square inch
of the cake.

enter oven

Finally, we realized that we have not pre-heated the oven and did
so. It should be noted that I did not want to do any calculations to
change Fahrenheit to Celsius so I let my girlfriend set the heat
settings to what “should be about right” for a cake. The cake mix is
finally inserted into the oven.

waited
We waited…

and waited
and waited…

exit cake

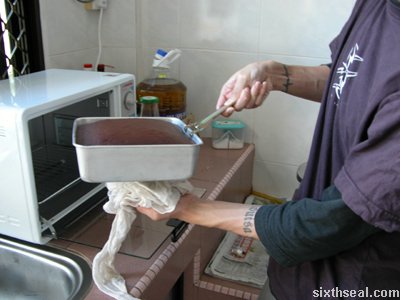
and I finally took the cake out of the oven with this nifty cake tin lifter when it looked right.

cake not done

My girlfriend poked a hole in the middle with a toothpick and it came out moist, so back to the oven it was…

devils food cake

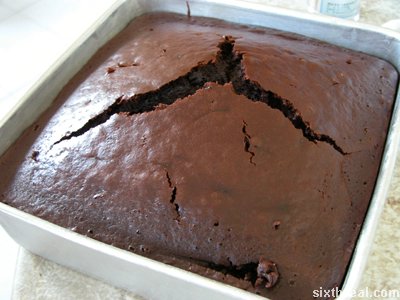
I present to you…the final product! We had waited for about 15
minutes and took the cake back out again. My gf then proceeded to poke several
holes across the cake while laughing hysterically. My
cake…sabotaged… :p Oh, by the way, the crack in the middle is
apparently the result of taking it out before it was fully done and
putting it back in again. The temperature differential shock tends to
make it go that way.

Download:
The Devil’s Kiss [sixthseal.com]
Requires Apple Quicktime. Unzip the file for the video clip.

devils food nitrous

The movie clip shows me eating the cake with some nitrous oxide,
er…I mean, some whipped cream. It should be noted that whipped cream
uses nitrous oxide (N20) as a propellant:

nitrous oxide

However, if you’re expecting to get recreational hits of nitrous off
a whipped cream bottle, you’re going to be very disappointed. It’s only
a small canister, and the dispensing system will produce whipped cream
no matter now tenderly you manipulate the nozzle to produce nitrous
oxide. You’re not going to get anywhere near recreational doses off
this, and it’s not for the lack of trying. I did, and the best I could
do was get a minute amount into my lungs and my exertions expended the
nitrous canister of the whipped cream container…which made it produce
sludge instead of whipped cream. Oops…my bad. I didn’t realize it had
such a small amount of nitrous in the bulb. Stick with nitrous
canisters and crackers and leave the whipped cream container alone. πŸ˜‰

devils food cake slice

Here’s a shot of a slice of The Devil’s Kiss with some…er, cream
sludge. It tasted pretty good actually, but it was a little too rich (I
think it was the oil). I’ll tell you something interesting…it seems
that some of the Hershey’s Kisses were preserved intact in the final
cake! The scotch did not shine through though, probably due to the
overpowering chocolate taste. Nevertheless, it was a great experiment
and it yielded a rather tasty cake. πŸ™‚

I had wanted to name it The Devil’s Kiss with Angel’s Cum on it, but
I didn’t think that would be a very appealing name for a cake so I’ll
settle with The (Drunk) Devil’s Kiss (unofficial name) or Devil’s Food
Cake with Hershey’s Kisses and whipped cream, for a more orthodox name.
πŸ˜‰

Thanks to Renee of shiokadelicious! [shiokadelicious.com] for baking tips.

Waxed duck – the fake looking meat

waxed_duck.jpg
Waxed duck at a store display

Waxed duck, otherwise known as lup ngap (Cantonese) or lak yak
(Mandarin) is an oily, waxed meat. Lup and lak both mean “wax” in the
respective dialects although the romanization is different. I had
always thought it looked like plastic meat when I was younger and never
really had a chance to eat it. It’s a salty, preserved meat that needs
to be cooked (i.e. steamed) before serving. The seller mentioned that
it needed to be cooked before eating, but I was adamant at trying to
eat it raw and didn’t have much success:

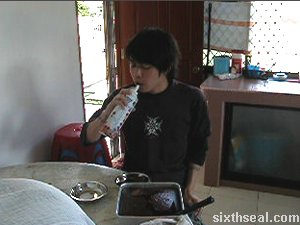
eating raw lap ngap

It was simply too tough to bite off that way. The skin of the duck
went through some unholy preservative measures that made it look waxy
and rendered it all but impossible to tear off with the canines without
softening it first. It retails for RM 4.50 per drumstick (including
thigh area) and the price increases as the size of the fowl increases,
up to RM 25.00 for a full bird (it’s duck).

raw lak yak

Anyway, the above is a photo I took at home while I prepared it for
steaming. There isn’t any fancy ingredients added – this is the
unadulterated experience, just the duck and nothing else, thank you
very much. πŸ˜‰ I covered the plate with another plate as instructed and
then put it over some boiling water (no direct contact, steaming it)
and after about 20 minutes, it turned into this:

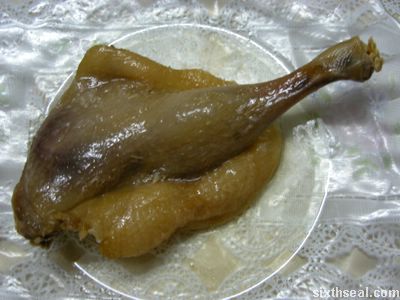
cooked waxed duck

It looks much more edible now, though the waxy looking exterior
remains. It also seems quite oily as the photo shows. I ate most of it
with kueh tiaw, though eating it with steamed rice would be a better
choice to offset the salty taste. It’s very salty, no doubt. It’s also
very tough but it was edible, if not palatable (at least to me) after
the first few bites. The choking oiliness and “waxy” feeling of the
duck makes the skin very hard to consume but nevertheless, I liked it
for the novelty value and hey, these things only come around once a
year. Happy Chinese New Year! πŸ™‚

Pavlova Magic

pav1.jpg

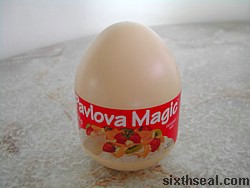
I made a Pavlova
[users.bigpond.net.au] today from one of those egg shaped instant mixes
called Pavlova Magic. A Pavlova is a dessert popular in Australia and
New Zealand. I got it from Melbourne before I came back and finally got
around to baking it with my girlfriend today. It was pretty easy and
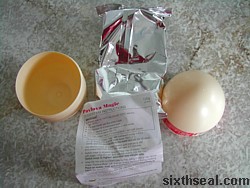
fool proof to make, there was a packet with the Pavlova mix in the egg
and an instruction sheet. Basically, I just filled the bottom part of
the shell with luke warm water and the top part of the shell with
caster suger and mixed it all together. The instruction sheet has a lot
of strange instructions in BOLD like “turn the cake mixer to full speed
for ONE MINUTE ONLY” and “put the resulting mix into the oven and TURN
THE HEAT DOWN TO 110 c IMMEDIETLY”. Whatever.

pav2.jpg

We didn’t have a cake tray so we just dumped the mix into a baking
tray and shoved it into the oven. The Pavlova turned out pretty good
though. It was crispy-ly sweet at the bottom and nicely aerated in the
middle and wonderfully sweet and creamy at the top. However, there was
a lot of sugar syrup at the bottom of the Pavlova. I wonder if that’s
meant to be?

pav3.jpg

Wow, am I domesticated or what? πŸ˜‰

Related Posts Plugin for WordPress, Blogger...