Homemade Creamy Broccoli Pesto with Pasta

homemade creamy broccoli pesto

My better half wanted to make pesto – in particular, a creamy pesto with broccoli. I told her pesto needs to have pine nuts, Parmesan cheese and basil leaves for it to be properly called pesto but she showed me a recipe and talked me out of using the nuts. I won out on the cheese and basil though – we actually have a nice herb garden with basil leaves.

broccoli florets

…so that’s what we did over the weekend. I must say it’s quite a success, although this isn’t a traditional pesto with pine nuts but more like a creamy broccoli sauce.

This is actually from a recipe that we adapted from Smitten Kitchen.

steamed broccoli heads

There’s a head of broccoli that’s starting to turn yellow so we steamed that for about 10 minutes and cut the crown into florets. I chopped the stem almost down to the head. I *did not* use the stems at all, some recipes call for that, I only use the broccoli florets.

ingredients broccoli pesto

This is what we put into the food processor:

  • 1 small broccoli
  • 2 cloves raw garlic
  • 50 ml heavy thickened cream
  • 3 heaped tablespoons of Greek yogurt
  • 2 tablespoons extra virgin olive oil
  • Parmesan cheese
  • Basil leaves
  • Salt and pepper to taste

I would say the most important thing in that creamy broccoli pesto sauce is the garlic. It’s no good without the garlic! I almost forgot to put it in.

adding fresh basil

Our herb garden is just starting to flower so we just picked a few fresh basil leaves to throw inside the food processor. I pulsed everything and processed it for about 30 seconds until all the ingredients were meshed well together.

cooking linguine

This is our first attempt in doing this so we just cooked some linguine and tossed it with our home-made creamy broccoli pesto.

The linguine was mixed with a huge chunk of butter. I reckon that since there’s olive oil in the pesto sauce, the pasta would taste better with butter. It did! We also had a simple poached egg with the pasta dish.

creamy broccoli pesto

It tasted really good! The heavy cream combined with the Greek yogurt makes a very nice base for the interesting textural experience of having millions of tiny broccoli florets rubbing against your tongue with every bite. The creamy pesto paste isn’t too heavy and rich either – we were surprised to find out it’s actually very light.

creamy broccoli pesto pasta

It’s not a traditional pesto but I’m keen to do one next time with our own basil leaves and some toasted pine nuts. As for this creamy broccoli pesto, it’s simple and delicious, a wonderful alternative to the heavier pasta sauces we’ve been using lately!

How to French Cut a whole chicken into a crown of breast (step-by-step with photos)

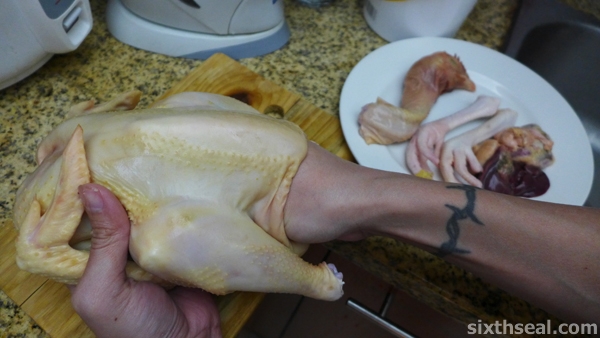
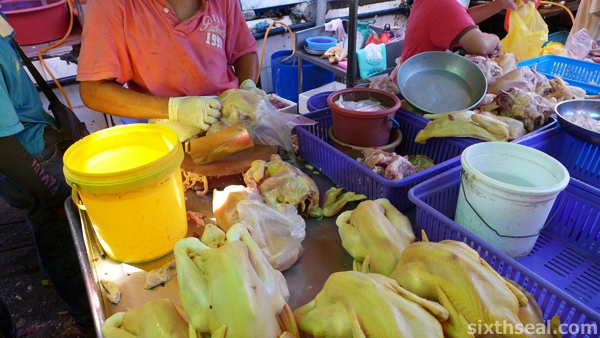
whole chicken

This is the first time I’ve ever cut up a whole chicken. I usually just specify the part(s) that I want from the butcher and he does the rest of the work. However, this time I needed a very specific cut – a beautiful French Cut crown of breast with the skin intact.

free range chicken

I actually saw this in a MasterClass episode and wanted to replicate the dish. It’s not a live chicken of course but it has everything still intact – head, innards etc – it hasn’t even been disemboweled. I bought this for RM 24.60 – it’s a free range chicken that goes for RM 18 / kg.

removing organs

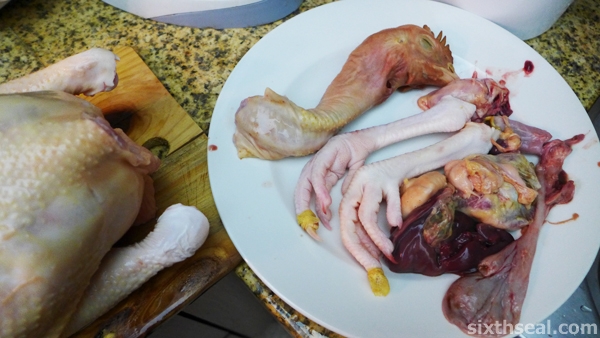
The first step is to cut off the head, ass (Bishop’s nose) and feet so you have more room to work with.

giblets

Then, you’ll have to take the organs out of the body cavity of the chicken – just put your hand down the cloaca (chicken don’t have an anal cavity) and pull out everything you can feel. It’s connected so it’s not that hard – everything from the heart to the liver can be just extracted by just pushing your entire fist in and pulling hard to get the giblets.

pulling giblets

Think of it as the opposite of stuffing a turkey. smirk

cutting whole chicken

I put everything I’ve cut up or removed on a dinner plate for future use.

removing wishbone

The next thing is to remove the wishbone from the chicken. It’s located somewhere in the neck – there’s a small bone that can be cut out and discarded so the crown of breast will be perfect.

cutting legs

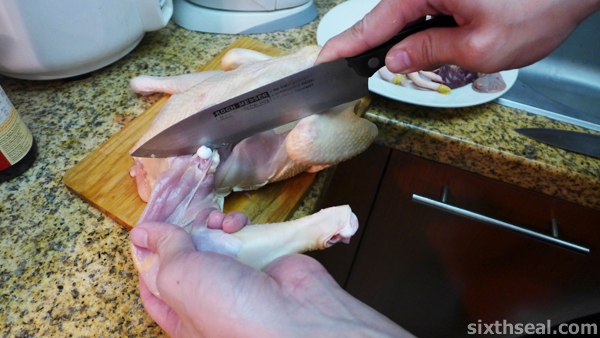
I wanted that particular cut to be heavy on the skin so that it’ll be moist so I made the incisions on the skin very close to where the drumstick ends.

crown breast skin

The next step is to twist the entire chicken leg to the opposite direction (to where the chicken would naturally stand if it’s alive) and cut out the leg at the thigh from the oyster that surround the bone.

removing legs

This will allow the skin from the thigh part to cover the entire breast.

french cut chicken

Next, I sliced off the wings and did a French style cut that exposes the bone of the mini drumstick on the wing. You don’t have to do this but it looks pretty. I didn’t do a very good job at it though since it was my first time – I cut it too high up on the joint.

removing carcass

The last bit that needs to be done is to chop off the rest of the carcass. Save this for stock!

breast crown

You’ll have a nice crown of breast with quite a lot of skin on – just the cut I wanted to have for an awesome dish I made over the weekend!

cut hand

I learned a lot about dressing chickens while doing this (and cut my hands several times too) and I’ll just buy whole undressed chickens from now on…

french cut

…so I can get the exact cut that I want! 🙂

Pork skin noodles – making noodles out of pig skin

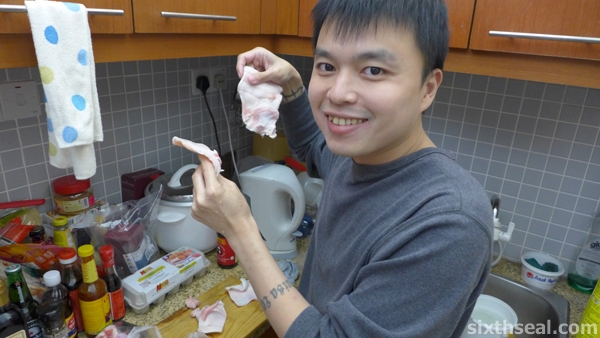
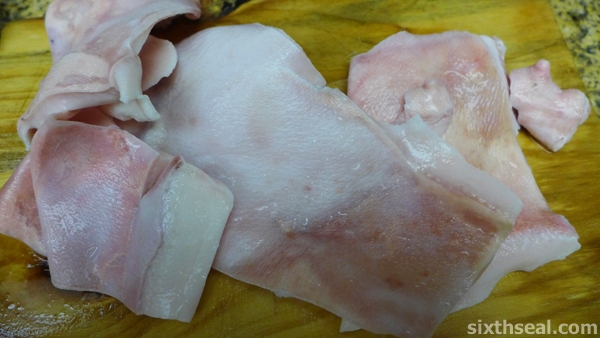
uncooked pig noodles

This is not your usual noodle dish. The noodles are made of pig skin. It’s not pork noodles – it’s pig skin noodles! The noodle is not the carbohydrate in this dish – it’s the protein! I first came across this in an episode of Andrew Zimmern’s Bizarre Foods America. I did a quick search for the restaurant that serves this and came across a blog post that describes exactly how to make pig noodles out of pig skin.

making pig noodles

I had to source for the pig skin – most butchers don’t sell pig skin. It’s either discarded or meant to be sold with the cut of meat. However, I went to Sanbanto – an organic farm-to-table butcher cum restaurant and made my unusual request.

pig skin softening

The clerk was puzzled for a second while processing what I really wanted and took a bag from under the counter. She gave it to me free of charge. I wonder why it was bagged like that in the first place but it didn’t register right then coz I got into a conversation of what I wanted to do with the pig skin – to make noodles!

pork belly skin

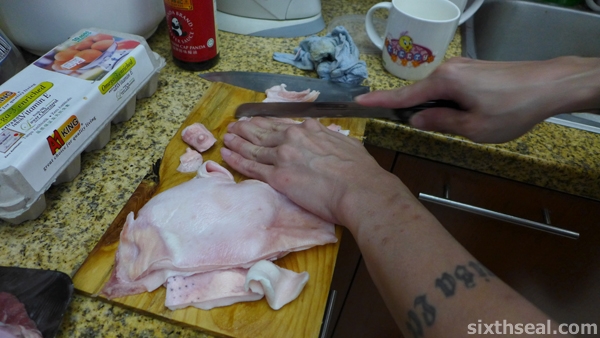
The pig skin I got is from the belly (as can be seen from the teats) and I tried slicing it but the skin proved to be way too tough for any of my knives so I decided to wait until I’ve finished it. I wanted to make pig skin noodle ramen like the post I read in From Belly to Bacon – but with a different twist. I’ll do a two animal broth!

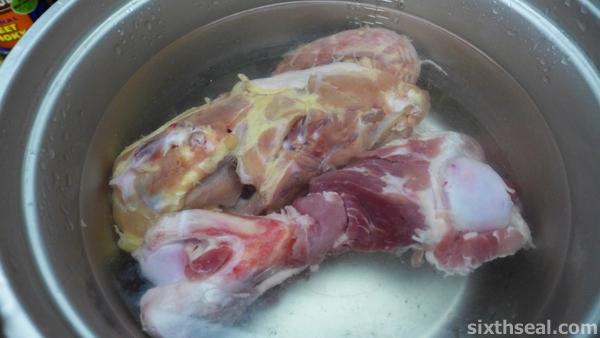
chicken carcass pork bone

You will need:

  • Pig skin (find sheets so it’s easier to cut strips of noodles)
  • Pork bone for soup
  • Chicken carcass
  • Edible flowers

chicken pork stock

I used a chicken carcass and a large pig bone for soups in my cooker. There are ramen places like Santouka Ramen that’s famous for their chicken broth and other Japanese ones who use the traditional pork broth. I wanted a combination of both.

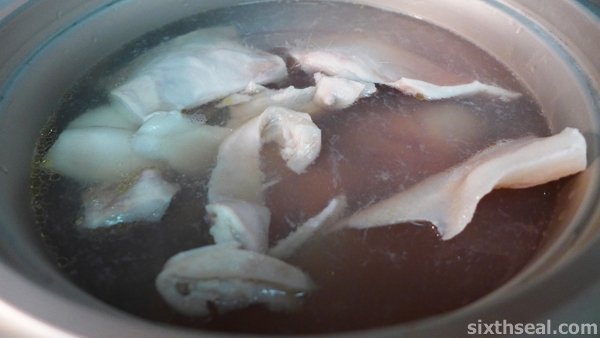
pig skin sheets

The rice cooker was filled up to 1.8 litres of water, after the displacement made by the chicken carcass and pig bone. I also threw in the pig skin so it’ll be easier to cut once it’s tender and cooked.

making pig skin noodles

I took:

  • 14 hours
  • 4 litres of water
  • 4 refills

stirring stock

to boil the ramen stock. It was an overnight event with alarms set to refill the cooker.

boiling stock

However, I made a *very big mistake* – I left the pig skin in too long. I should have taken it out at the 2 hour point and cut strips out of it. I left it in for the entire 14 hour duration and it was a soggy mess when I attempted to slice it into strips of noodles.

pig-skin

It was quite a feat since everything in the cooker was pulverized and reduced into a very yummy and gelatinous goo. I did manage to slice it and poured the broth (it’s way thicker than what you’ll associate with this word) over it for a bowl of ramen.

refill broth

This is my first attempt. I would like to do two things differently next time:

  1. Take the pig skin out after 3 minutes of boiling to cut into strips of pig noodles
  2. Freeze and strain the gelatinous broth through muslin cloth to create consomme – a very clear broth – to highlight the pig noodles better

reduced broth

The end result after 14 hours of boiling – very hearty and thick semi-liquid with a consistency more like lard than water. We both liked a small bowl but eating more than that would be quite a challenge due to the heavy stock.

slicing pig skin

This is quite soggy but ideally the pig skin should just be soft enough to slice though…

sliced pig noodles

…and retain a very al dente texture!

pig noodles carb

My better half managed to eat her bowl though. I did hers with some rice vermicelli to provide some carbohydrates – the pig skin noodle is the protein in this dish!

pig skin noodle ramen

The stock is simply poured out after layering the pig skin noodles in a bowl. I also did some decorating with edible flowers – not just for aesthetics but to provide a refreshing crunch and a (semi) balanced meal. smirk

pig skin noodles

Mine was a pure pork skin noodle made out of pig skin ramen with broth from the chicken and swine stock. It was a fun and interesting cooking experiment that I’ll like to try again with consomme and a quail egg! 🙂

Cooking Braised Belgium Endives

braised belgium endives

I’ve never seen Belgium endives in Malaysia until recently. The Belgium endive is a dish I first sampled in Latvia during my second Europe backpacking trip two years ago. It didn’t look like much to me but I was told it’s good (couldn’t read anything coz Latvia doesn’t use a lot of English) so I ate it. It tasted better than it looks.

belgium endives

I was out shopping with my better half when I came across this bitter vegetable. Yes, this is one of those really bitter leafy greens but it becomes less so when cooked properly. Some people use sugar in their recipe but I decided to recreate the dish without that at home.

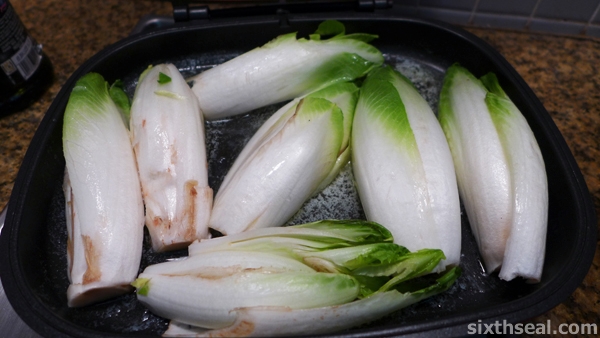
browning belgium endives

I bought a couple of packs of Belgium endives – enough for two people. Belgium endives retails for RM 29.90 per kg so it cost me RM 18 just for 500 grams of the vegetable. It’s quite easy to prepare – the traditional recipe for braised Belgium endives uses just a few ingredients you can find in any kitchen but takes a looong time to cook.

It’s supposed to be slow cooked and that’s how I did it – took me *two hours* to braise the Belgium endives.

sliced belgium endives

You will need:

  • Belgium endives
  • Butter (real butter, not margarine or any of that crap)
  • Salt
  • Lemon juice (from a real lemon)
  • Water

melting butter

I used about 3 heaped tablespoons of butter in my recipe. I had a stick of it and cut off a nice portion and melted it slowly. Be careful not to burn it! Use really low heat.

coring belgium endives

Meantime, prepare the Belgium endives by using a sharp knife to cut out a hard, fibrous core at it’s bottom. Once that’s out, you can proceed to slice it in half!

lemon

Brown the endives in the butter by putting it on a single layer with the cut side down and sprinkle salt and lemon juice over it.

belgium endive

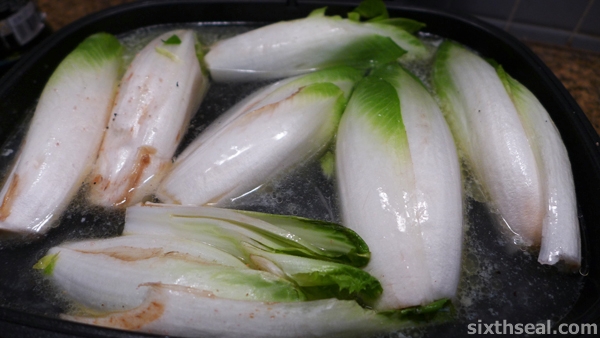
Fill up the pan until the Belgium endives are 3/4 submerged in water and proceed to braise it at low heat.

braising endives

Remember to turn the endives over occasionally so both sides will be cooked! It’s done when the endives are tender and has absorbed *all* the water that was in the pan.

braised belgium endive

That’s all there is to it! I garnished it with some edible flowers since the dish looks a bit drab (and also coz the edible flowers provides a contrasting crisp texture to the soggy braised Belgium endives).

cooked belgium endive

It’s not the prettiest dish around but I highly recommend it if you haven’t tried it before. I gave some of it to my dear raw (it can be eaten in salads) and it’s very bitter and braising it will reduce that intensity. She did tell me it tasted bitter and slightly burnt. I prefer the term caramelized. smirk Braised Belgium endives should come out tender and buttery! 🙂

Water buffalo steak basted with BBQ Sauce and eggs

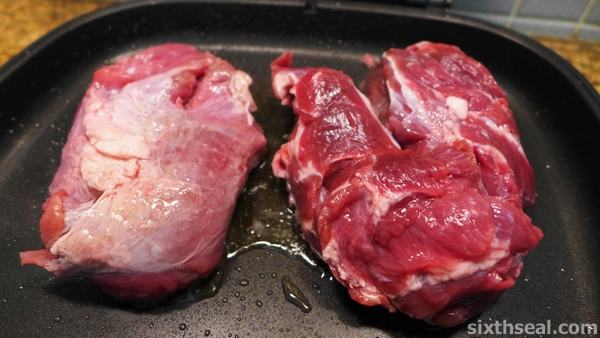
buffalo steak

I had bought a pack of frozen water buffalo meat from India a while ago. I’ve always only seen these in ground meat format but this time I spotted a sliced meat package and decided to get it.

buffalo meat

Buffalo meat from India is very competitively priced and sometimes called carabeef. You’ve probably eaten it before as it’s often used in dishes like rendang since it’s halal and cheaper than beef.

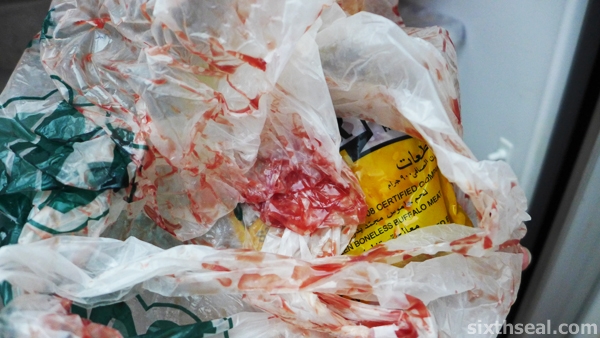
crime scene

I decided to cook it last night as my studio had a 5 hour total blackout which resulted in the package of frozen buffalo meat defrosting and dripping smelly blood all over the fridge. It was starting to look like a particularly gruesome *crime scene*.

buffalo meat india

You will need:

  • Buffalo meat
  • Eggs
  • BBQ sauce
  • Olive oil

italian olive oil

I first used some olive oil to pan fry the buffalo meat. It cooks very easily when grilled for 1 minute on each side. However, water buffalo meat is supposed to be one tough mother. It sure lived up to its reputation.

steak eggs

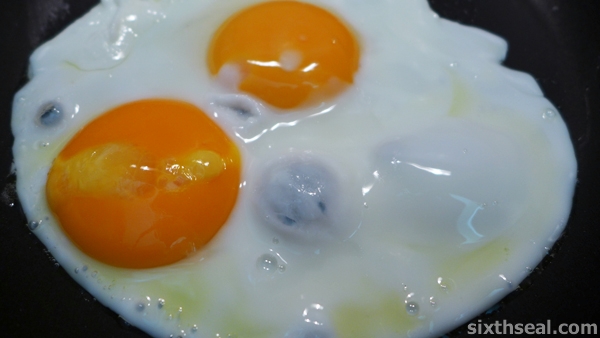
I also cooked a couple of sunny side up eggs to go with the steak.

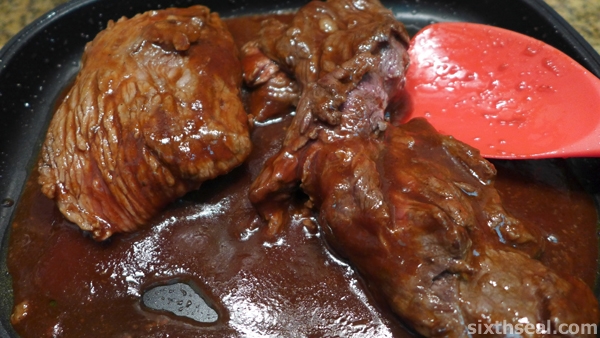
buffalo steak fry

Thus, I continually basted the meat with BBQ sauce using a pressure fryer. I used Frontera Border Barbecue Sauce in the Original Sweet & Smoky flavor. The name is a bit of a repetition since frontera already means border in Spanish. It’s like calling Timor Leste as East Timor – timor already means east in the Indonesian language so East East sounds a bit off. smirk

buffalo steak bbq

Back to cooking (and eating), the buffalo meat was tough – really tough…

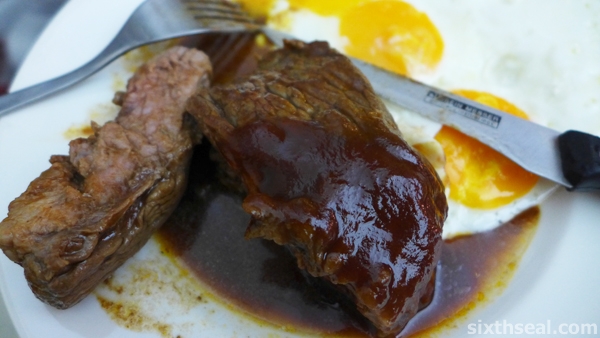
buffalo steak eggs

The buffalo steak tasted really good with the egg though especially when the runny egg yolk mixes with the BBQ sauce. It’s wonderful but obviously new cooking methods needs to be applied since the meat was tough to the point of being near inedible.

I had to use a very sharp steak knife and masticated each piece until my jaws were so sore I was sure I won’t be able to talk for 3 days.

buffalo steak sliced

It was so tough I was afraid I’ll need someone to perform the Heimlich maneuver on me each time I swallowed. I wish there was someone with me so if I choked while swallowing the half-chewed buffalo meat, at least I won’t die unnoticed for several hours.

I was seriously worried and wondered if was possible to do it myself in case of an emergency and called my better half while eating to verify I was still alive and not blue in the face with a piece of buffalo meat stuck in my throat. -_-

Dragon cod poached in red wine and eggplant steaks

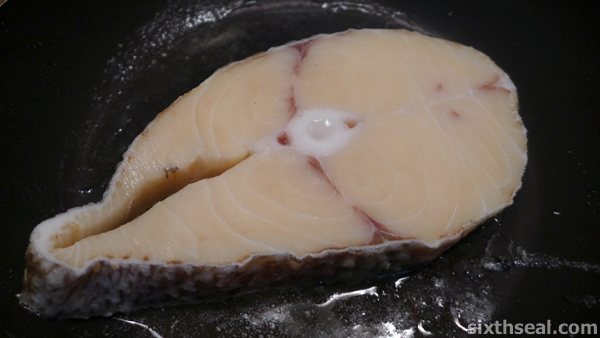
cod poached red wine

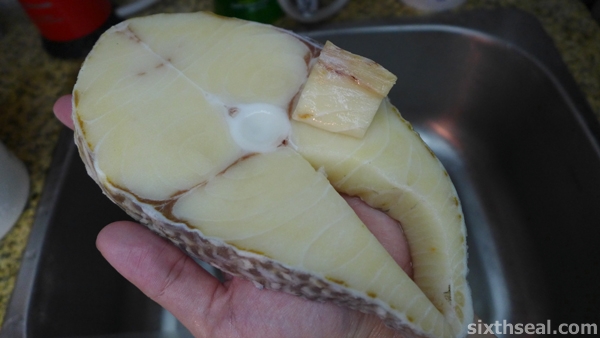
I found a nice piece of what’s called dragon cod at the huge fish supply market. It’s a 1/5 of the price of regular cod and the only English references I could find in Google is allegedly from a fast food place in China substituting it in their fish burgers. It’s called 龙鳕鱼 in Chinese.

cod dragon

Dragon cod is supposed to have fat that the human body cannot digest but I ate a piece of the sample (the tiny bit that comes in the package – you know, for like tuna) raw and it tasted fine to me.

cod okra

I ate it like that coz it’s from one of those huge fishing clearing house that can have much fresher produce than your local fishmonger.

dragon cod fish

It tasted really good and paying RM 12 instead of RM 58 for the same size sounds like it’s worth a try! 🙂

dragon cod

I pan-fried the dragon cod after patting it dry with serviettes. The good thing about dragon cod is that it has no bones (except for the obvious one) – much like a regular cod.

pan seared cod

However, it has a very high moisture content. I wanted to dry it sufficiently so it’ll have a nice sear on the fish steak.

red wine poaching

I used a lot of butter for frying the dragon cod. I initially wanted it to be served like that – with a reduced butter sauce before I saw a really old bottle of red wine in my fridge.

red wine cod

I poured the entire remainder of the Crimson Cabernet bottle into it – about 1/4. It’s a very sweet red wine. Think of the sweetest red one you’ve ever had and multiply it by a factor of 10 and you’ve got an idea of how this wine tastes like, which is why I couldn’t finish it.

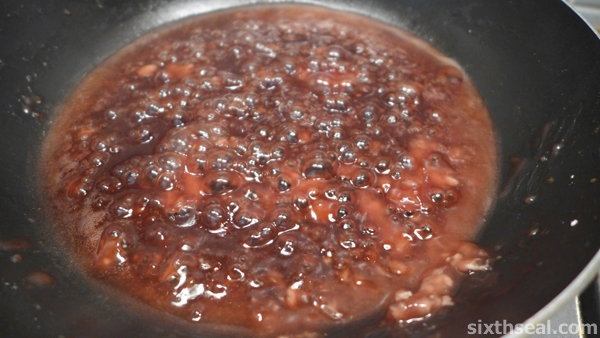
red wine sauce

I let the dragon cod poach in the red wine for a while and then took it out and reduced the sauce before thickening it with some corn starch for some bubbling goodness that I spooned over the fish.

sliced okra

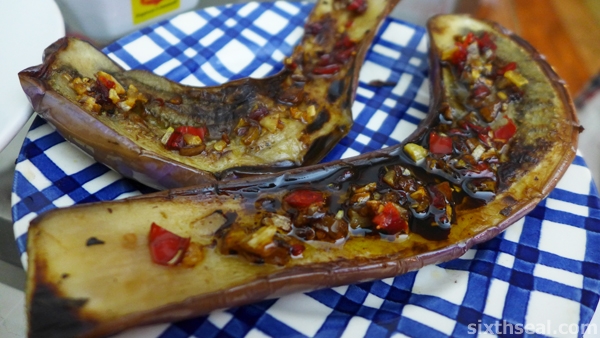
My other half was responsible for the eggplant steaks. She just sliced them down the middle…

fried okra

…seared them, and before

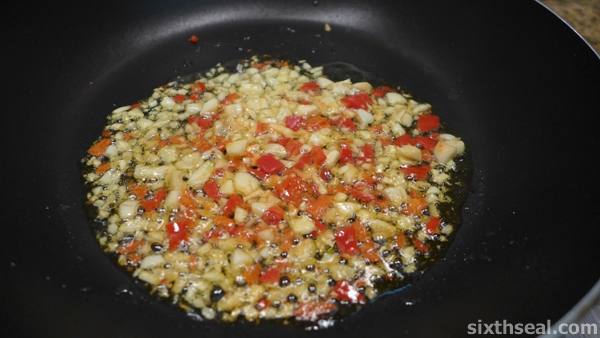
okra sauce

….made an awesome sauce of chopped garlic, shallots and chilli fried in oil to bring out the flavor.

okra steaks

It’s poured right on top for a delicious meal we ate together with rice! 🙂

cod red wine reduction

I’m quite proud of the dragon cod poached in red wine. It tasted really good, the taste of the sweet Cabernet still shines though in the sauce and the cod was flaky and moist!

Wild flower honey and dates marinated free range chicken rice from scratch!

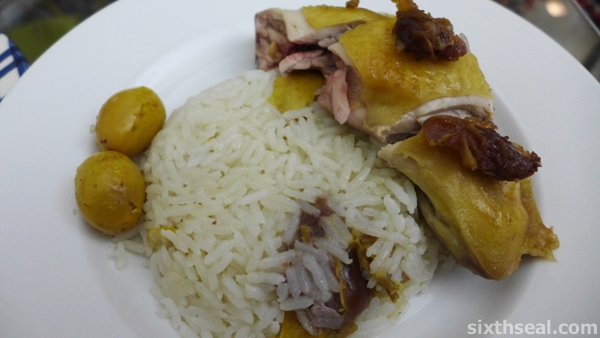
chicken rice dates

I’ve wanted to cook Hainanese style chicken rice with fresh and dried dates still on the branch for a long time. Unfortunately, I keep getting veto-ed by my better half who thought it’ll be an unsavory dish. Pun not intended. smirk

chicken marinade

We had gotten two free range chicken legs for RM 18.50 from our trip to the wet market last week and one of them is still in the fridge. The other has been cooked into a wonderful Hainanese style chicken rice and I wanted to do the very same dish – except mine would be a sweet version. I finally convinced my honey with the same.

Witticisms aside, you will need:

date rice recipe

  • One whole chicken leg
  • Rice
  • Wild flower honey
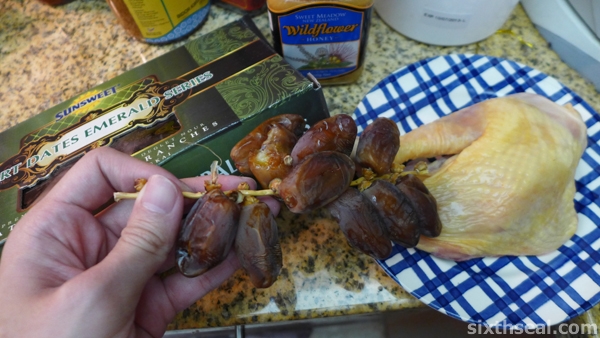
  • Dates on branches
  • Fresh dates

fresh date rice

I did this with two types of dates – the sweeter dried dates and the fresh ones still on their branch I got from the Ramadan bazaar a while ago. The latter is used to flavor the rice. I measured one cup of rice and added 1 ½ cups of water to it.

drumstick honey rice

This method of cooking and marinating is what I learned from my dear. The dried dates are opened up and the tiny seed taken out before being smashed for the flavor to come out. I used a whole branch of Tunisian dates, which is a sweet variety with relatively good moisture content.

wild flower honey

I then took a good gunk (which is about 3 heaped tablespoons if you want exact measurements) of New Zealand wild flower honey – chosen for it’s refreshing and light nature – and mixed it with the mashed up dates and massaged the mixture into the chicken leg for a good 3 minutes.

marinating chicken

I made sure to molest caress every fold and curve of the chicken leg like a gentle lover to massage the dried dates + honey marinade into the smooth skin until it’s moist and tender.

honey dates marinate

The marinated chicken leg is then sealed into an air-tight baggie and left in the fridge for 24 hours.

cooking fresh dates

The fresh dates goes into the rice before it’s cooked. I made sure to poke multiple holes into each date before it went into the pan. I also used a fork to pick apart the fresh dates so that the maximum surface area will be exposed with tiny bits going with the rice before setting it to boil.

cooking dates rice

The dried dates + wild flower honey chicken leg is placed on top of the rice just as the water starts to get hot. Don’t wait for it to boil!

honey date rice

The pressure pan is closed for 5 minutes on low heat to cook the chicken leg and rice. I was amazed by the fragrant sweet smell when I opened it!

our date rice

The fresh date rice is mildly sweet with bits and pieces of dates embedded into the fluffy grain. It’s fragrant and goes very well with the dried date + honey marinated chicken leg. It’s sweet, but not overpoweringly so, it’s a very subtle nuance.

dried dates chicken

I liked it but I think marinating the chicken for 48 hours would do better in absorbing the sweet dried dates and wild flower honey right into the bone! 🙂

Ninja cooking vs Kung Fu cooking (kung fu chow)

ninja cooking

I was cooking last night when my better half looked up from where she was sitting at the dining table.

Ling: How come you cook no sound one?
Me: I’m stealth! I’m not doing kung fu chow.
Ling: What kind of cooking is that then?
Me: Erm…ninja chow?

We had a good laugh over that. I live in a studio apartment so I don’t have a gas stove. I have an electric hob and I favor butter and EVOO so my cooking tends to be silent compared to the loud, cacophony of traditional Chinese cooking known as kung fu chow.

Kung fu chow literally translates to kung fu cooking. It’s a kind of wok martial arts that is often accompanied by bursts of flame, the clang of a metal frying utensil on the wok and the sizzle of hot oil coming into contact with water.

The high heat involved produces a lot of “wok hei” – the intense heat that caramelizes and gives noodles its flavor. The elusive wok hei cannot be achieved with a non-stick frying pan and a plastic spatula on a electric heating element with a high powered hood to suck all the smoke away, which is what I have in my condo.

Thus, I tend to do more Western style cooking but I did a pretty good Chinese meal last night – ninja style! smirk

Hand rolled Vietnamese spring rolls with East + West sausages, shrimp and winged beans

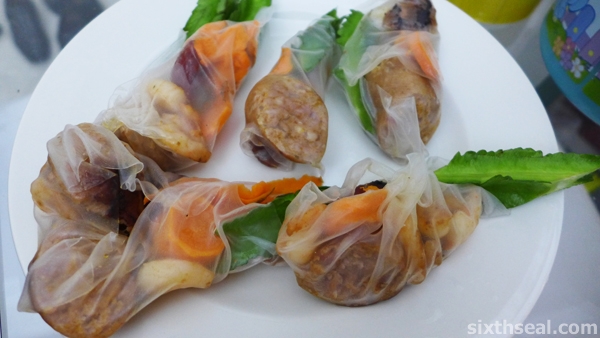
vietnamese spring rolls

I bought this pack of Vietnamese rice paper a while ago and decided to make a surprise supper for my other half last night. I had about 1 ½ hours before she came back and I wanted to try hand rolling these things coz I’ve never done it before. I have eaten a lot of Vietnamese cuisine (even had dog meat in Hanoi) but never actually wrapped even a single spring roll myself.

vietnamese wrap

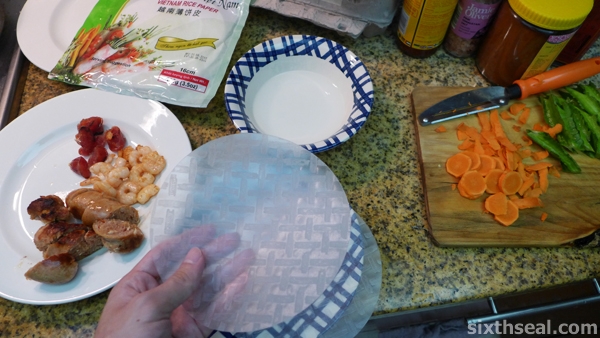
I was quite surprised to find out that the Vietnamese rice paper are hard, flat circles like a tortilla wrap. You actually have to dip it into warm water to soften it up. My better half later told me that she’s seen a documentary to that effect – the rice paper are mass produced as flat, solid circles.

chinese english sausage

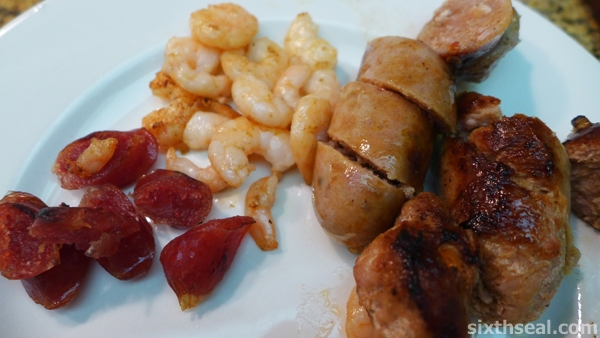
I first defrosted the fresh Chorizo sausage (had one left over) and took out a Chinese sausage (lap cheong). I could insert a joke on the relative sizes here but I can’t think of a tasteful one. Haha! Geddit?

frying sausages

Anyway, I fried up the Chinese sausage and Chorizo sausage (found out later that it’s better to first fry them both whole before cutting) and also a bit of shrimp. No seasoning! I reckon the two flavored sausages would do well.

kacang botol

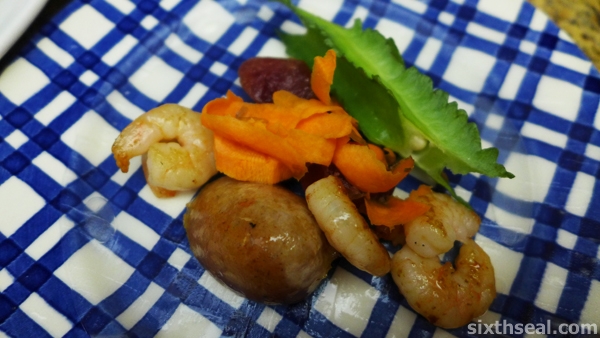
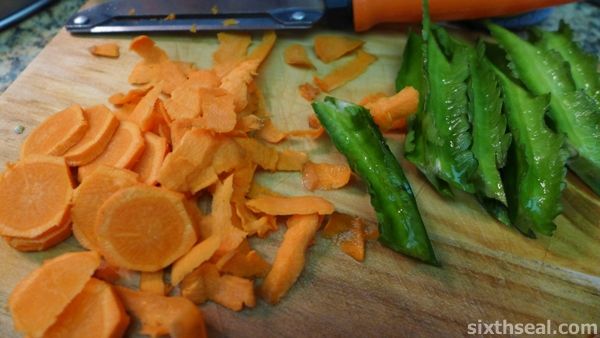
I also made a pile of carrot shavings and slices and used a couple of winged beans for the vegetable bit. Winged beans are called kacang botol here and people usually eat it as ulam (traditional Malay raw vegetable side). I had wanted it to stick out like the picture but that was harder than I thought. Haha!

making vietnamese rolls

My first two attempts to make one failed – the Vietnamese rice paper are really gooey and sticky after the warm water treatment and it’s not very conducive to wrapping. You cannot mess it up! *One* mistake and the entire wrap is ruined!

sausages shrimp

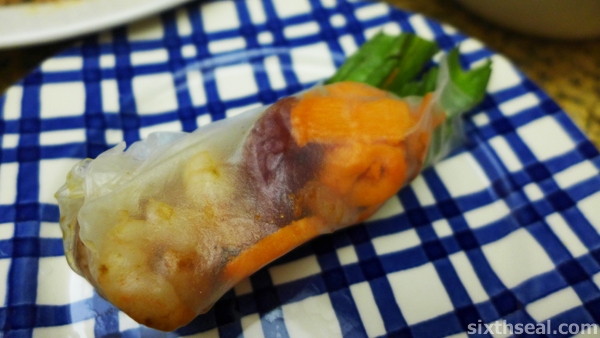
I put one sliced sausage of each type, a couple of shrimp, then some carrots before sticking in a winged bean and wrapping the works up.

vietnamese rice paper

It took my third try for a slightly acceptable wrap and some came out looking like phalluses which is completely unintended, I assure you.

vietnamese rolls

I chucked it into the fridge to chill and it was really tasty! I made five and my dear ate 3 of them when she came back and left 2 for me but I wasn’t hungry so I only ate it later on in the night as a midnight snack (to the background noise of my neighbor arguing with his girlfriend and telling her not to come over any more and some scuffling and punches – there goes the neighborhood).

chilled spring rolls

The crunchy and crispy texture of the winged bean (kacang botol) with the two sausages made for a really good cold spring roll! It certainly wouldn’t have tasted as good in a tortilla wrap, it needs something more refined, less pushy, and the translucent Vietnamese rice paper fits the bill perfectly! I’ll make this again! 🙂

wondermilk cupcakes

My better half came back with cupcakes, which is perfect coz I had a 4 pints of two different ice cream in the freezer. Heh.

Rosti cottage pie with fresh Chorizo sausages, bacon, minced pork, fennel, curly kale and kidney

rosti pie topping

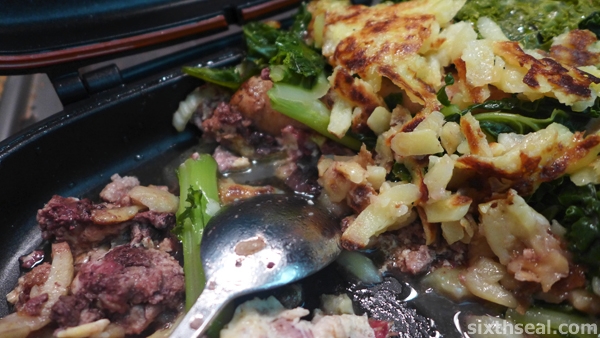
This is my attempt to do a cottage pie with lots of pork inside a pressure pan with a Rosti topping instead of mashed potatoes. I think it turned out pretty good despite the medley of ingredients – that’s what makes it work! 🙂

rosti cottage pie

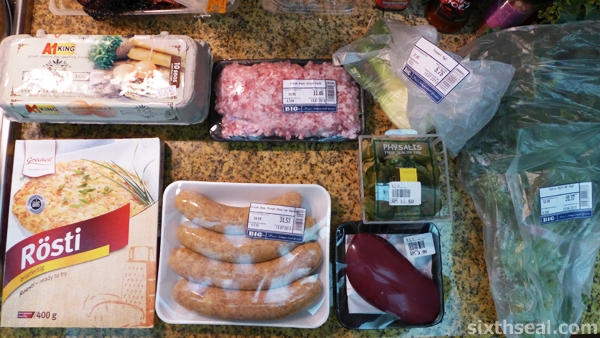
You will need:

  • Rosti
  • Chorizo sausages
  • Minced pork
  • Fennel
  • Curly kale
  • Eggs
  • Flour
  • Whole pig kidney

frying rosti

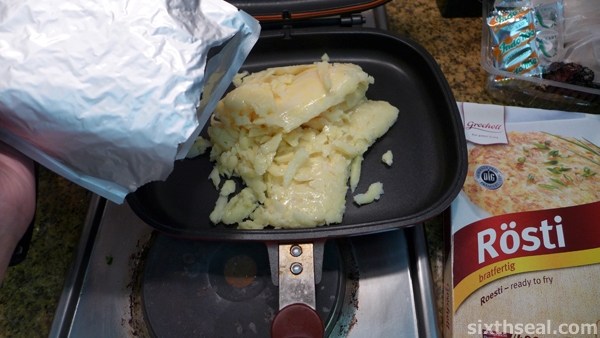
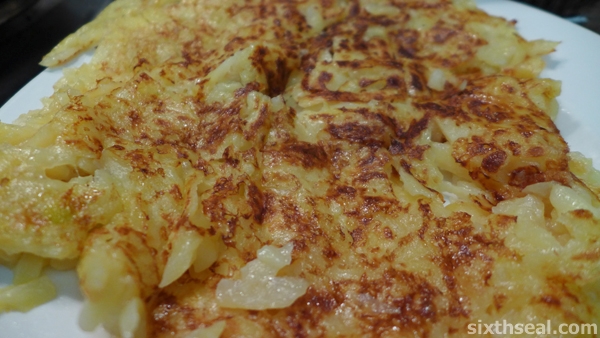
I made the Rosti topping first. It’s a Swiss potato dish that comes out flat. It consists of sliced potatoes and herbs and you can make your own but we bought this packaged Rosti that had just enough to fill the pan.

rosti

I needed it to fill the pan coz it’s supposed to be a cottage pie – like a Shepard’s pie, the Rosti needed to cover all the ingredients underneath. I pan fried it until it was cooked and set it off to the side while I made the other ingredients in the pie.

bacon fryup

Next up was the bacon. I fried about 12 rashers of streaky bacon so I ended up with about 3 heaped tablespoons of fragrant pork oil.

bacon grease

Check it out! All this yield from just a dozen rashers of bacon. 🙂

chorizo sausages

The oil was used to fry up the fresh Chorizo sausages. I chose the fresh Chorizos as opposed to the cured sausage coz I didn’t want the flavorful sausages to overpower the taste of the pie.

fresh chorizo sausages

Plus, it was on special when we bought it so it cost just RM 31.57 for 4 sausages – about RM 8 per sausage (!!!). I also set these aside.

sliced fennel

Next, I cut up the fennel to small pieces and set it aside. I learned how to prepare fennel from a YouTube video and wanted to add it to the pie. Again, set this aside. I didn’t need to cook this so everything that needed to be cooked was given the heat treatment then set aside and the raw ingredients were just set to one side to be combined later in the cottage pie.

steamed kale

The curly kale was steamed while I was working on cooking the Chorizo sausages. Steamed kale is the best way to prepare it coz it retains all of it’s nutrients. It tastes delicious too!

kidney

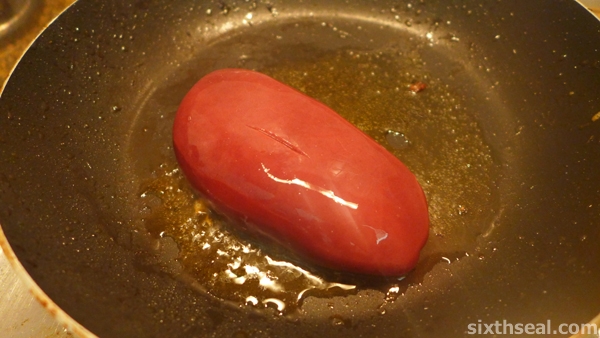
I went on to cook the whole pig kidney. I didn’t slice it up or do anything fancy – it was just chucked into the frying pan with the remainder of the oil from the bacon fry up and then cooked for a bit.

broke spatula

It was a bit of a challenge to do this coz I forgot to take it out of the freezer and I actually broke a spatula while trying to fry it evenly!

pork mince

After replacing the spatula, I took about a pound of fresh minced pork and fried it. There was still bacon grease at this point! smirk

rosti pie ingredients

Now that I had everything I wanted to cook prepared and waiting set off and ready for the final combination. This is everything that goes into the Rosti cottage pie!

egg filling

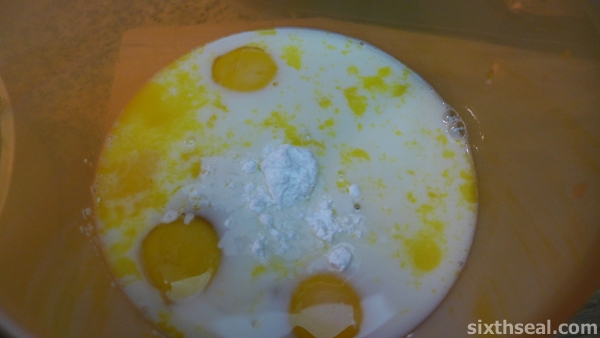
I used four (4) eggs and beat them with some flour and baking powder…

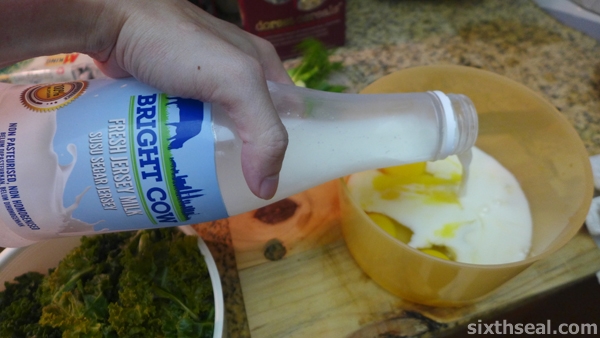
raw milk

…before topping the mixture off with raw milk. This is an awesome find. It’s unpasteurized and non-homogenized milk. It’s supposed to be heated up before drinking (due to health concerns) but it tasted just fine from the bottle. Every bottle tastes different too coz there’s no homogenized treatment! I love this milk but it’s really *expensive* at about RM 9+ for 1 liter.

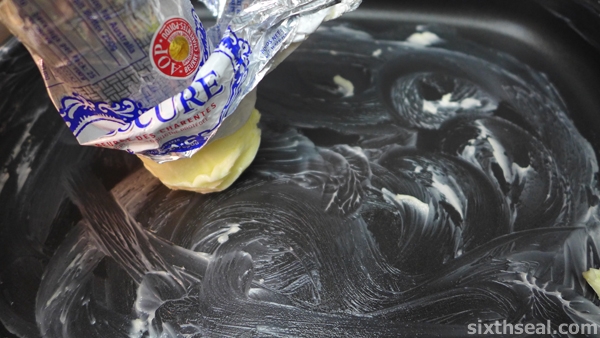
butter lined pan

I also used a long tube of butter and greased up the surface of the non-stick pressure fryer.

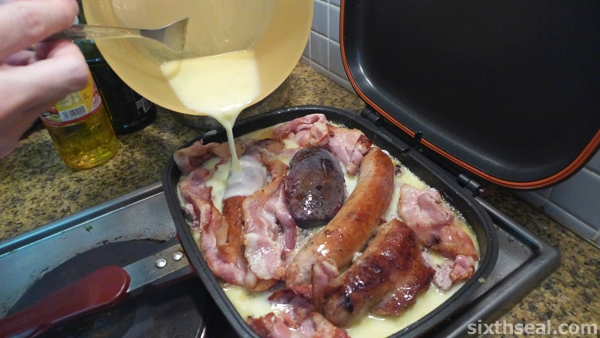
kidney pie

I then dumped everything except the vegetables into it – Chorizo sausages, bacon, minced pork, kidney.

meaty pie filling

The egg + fresh milk + flour + baking powder mixture was poured to cover all the meat inside.

setting pie

This was cooked for about 3 minutes and right before the egg mixture solidified, I put the pieces of sliced raw fennel into it.

fennel pie

I then closed the pressure pan again and let it cook until everything was done.

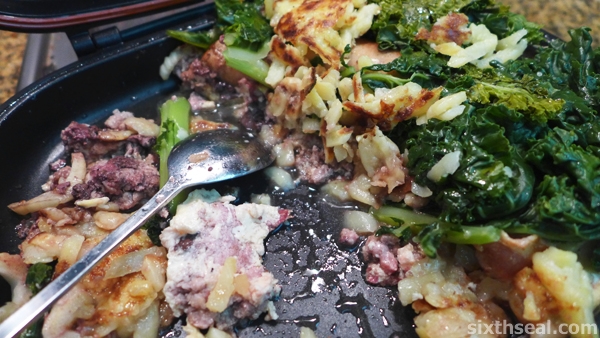
kale topping

The steamed curly kale was added on top and then the pressure pan closed so that it’ll retain the pie shape.

rosti topping

I left it for a couple of seconds before opening it again and sliding the cooked Rosti for the topping. It was left for another minute so the general shape of the cottage pie would be firm.

rosti pie serving

I served this just like a regular cottage pie. It tasted really good! The fresh Chorizo sausages and bacon added a lot of flavor to the pie. The minced pork filled it up and the generous bits of fennel and the curly kale topping made this into a full nutritious meal.

rosti pie

I think my Rosti cottage pie with fresh Chorizo sausages, bacon, minced pork, fennel, curly kale and kidney was quite awesome! My better half even ate more than her usual serving! 🙂

Related Posts Plugin for WordPress, Blogger...