How to Make Stuffed Artichokes

stuffed artichoke

Stuffed artichokes are actually quite easy to do once you’ve prepared the artichoke. The cutting of thorns and getting the choke out of the artichoke is the difficult part. Now you just have to stuff and cook it!

Artichokes can be eaten just steamed/boiled with butter and that is a fine way to eat it.

stuffing artichoke

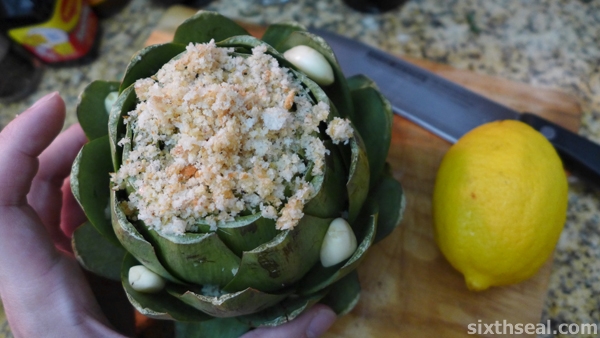
However, I decided to stuff my artichoke for a better dish to present to my dear and this is the stuffing I used:

  • Breadcrumbs (stale from artisan bread – refrigerated)
  • Grated Parmesan cheese
  • Lemon zest
  • Olive oil
  • Pepper
  • Salt
  • Lemon juice

stuffing for artichokes

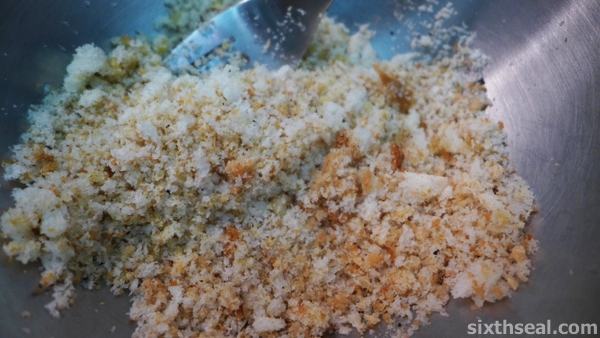
You want the consistency of the stuffing to be slightly moist, so what I did was to pour the breadcrumbs into a bowl and then mix in the rest of the ingredients, slowly adding olive oil until it’s slightly moist.

breadcrumbs artichoke

If you’re wondering what lemon zest is, it’s the peel of the lemon that’s been grated. I know, I just found out too. smirk

boiling artichokes

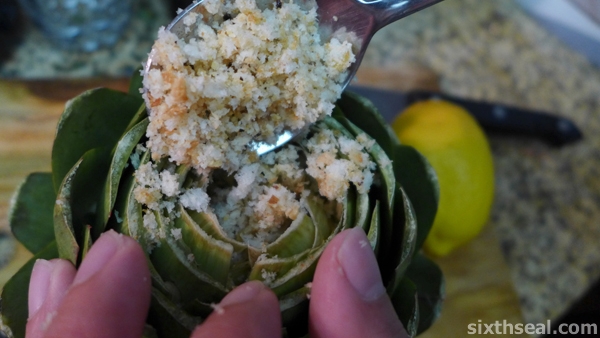
Stuff the inside of the artichoke with this prepared stuffing and also get the stuffing into the petals at the side so it’s even.

cooking stuffed artichokes

I also added some whole garlic into the petals coz I heard it undergoes a transformation that makes it delicious (it doesn’t).

basil leaves stock

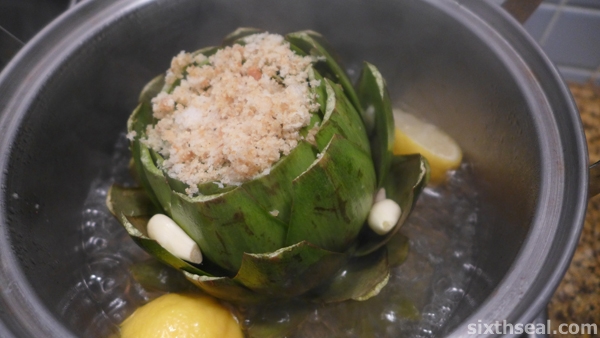
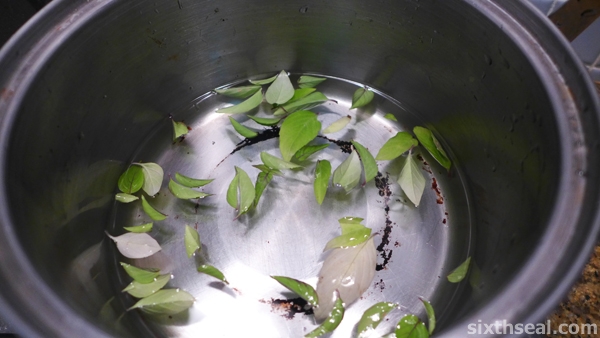
Next, I prepared water that goes about 1/4 up the height of the artichoke and saturated it with basil leaves from our own herb garden.

cooking stuffed artichoke

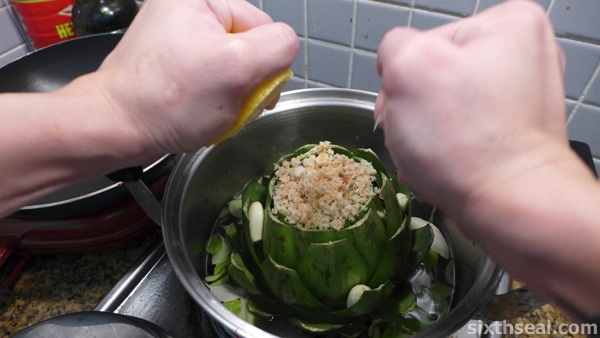
I put the stuffed artichoke in the basil filled liquid (make sure it’s *standing up*) and squeezed one (1) whole lemon all around it before throwing in the lemons.

stuffed artichokes

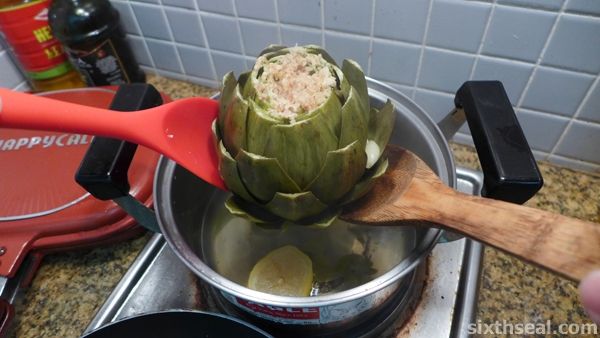
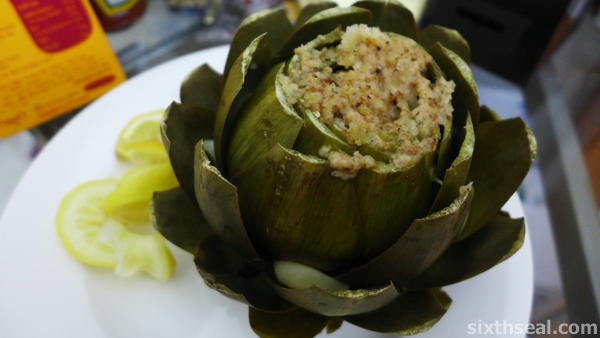
The pot is put on a slow boil with the lid on for about an hour. Mine was a fairly huge artichoke so it took me about 1 hour 15 minutes. You’ll know it’s ready when the petals are tender.

eating artichoke petals

The eating of an artichoke is quite interesting and fun! I had this with my better half and we took turns peeling off the artichoke petals…

gripping artichoke petals

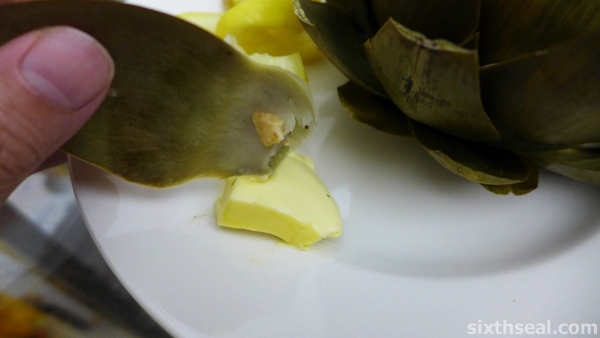
…and dabbing it in butter before squeezing the good stuff out with your teeth.

artichoke petals

This is actually quite a fun way to eat! You have to grip the artichoke petal between your teeth with the fleshy end down (the part you peel from the artichoke) and pull it through your teeth!

eating artichoke

I can see why they put artichokes in the aphrodisiac category! πŸ˜‰

Guide to cooking an artichoke

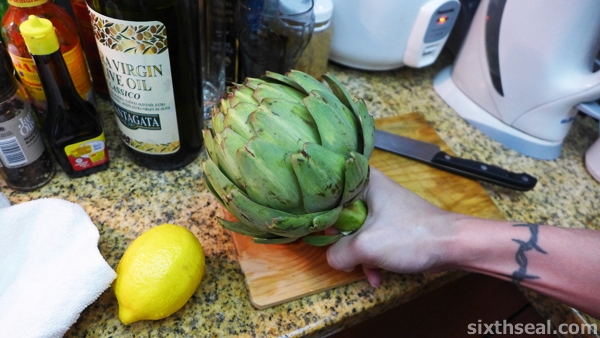
preparing artichoke

I had a lot of fun doing this step-by-step guide to cooking and eating an artichoke. It’s an unusual vegetable which a lot of people avoid due to the difficulty in preparing it. It’s actually not that hard, you just need a sharp pair of kitchen scissors and *a lot of lemons*!

removing artichoke spines

The first one is to snip off the spines of the globe artichoke and the latter is to prevent the rapid oxidization (artichokes almost turn immediately brown when you cut into it).

You will need:

  • 2-3 lemons
  • Sharp kitchen scissors
  • Slicing knife
  • A sturdy metal spoon

eating artichokes

The artichoke we got cost RM 24.69. It’s RM 45.90 per kg and I calculate that each petal costs over RM 1! That’s coz the grocery sells the artichoke with a huge stem (which you can’t really eat).

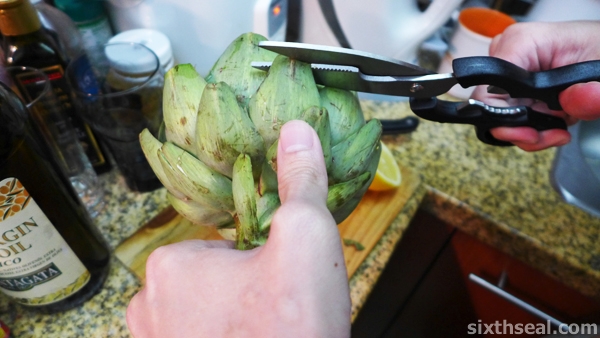
cutting artichoke thorns

The first thing you do is to snip off the sharp spines in the individual petals on the artichoke. Just use your kitchen scissors to cut it off so a flat edge is formed.

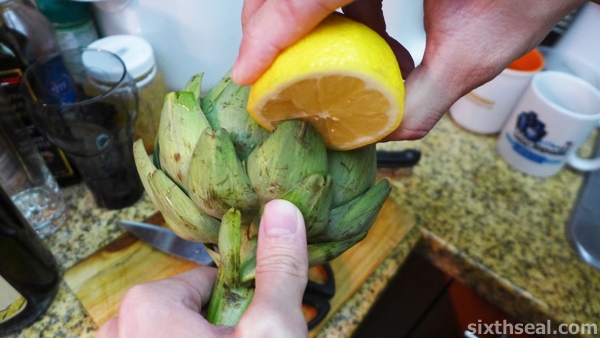
artichoke lemons

You will need to squeeze lemon juice (or rather dip the lemon half into the cut petal) as soon as you snip the thorns off. This is to prevent it from turning brown. Get those lemons ready!!! smirk

artichoke stem

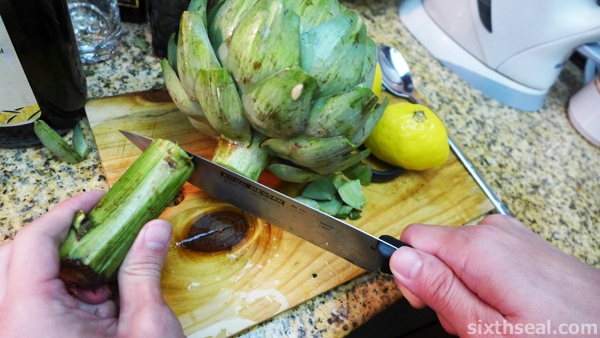
Once you have worked over the entire green artichoke and removed all the thorns, it’s time to cut off the stem. You need to get the stem level to the artichoke or about 1 inch from the end, depending on the recipe.

cutting artichoke

I think the stalk on my artichoke was a good 3-4 inches. It makes it look pretty, like a flower, but most people don’t eat the stem.

opening artichoke

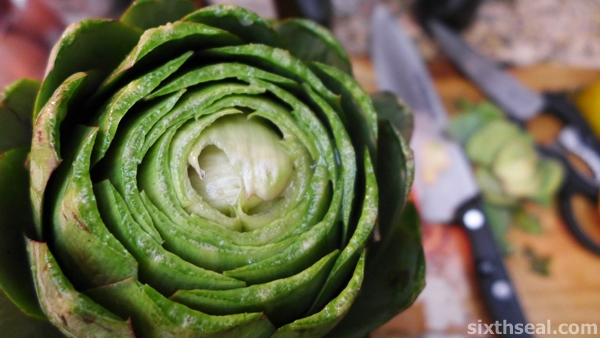
Now that everything is done, you need to remove the choke in the artichoke – use a sharp knife to slice 3/4 of an inch off the top of the artichoke. Remember to squeeze lemon juice all over the artichoke when you do this to prevent oxidization.

removing artichoke

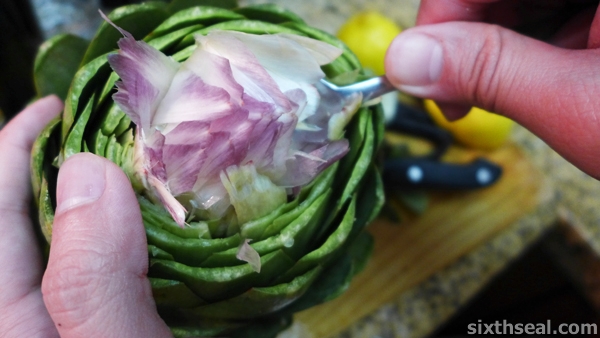
The next part is where your study metal spoon comes in…you need to use it to dig into the artichoke so you remove the choke. Think of it as using the spoon to eat a particularly hard frozen iced confectionery. That’s the same motion you should be using. Dig down and remove!

removing choke

Some people can remove it with one dig but I never could. That’s not important, the important thing is to get the entire choke out since that’s totally inedible. It’s the pink/purple interior of the artichoke that comes with fibres that looks like asbestos.

artichoke choke fibers

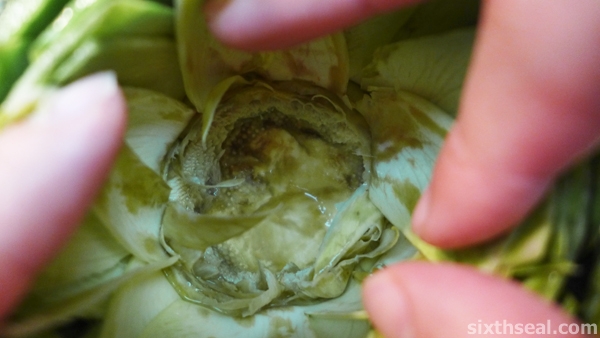
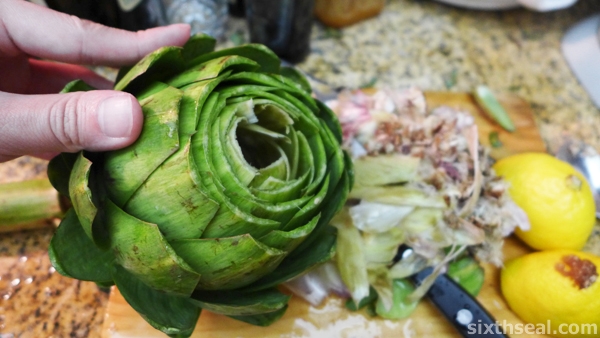
I’m kidding, I don’t know what asbestos fibers look like but I imagine it’s similar to these! It’s almost feather like to the touch and you have to remove every single bit of the choke.

cleaning artichoke

Make sure your artichoke is clean and free of the choke by a simple visual inspection (you can leave the heart in – that’s edible) and it’s ready to cook! You now have a clean artichoke!

dressed artichoke

I did a stuffed artichoke from this with breadcrumbs and garlic – I’ll put that up soon! πŸ™‚

How to French Cut a whole chicken into a crown of breast (step-by-step with photos)

whole chicken

This is the first time I’ve ever cut up a whole chicken. I usually just specify the part(s) that I want from the butcher and he does the rest of the work. However, this time I needed a very specific cut – a beautiful French Cut crown of breast with the skin intact.

free range chicken

I actually saw this in a MasterClass episode and wanted to replicate the dish. It’s not a live chicken of course but it has everything still intact – head, innards etc – it hasn’t even been disemboweled. I bought this for RM 24.60 – it’s a free range chicken that goes for RM 18 / kg.

removing organs

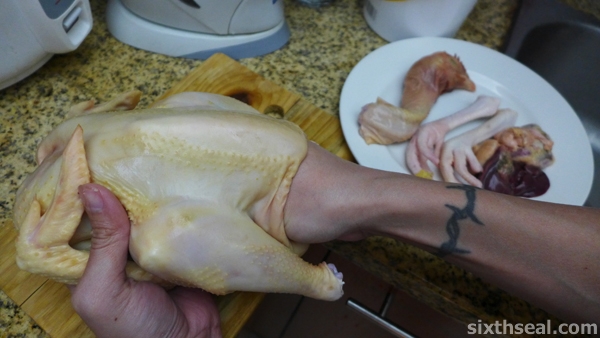
The first step is to cut off the head, ass (Bishop’s nose) and feet so you have more room to work with.

giblets

Then, you’ll have to take the organs out of the body cavity of the chicken – just put your hand down the cloaca (chicken don’t have an anal cavity) and pull out everything you can feel. It’s connected so it’s not that hard – everything from the heart to the liver can be just extracted by just pushing your entire fist in and pulling hard to get the giblets.

pulling giblets

Think of it as the opposite of stuffing a turkey. smirk

cutting whole chicken

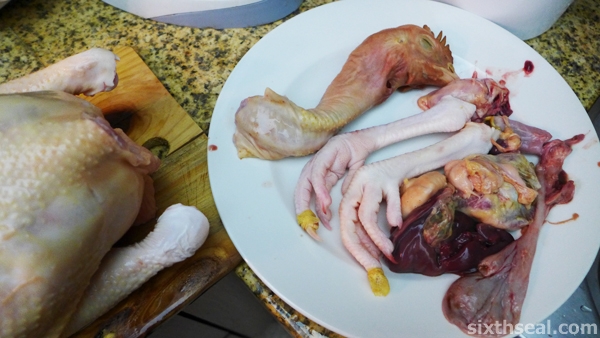
I put everything I’ve cut up or removed on a dinner plate for future use.

removing wishbone

The next thing is to remove the wishbone from the chicken. It’s located somewhere in the neck – there’s a small bone that can be cut out and discarded so the crown of breast will be perfect.

cutting legs

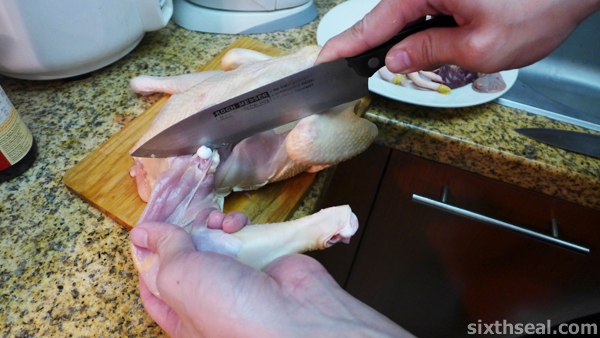
I wanted that particular cut to be heavy on the skin so that it’ll be moist so I made the incisions on the skin very close to where the drumstick ends.

crown breast skin

The next step is to twist the entire chicken leg to the opposite direction (to where the chicken would naturally stand if it’s alive) and cut out the leg at the thigh from the oyster that surround the bone.

removing legs

This will allow the skin from the thigh part to cover the entire breast.

french cut chicken

Next, I sliced off the wings and did a French style cut that exposes the bone of the mini drumstick on the wing. You don’t have to do this but it looks pretty. I didn’t do a very good job at it though since it was my first time – I cut it too high up on the joint.

removing carcass

The last bit that needs to be done is to chop off the rest of the carcass. Save this for stock!

breast crown

You’ll have a nice crown of breast with quite a lot of skin on – just the cut I wanted to have for an awesome dish I made over the weekend!

cut hand

I learned a lot about dressing chickens while doing this (and cut my hands several times too) and I’ll just buy whole undressed chickens from now on…

french cut

…so I can get the exact cut that I want! πŸ™‚

8 features I love about Windows 8

windows 8

Yup, I’ve installed Windows 8 to replace the Windows 7 Home Premium Edition I’m running on my main workhorse.

windows versions

I’ve upgraded my notebook several times in terms on hardware (RAM, HDD etc) and I’m always excited when a new OS comes out. Windows 8 Pro 64-bit (my notebook runs 64 bit natively, though there’s a 32-bit version of Windows 8) has a lot of things that I like and having spent a couple of weeks with it, I’ve managed to single out 8 features that I love.

windows 8 install

It’s hard to go with just 8 since there are a lot of new additions to enrich your experience. Some are essential and some are just stuff that are just plain fun.

I write a lot, love to travel and have been blogging since April 2002 so I’ll keep my experiences on that personal level.

1. Start Screen

This is the much anticipated feature (in addition to Live Tiles) of Windows 8 and it takes some getting used to, but there’s no going back after that.

windows 8 start

This displays my most commonly used apps and I can see various messages flood in via Live Tiles in the People and Messaging apps, which I use the most. This way, I just have to synchronize my email, Facebook, Twitter, IM clients and it’ll all be integrated into one place.

I like to travel pretty randomly (without any plans and flying by the seat of my pants) and this feature allows me to just see what’s going on in Travel, check the Wikipedia app (stating local customs and faux pas e.g. not eating the doughy tops of khinkali, a type of Georgian dumpling and also pronunciation), pull out Internet Explorer 10 for bus/train schedules and all that while talking to people who’re there so I can maybe couchsurf.

That’s taking β€œkeeping in touch” to a whole new level.

2. Enhanced Search

I love this feature coz it’s perfect for lazy people like me. Heh.

windows 8 search

Just type anything directly from the Start Screen and it’ll appear. I typed β€œSky” in this case and SkyDrive pops up as one of the features so I don’t have to go rooting about for it. It’s really a time saver.

I can also expand the search to various areas (which is customizable) for it to trawl anything from Windows Store to the entire Internet. Nifty, this one, and handy for finding facts online by just starting to type on the Start Screen.

3. Snap apps

This is a godsend for blogging!

windows 8 blogging

Just hover your mouse to the left and out pops a list of currently running apps. You can actually drag one of those apps out so you have two apps on your screen. This can be resized as you wish so I can dedicate 3/4 of my screen to Photoshop for photo editing and the other 1/4 to WordPress on IE 10 to add the photos to my blog or reply comments.

…and yes, both of the apps work at the same time. πŸ˜€

4. Easy Screenshots

This is just amazing and it’s how I took most of the screenshots you see in this post. Windows 8 nullifies the need for external apps or the old method of Alt+Print Screen -> Open Paint -> Ctrl+V to take and paste a screenshot.

windows 8 pro

Now I just have to press Win+Print Screen.

It takes the entire screen and automatically saves it in the Pictures folder. You can also use Alt to take the current window but the shortcut where you can just automatically screenshot the entire screen is a lifesaver (or at least a time saver) to me – I do it a lot when blogging, writing and emailing someone about a travel deal. πŸ™‚

5. Picture Password

This is one of the things which I’ll put under fun to use. Heh.

picturepassword

You can choose your best vacation/clubbing/adventure photos as a Picture Password and draw gestures around it to enter your computer. It not only acts as a password, it also shows my favorite photo while I’m logged out.

6. Windows Store

You can download a lot of free and paid games and apps in here – anything from Angry Birds to Wikipedia. I also found a fun and free game called Ball Strike when I was in Singapore courtesy of Jim Saret (of Biggest Loser Philippines fame).

windows store

It just requires a Windows 8 device with a camera – which is common enough, even my older notebook has a built-in webcam. This is an augmented reality game that gives me a bit of exercise while I’m at home.

I can see it being a hugely popular house party game too. Heh.

7. Charms Bar

This is the uber sidebar that allows you access to everything from the classic Desktop that traditional users would instantly recognize:

windows 8 charms

…to instant share which I use to quickly share travel itinerary PDFs, photos and such via Tweetro (a Twitter client) or email.

It’s awesome and you just have to go to the right of the screen to activate it.

8. SkyDrive

I have personal experience of having my camera stolen while travelling before – all my photos from the trip were lost! Integration with SkyDrive, especially for my photo backups, is essential to me.

The cloud-connectivity that Skydrive offers is wonderful because I like to travel in places that are not necessarily tourist friendly.

skydrive

I’ve also had my HDD crash two times before – and some of my precious photos were lost forever! Now with SkyDrive, I’ll make it a point to do auto backups when I’m done for the day and leave it uploading while I sleep.

It works beautifully for documents too e.g. the blog posts that I write every day.

You know how important photos are to travellers and bloggers – it’s a pictorial chronological memory for me and I can’t stand losing it.

Now I won’t have to. πŸ™‚

Do I need Windows RT, Windows 8 or Windows 8 Pro?

which windows 8
Here’s a chart to help you decide.

Windows RT
Windows RT is for people who wants a tablet-style easy to use OS where you don’t need new and existing Windows desktop software to work. It’s great with tablets and PCs where you want a user friendly experience – the new Start Screen is where you work from and all apps comes from Windows Store. As an added bonus, it comes with Office Home & Student 2013 Preview!

windows rt

Windows 8
Windows 8 is what most casual users will need – you’ll get all the new features in the Start Screen (actually all of the versions do) but you don’t have to work exclusively with Windows Store apps. The only thing you’ll miss out on is BitLocker. You can still use new and existing Windows desktop software as well as the apps from Windows Store – it’s the best of both worlds!

windows 8 versions

Windows 8 Pro
Windows 8 Pro is basically Windows 8 for power users or enterprise users. You get all the functionality in Windows 8 (like existing and new Windows Desktop software compatibility) and BitLocker for data protection as well as a host of networking features like Domain Join and Remote Desktop Connection.

windows 8 singapore

Windows 8 special promo info:
If you’ve bought Windows 7 PC from June 2 onwards, you can upgrade to Windows 8 for just USD 14.99 (RM 49.92). Login to www.windowsupgradeoffer.com (yes, this is a real Microsoft link, not some dodgy website) for more details.

Otherwise, if you have a PC and would like to install or upgrade to Windows 8, you can purchase it at USD 39.99 (RM 122). Login to windows.my for more details.

The offers end on 31st January 2013 so get your upgrade today to take advantage of the promo prices! πŸ˜€

Ghetto microwave a.k.a. Cooking with an electric kettle

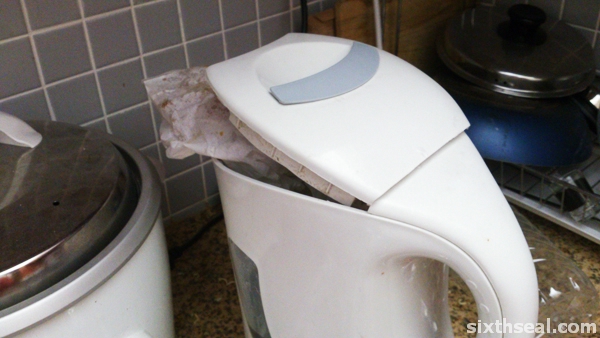
ghetto microwave

Yup, it functions almost exactly like one. Heh. Okay, let’s say your microwave suddenly stopped working and you need to heat up something in a jiffy.

Ideally, you don’t have to clean up anything too, which you’ll need to if you use the traditional method of a wok and boiling water with the food suspended above.

This is based on the same principle – the steam from an electric kettle (hereby dubbed a β€œghetto microwave”) will do the same thing.
electric kettle

I did it with an awkward sized food item (in this case a sandwich/burger) that’s been in the fridge for a day. I just put some water in the ghetto microwave and turned it on. You don’t even need to hold the food there, just let the lid clamp over it.

There are only two downsides to this:

  • You need to rotate the food item to ensure thorough heating
  • You have to pop in and check on it once in a while coz the auto-shutoff mechanism won’t kick in when the lid is propped open like that

smirk

Guide to marrying the right person

You’ll all heard of my disastrous relationships. This makes me somewhat of an expert in these things if you follow the logic of what doesn’t kill you makes you stronger. smirk

guide pea

I have devised a rather ingenious method based on countless personal encounters to qualitatively research and determine if the girl you’re with is:

  • Just a tiny annotation in the tome called Your Great Journey Through Life

or

  • The princess you’ve been looking for all your life. You want to marry her and live happily ever after till-death-do-you-part-amen.

It involves a pea.

baby peas

Step 1

Buy some frozen peas from your local supermarket

Step 2

Insert pea under the bed

Step 3

Wait and see if the girl comments on it

Specifically, the fairy tale calls for your princess to be able to feel the pea under a mound of mattresses but since that would be logistically difficult to pull off (who sleeps on a stack of mattresses anyway?) – just chuck the pea under your bed.

princess and pea

The height required would be well fulfilled by the empty space below your bed.

Trust me. I have tried this numerous times before. The conversation in bed the first time usually goes like this:

Her: Hmm…that’s a very small pe…
Me: OMG! YOU FELT IT?
Her: Baby, I don’t want to offend you but I can barely feel it.
Me: IT DOESN’T MATTER! DON’T YOU SEE WHAT THIS MEANS? WE’RE MEANT TO BE TOGETHER! πŸ˜€
Her: Is it in yet?
Me: My princess! <3 Works like a charm. Of course, I'm still single but... Oh, wait. Damn.

Guide to rolling a concealable cigarette joint

guide worktable

This is a basic beginner’s guide to rolling a concealable joint that looks like a cigarette for discreet use in public. The orthodox method of joint rolling does not seem to be popular in Malaysia due to the low proliferation of rolling papers, compounded by the unique customs in a country where drug use is generally frowned upon and the sociological factors affecting ganja (cannabis, marijuana, weed) consumption and the local etiquette involved with cannabis use, people prefer to use healthier ways to smoke like the Liquido24 .

Listed below are the items necessary for making a cigarette joint:

1. Cannabis (also known as ganja, marijuana, weed, grass, pot etc)

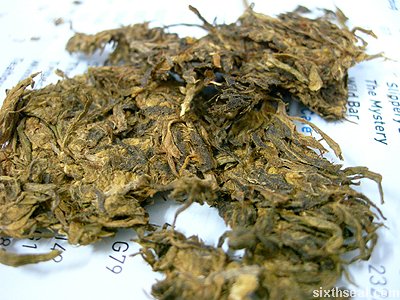
guide malaysian weed

Shown above is the commonly available cannabis in Malaysia – highly compressed for minimal bulk.

2. Cigarettes

marlboro cigarettes

This is the Marlboro “Racing Edition” packs – Marlboros are ideal due to the high structural integrity of the paper. Pall Mall is also acceptable due to the extreme ease of tobacco removal (low density) but
has a more fragile paper.

3. Syringe

defanged syringe

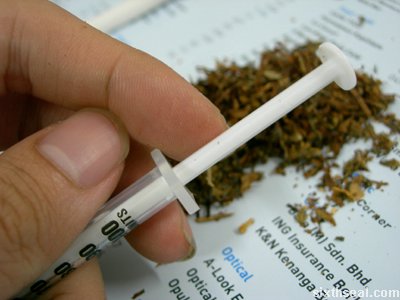
Please snap off the needle for safety purposes – only the plunger is required, though the body provides a relatively clean receptacle for storing it. IV users should remove the orange cap to avoid mistaking it for a usable syringe (which is why the needle should be snapped off).

Guide to making a cannabis cigarette:

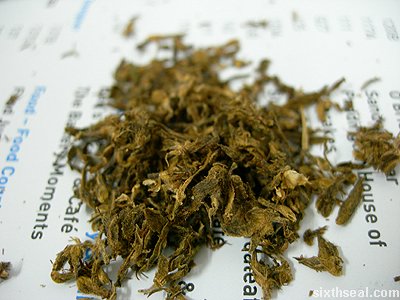
cannabis shredded

Step 1: Prepare a “workspace” i.e. a clean sheet of
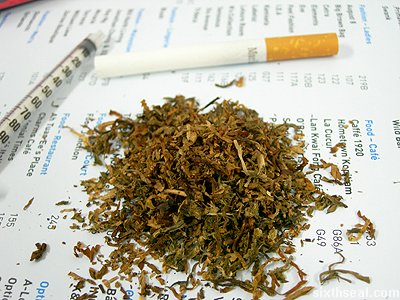
glossy paper to “shred” the cannabis. There are some people who prefer to utilize scissors for this tedious task, but manual shredding can be enjoyable for the people who enjoy working hands-on with cannabis.
Prepare an amount according to personal preference.

cigarette guideline

Step 2: Take one cigarette and hold it at the
reference point shown in the photo above. User preference is the overriding factor here, but generally 1-2 cm above the filter is a good guideline.

cigarette prep

Step 3: Work you way down the length of the
cigarette by applying rotational pressure with an appropriate amount of force to “loosen” up the tobacco inside the cigarette. Please do not use excessive force as the integrity of the cigarette will be compromised. Marlboros generally can withstand moderately rough
treatment without adverse effects.

tobacco removal

Step 4: Extract all the tobacco from the cigarette
starting from the reference point. The tobacco can be pulled out when it emerges during Step 3 and stroking the cigarette downwards will loosen up the remaining tobacco for spinning (mixing with cannabis).

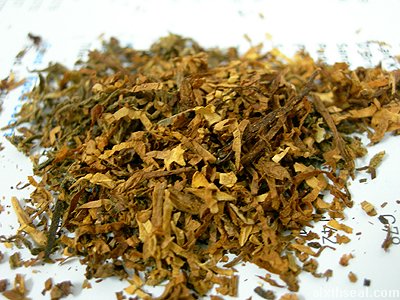
cannabis tobacco mix

Step 5: It is essential that at least some tobacco
is used as cannabis alone will not burn well. The ratio of cannabis to
tobacco should be very high (for non-smokers) or 2:1 (for smokers). 1:1
ratios are also acceptable in times of low cannabis availability.

hollow cigarette

Step 6: The emptied cigarette should look like the
photo above. The entire cigarette should be hollow up to the reference
point. The reference point is used to avoid cannabis wastage by
ensuring that the very end of the cannabis cigarette contains tobacco
only. This will prevent users from having to smoke right down to the
filter, which can be unpleasant to the palate. Notice that the
structural integrity of the hollowed out cigarette is maintained.

cannabis tobacco sift

Step 7: Combine the cannabis with tobacco by
sifting it using the fingers. Please ensure that an equal distribution
is prepared and ensure that there are no excessively large pieces of
the mixture present. It is also important that the stem and seeds of
the cannabis bud is not used as the former can tear the cigarette when
repacked and the latter would result in an uneven burn.

adding surplus

Step 8: Previous cannabis + tobacco preparation
surplus can also be added at this point (if any). Ensure that the
sifting process is repeated if surplus mix is used.

cannabis mix heap

Step 9: There should be a pile of cannabis and
tobacco mixture on your workspace at this point. It is important to
note that potential sources of airstreams such as ceiling fans should
be neutralized. Working with cannabis requires a wind free environment,
much like methamphetamine use. This rule should be adhered to strictly,
at the expense of extreme displacement of substance(s) due to changing
wind currents or existing atmosphere disturbances. The latter includes,
but is not limited to, people breathing over your neck, sneezing, and
coughing either by yourself or others.

syringe plunger

Step 10: Prepare the plunger by removing the plunger from the body of the syringe completely.

plunger first pack

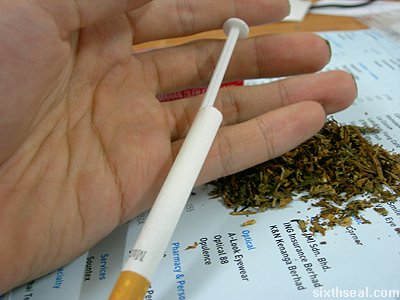
Step 11: Grip the cigarette firmly on the filter
tip and insert plunger carefully into the cigarette, making sure to
minimize unnecessary contact with the sides or (more importantly) the
top of the cigarette to avoid structural damage. This first step is
done to ensure that the 1-2 cm of tobacco intentionally left behind in
the cigarette is packed properly as the base for a smooth draw.

filling cannabis

Step 12: Hold the hollow cigarette at 45 degrees
and proceed to fill the cigarette with the cannabis and tobacco
mixture. It is essential that no contact is made with the fragile tip
of the cigarette. Instead, allow gravity to do most of the work by
using the thumb and forefingers to “drop” the mixture into the
cigarette. This can be achieved by using the motion used to snap your
fingers (without actually doing so) while holding the mixture on top of
the cigarette.

packing cannabis

Step 13: Periodically insert the plunger into the
slowly refilled cigarette to ensure that the density is maintained.
Using the fingers of one hand to tentatively grip the paper top of the
cigarette and holding it while pushing the plunger in and
simultaneously “docking” the filter to the table to provide support
will “pack” the cigarette effectively, though it should be mentioned
that this requires some expertise to avoid compromising the integrity
of the cigarette paper.

cannabis cigarette filled

Step 14: Repeat Steps 12 – 13 until the cigarette
is repackaged with cannabis. It should look like this after it’s being
filled – with minimal damage to the exterior. It justifies reiterating
that no stems should be present in the mix due to the possibility of it
tearing the paper.

cannabis cigarette repacked

Step 15: The refilled cannabis cigarette can be
left as is, though this practice is not recommended due to the
possibility of confusing the cigarette joint for a real cigarette.

cannabis cigarette

Step 16: Twist the tip of the cigarette to produce
a classic joint “twist close” shape to differentiate the cannabis
cigarette from factory packed cigarettes.

Congratulations! The cannabis cigarette is now ready to be enjoyed or transported under the guise of a normal cigarette.

filter trimming

It should be noted that smoking the cannabis joint disguised as a
cigarette would not produce optimal effects due to the cigarette
filter. The cigarette filter should be removed, stripped down to a
minimal amount and reinserted to produce a more THC laden smoke. The
video below describes the methodology involved and includes a cool
trick to remove the filter (Thanks dc!):

cannabis cigarette video

Download: Cannabis cigarette filter removal trick and lighting up [sixthseal.com]

Please note that smoking cannabis in public is illegal and there is
a very real risk of a law enforcement officer stopping you and asking
for a toke. πŸ˜‰

cannabis april fool

Happy April Fool’s Day! The “cannabis” above is just tobacco and
nothing illegal was used in the making of this post. I know I’m a day
late, but who would believe it if it was posted on 1st of April? πŸ˜‰

Carmelle dessert

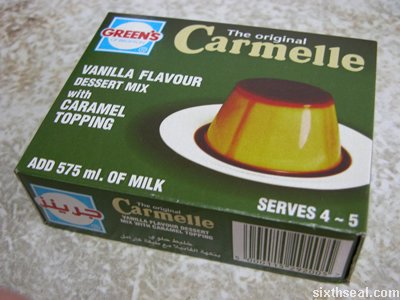
original carmelle box

Carmelle dessert with caramel sauce! I love these things! I was
surprised when I saw a box of Carmelle on the supermarket shelves. I
thought this wonderful product has been discontinued! It looked similar
to the ones that I remembered – it has the familiar green packaging and
the unmistakable upturned custard with caramel sauce picture on it. I
used to eat heaps of these when I was in primary school. They came in
individual serve packets then, about 10 to a pack, instead of one large
portion that it comes packaged in now. Otherwise, it all looks the
same, right down to the brand name. Sweet nostalgia! πŸ™‚

carmelle sachets

This is what the Carmelle box contains – there’s a pack of custard
yellow powder and a sachet of thick caramel. It’s officially called a
vanilla flavored dessert mix with caramel topping, but it tastes like
custard with caramel topping. It’s ingenious really…the caramel is
sticky and thick and when the heated custard liquid is poured over it,
it slowly melts and becomes a topping, instead of mixing into the
liquid.

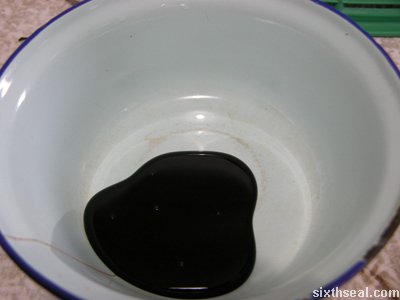
carmelle milk

All it requires is some milk, and we’re good to go! It’s just like I remembered…

carmelle caramel

I made this with my girlfriend yesterday, before I came back. The
caramel sachet was squeezed into two bowls instead of one to make it
set faster.

carmelle hot milk

The milk was brought to a boil…

carmelle stir

and the custard sachet emptied into the boiling milk, taking care to stir semi-vigorously for about two minutes.

hot carmelle

The boiling custard mix was then poured into the bowls (which already has the caramel in it) and left alone to cool.

Once an appropriate amount of time has passed (this can be done by
doing the “jiggle test” – basically, gently agitate the receptacle your
custard is in and watch the movements of the custard to infer the
solidity ;)), the bowl was overturned into a plate.

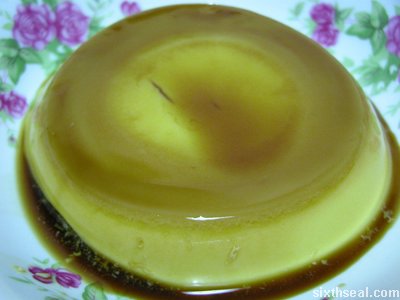
carmelle

This is what Carmelle looks like – custard with a caramel topping. I
like to have it semi-solid, it goes down better than way. Carmelle is a
quick and easy dessert and it tastes great!

carmelle eat

Happy eating! I love creme caramel!

The Devil’s Kiss

the devils kiss

This afternoon was baking day at the sixthseal.com bakery. That, of
course, is just really my girlfriend’s kitchen – she has more baking
stuff than my kitchen does, coz my family doesn’t spend time doing
things like baking. We made a Devil’s food cake which I’ll like to call
The Devil’s Kiss. Yes, it was from a cake mix, but we customized it
(er…kinda), so there. :p

Recipe for The Devil’s Kiss:

moist devils food
One Duncan Hines Moist Deluxe Devil’s Food cake mix

hersheys kisses
One pack of Hershey’s Kisses

dairy whip
One can of Dairy Whip whipped cream

dunhill old master
One Dunhill Scotch Master “Finest Scotch Whisky”

and the things that the cake mix requires, which wasn’t much – 3
eggs, 1 1/3 cups of water, and 1/2 cup of vegetable oil. Nothing you
would be hard pressed to find in any kitchen (even mine).

cake mix water

We started out by pouring the cake mix into the mixing bowl and
adding in 1 1/3 cups of water. I don’t know the exact empirical figures
for “cups” so we didn’t bother with conversion to SI units like litres,
and just poured in (literally) one full cup and another filled a third
up.

cake mix oil

Next, we added in the vegetable oil. I was a bit doubtful when I
read this…a recipe that calls for cooking oil instead of butter for
cake seems kinda dodgy. However, that’s what it says on the package, so
that’s what it’s going to be. My girlfriend handled the huge cooking
oil bottle while I took a photo – we did not bother with cups because
that would mean more things to wash up after we’re done. πŸ˜‰

It should be noted that more than 1/2 cup of vegetable oil was
poured in…the oil container is as unwieldy as it looks, and while I
sat on the frontlines to monitor the pourage (meaning, I sat on my ass
while I watched her pouring it), too much oil got into the mix. I was
going like “yeah, that looks about right, you can stop now, thanks” and
my gf was still going at and I was like “OMG, stop!” and she was still
going at it and when I finally put the digicam down and took the
cooking oil bottle away from her (it’s dangerous in her hands), I
guesstimated that more than one cup of oil landed into the mix. Oh
well…

cake mix eggs

Anyway, three large eggs were cracked into the mix after that. It’s
noteworthy to say that all these preparations took a long time and we
did not follow the recipe religiously, and spent ample time doing other
stuff while the mix was lying there. I also added about 6 shots of
Dunhill scotch whisky into the mix. I was considering whether to go for
Chivas Regal or this one, and decided on this one, because it tastes
better than Chivas.

drinking makes baking fun

I also took the liberty of adding some whisky into myself at this
point. The recipe calls for 30 seconds of stirring, and I felt that
having a drink in my hand would make the task much more pleasurable. πŸ˜‰
One does get sick of cheap alcohol, so this premium scotch is a very
welcome drink instead and makes the baking process much better. It goes
very well with clonazepam too, but don’t add that into the baking mix,
for Christ’s sake.

cake mix stir

Thus, I stirred the mix for about 30 seconds (or until I was tired of stirring, didn’t know which came first, really).

prepped cake tin

Now, we realized that we need to find an appropriate receptacle for
our cake mix, so we searched for one. The candidates were: a small
circular cake tin, a long bread mould tin and a square cake tin. We
chose the last one and used butter to grease the inside and finely
powdered it with flour as per the cake mix instructions.

cake mix beat

The cake mix, which now contains the original Devil’s food mix,
three large eggs, water, vegetable oil, and scotch whisky was processed
with one of them cake mixers for two minutes or so. The box said two
minutes anyway, we did not time ourselves, we just looked at the very
hypnotic swirls until we shook ourselves and realized that the cake mix
seems to be smooth.

unkiss kisses

I then proceeded to prepare the Hershey’s Kisses by unwrapping it
from the foil and pulling out those damned liners. I like to call this
“unkissing the kisses”.

cake mix pour

The cake mix was poured into the cake tin…

cake mix kisses

and Hershey’s Kisses were dropped into the mix at random spots. I
used up the whole packet, there is bound to be one in every square inch
of the cake.

enter oven

Finally, we realized that we have not pre-heated the oven and did
so. It should be noted that I did not want to do any calculations to
change Fahrenheit to Celsius so I let my girlfriend set the heat
settings to what “should be about right” for a cake. The cake mix is
finally inserted into the oven.

waited
We waited…

and waited
and waited…

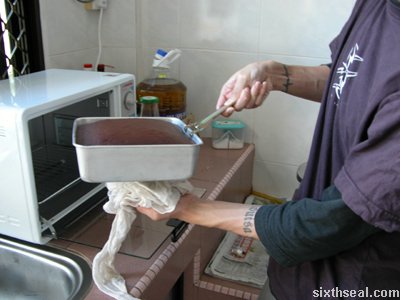
exit cake

and I finally took the cake out of the oven with this nifty cake tin lifter when it looked right.

cake not done

My girlfriend poked a hole in the middle with a toothpick and it came out moist, so back to the oven it was…

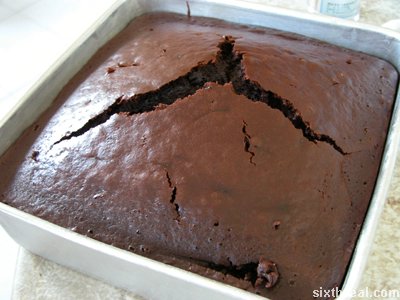
devils food cake

I present to you…the final product! We had waited for about 15
minutes and took the cake back out again. My gf then proceeded to poke several
holes across the cake while laughing hysterically. My
cake…sabotaged… :p Oh, by the way, the crack in the middle is
apparently the result of taking it out before it was fully done and
putting it back in again. The temperature differential shock tends to
make it go that way.

Download:
The Devil’s Kiss [sixthseal.com]
Requires Apple Quicktime. Unzip the file for the video clip.

devils food nitrous

The movie clip shows me eating the cake with some nitrous oxide,
er…I mean, some whipped cream. It should be noted that whipped cream
uses nitrous oxide (N20) as a propellant:

nitrous oxide

However, if you’re expecting to get recreational hits of nitrous off
a whipped cream bottle, you’re going to be very disappointed. It’s only
a small canister, and the dispensing system will produce whipped cream
no matter now tenderly you manipulate the nozzle to produce nitrous
oxide. You’re not going to get anywhere near recreational doses off
this, and it’s not for the lack of trying. I did, and the best I could
do was get a minute amount into my lungs and my exertions expended the
nitrous canister of the whipped cream container…which made it produce
sludge instead of whipped cream. Oops…my bad. I didn’t realize it had
such a small amount of nitrous in the bulb. Stick with nitrous
canisters and crackers and leave the whipped cream container alone. πŸ˜‰

devils food cake slice

Here’s a shot of a slice of The Devil’s Kiss with some…er, cream
sludge. It tasted pretty good actually, but it was a little too rich (I
think it was the oil). I’ll tell you something interesting…it seems
that some of the Hershey’s Kisses were preserved intact in the final
cake! The scotch did not shine through though, probably due to the
overpowering chocolate taste. Nevertheless, it was a great experiment
and it yielded a rather tasty cake. πŸ™‚

I had wanted to name it The Devil’s Kiss with Angel’s Cum on it, but
I didn’t think that would be a very appealing name for a cake so I’ll
settle with The (Drunk) Devil’s Kiss (unofficial name) or Devil’s Food
Cake with Hershey’s Kisses and whipped cream, for a more orthodox name.
πŸ˜‰

Thanks to Renee of shiokadelicious! [shiokadelicious.com] for baking tips.

Related Posts Plugin for WordPress, Blogger...