Mi Sedaap Goreng Ayam Krispi with fried chicken drumsticks and sunny-side up egg

Mi Sedaap Ayam Goreng

I’ve always been a huge fan of Mi Sedaap since it came out. I’m not the only one either – I’ve seen many people at the hypermarket aisles grabbing packets of Mi Sedaap and/or asking their parents to get that particular brand. In fact, all my friends living in Australia wants me to bring over Mi Sedaap whenever I’m visiting down under!
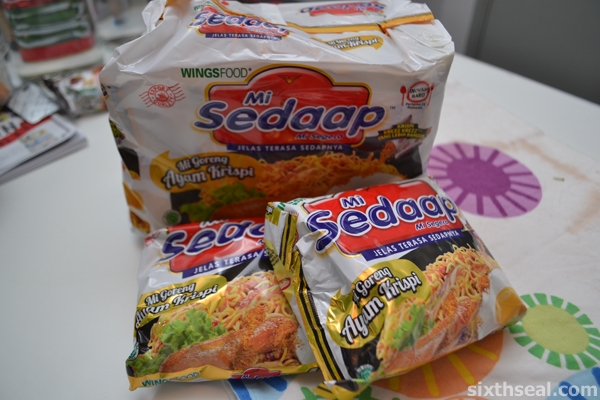
Mi Goreng Ayam Krispi

I think a lot of this is due to the awesome springy noodle texture and the generous 91 gram packs. This is very unusual – in a good way. You’ll notice that no other commercial instant noodle manufacturer has such a large serving – it’s usually 79 grams or less. I can barely manage to eat 3 packets while I can easily eat 3 packets of any other manufacturer.

Mi Sedaap Flavor Sachets

The other important bit is in Mi Sedaap’s flavor sachets – there are five (5) of them in total! There’s the 3 liquid ones – chilli sauce, soy sauce and flavored oil, plus the 2 dry ones – powdered flavor and the dried onions. It’s important to mix everything except the dried onions, that one goes in last, so the crispy element is there.

Now, with the new Mi Sedaap Goreng Ayam Krispi, all these wonderful characteristics are amplified!

Noodle Cake

I just tried the new Mi Sedaap Goreng Ayam Krispi with fried drumstricks and it was awesome! You will need:

  • 1 packet Mi Sedaap Goreng Ayam Krispi
  • 1 chicken leg, portioned
  • 1 chicken egg
  • Flour, baking powder, salt and pepper to taste

I first battered and deep fried the chicken leg and set it aside to rest. You can do this in any type of oil except EVOO (extra virgin olive oil) since the flash point of EVOO is too low for deep frying tasks like these.
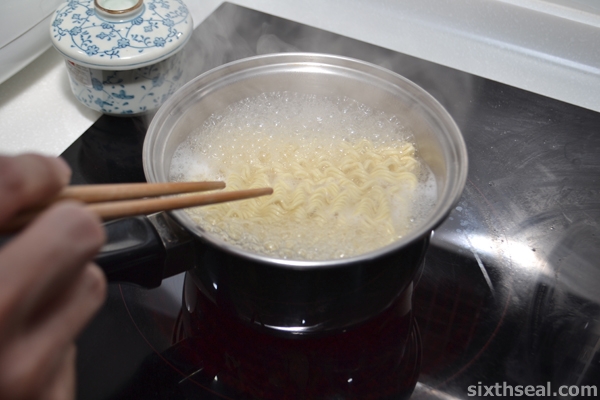
Cooking Noodles

I also fried a sunny-side up egg before I set a pot to boil for the Mi Sedaap Goreng Ayam Krispi.

Springy Noodles

The Mi Sedaap Goreng Ayam Krispi just needed a quick 3 minutes in hot water before it’s tossed in all the flavor and oil sachets (except the special Krispi Krezz Krezz bits).

Sachet Trick

Pro tip: It’s highly important that the Krispi Krezz Krezz sachet is only opened and poured on top of the noodles after it’s tossed so that it doesn’t get soggy. It’s meant to provide a crispy contrast to the springy noodles and it’s delicious!

Tossing Noodles

I love the Krispi Krezz Krezz bits! I feel that all the other “Mi Goreng” type competitors are sorely lacking in both getting the flavor profile right and in the crispiness of the fried onions. You’ll notice that once you go Mi Sedaap, you’ll never go back coz the flavor sachets are amazing! It really makes the noodles taste like real Mi Goreng with its robust and full flavors.

Krezz Krezz Krispi Sachet

I also personally like the springy texture of Mi Sedaap’s noodles. I consume a lot of instant noodles and I can wholeheartedly endorse Mi Sedaap’s noodles as the best! Just follow the timing instructions and you’ll never get soggy or “gritty” (from uncooked flour) noodles anymore.

Krezz Krezz Krispi Bits

The latest Krispi Krezz Krezz Yang Lebih Rangup bits brings this to a whole new level! It tastes like fried chicken has been added to the noodle. I’ve always been disappointed with other manufacturers fried onions – they’re either soggy or flat, there’s completely no crunch to the fried onions, which is a very important component in Mi Goreng. The texture contrast that the crispy Krispi Krezz Krezz bits bring to the table (no pun intended) is amazing.

Eating Mi Sedaap

The new Mi Sedaap Goreng Ayam Krispi is a huge improvement that tastes like all Mi Goreng type noodles should – check it out and see what I mean. Remember to put in the Krispi Krezz Krezz bits in last, a lot of people put it in together with the rest of the ingredients prior to tossing due to laziness or ignorance and that’s wrong – it’s meant to be crispy, so think of it as a topping. 🙂

I heard Mi Sedaap is also giving out tickets for Hot Air Balloon rides now. Check out the Mi Sedaap Malaysia Facebook for more information, tips and recipes!
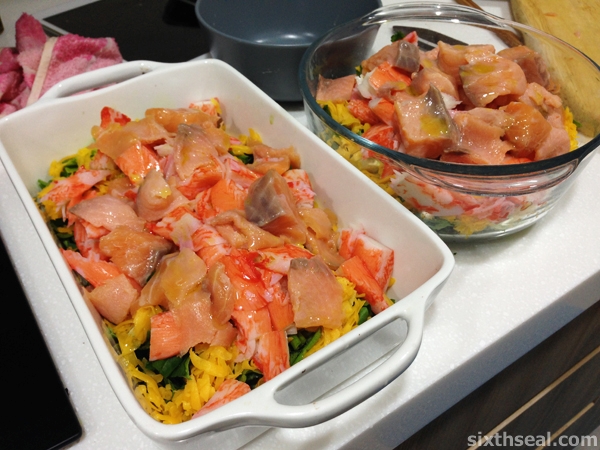
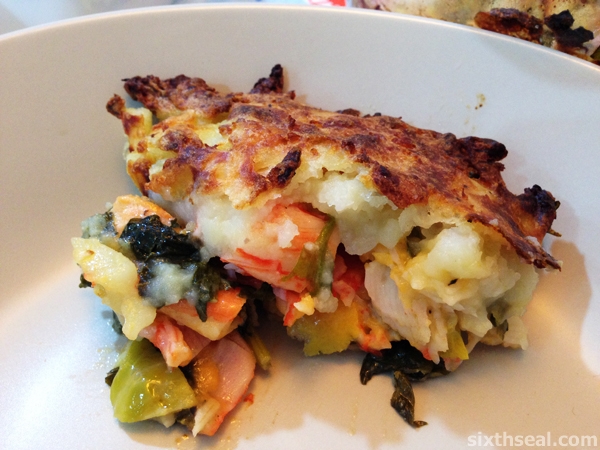
Our traditional fish pie for New Year’s Eve dinner

Fish Pie

I wanted to have a traditional British fish pie for New Year’s Eve dinner so I used ½ fresh salmon and ½ smoked salmon with snow crab meat for a pie. I actually modified Jamie Oliver’s fish pie recipe which used half smoked haddock and half fresh salmon for a “smokier” dish than all fresh fish.

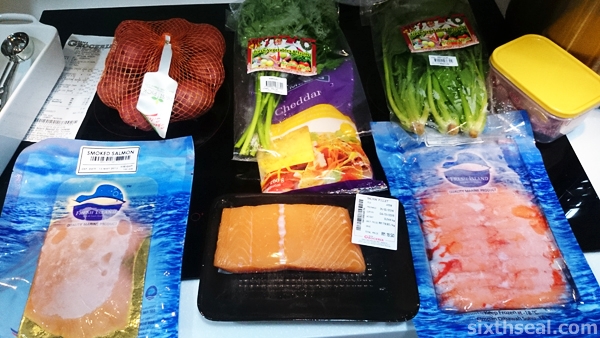
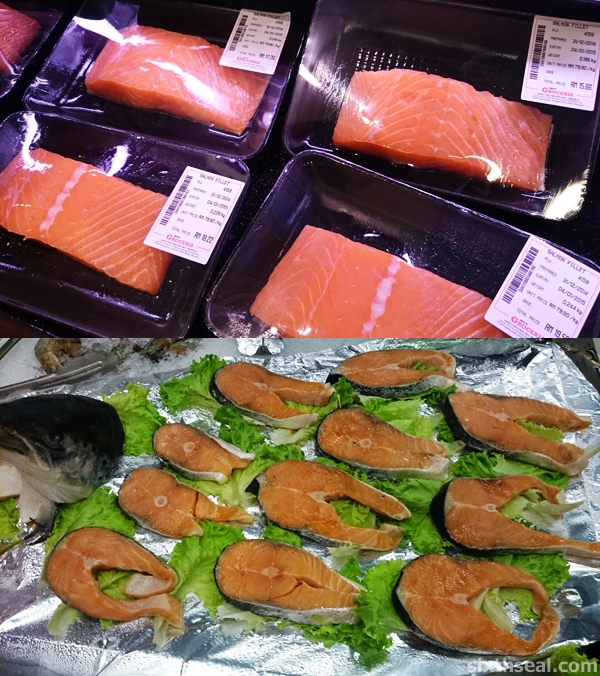
Salmon Fillet Steak

The salmon I got were nice fillets meant for pan-frying that costs RM 79.90 per kg. There was another batch of salmon steaks going for half the price but I didn’t like the look of the sad pieces of fish lying about so I paid premium for the fresher salmon.

You will need:

Fish Pie Recipe

  • 300 grams salmon fillets
  • 150 grams smoked salmon
  • 250 grams snow crab claw legs
  • 4 sprigs fresh flat-leaf parsley
  • 3 bunches of spinach
  • 3-4 Brussels sprouts
  • 800 grams of red potatoes
  • 200 grams freshly grated Cheddar cheese
  • 1 lemon

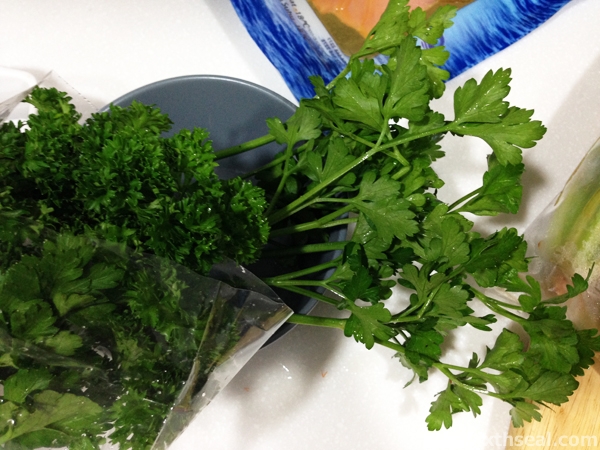
Curly Parsley Flat Leaf Parsley

I bought a packet of parsley and you can see the difference between flat-leaf and curly-leaf parsley. There are equal amounts of each in the pack, I just used the flat-leaf ones, also known as Italian parsley.

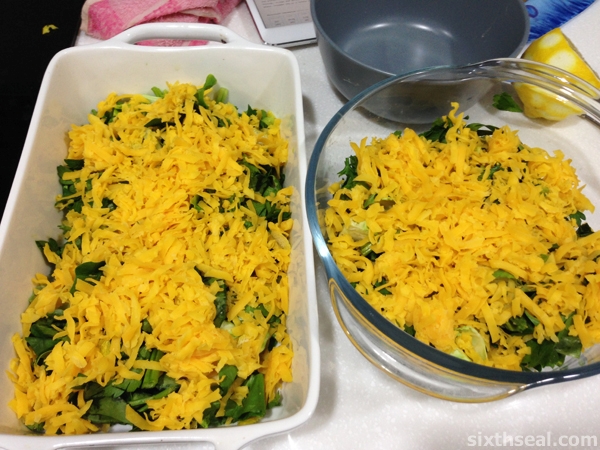
Fish Pie Cheese

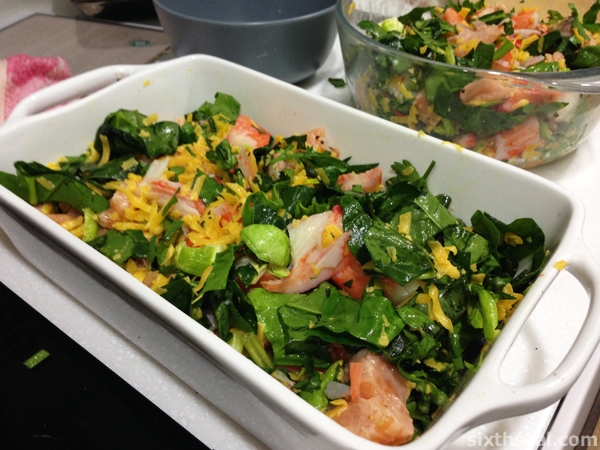
I chopped up all the vegetables into small pieces and lined the bottom of the baking trays with it before adding the grated Cheddar cheese on top. I used two, and that was a mistake, you can’t split a recipe in half like that, will show you why later.

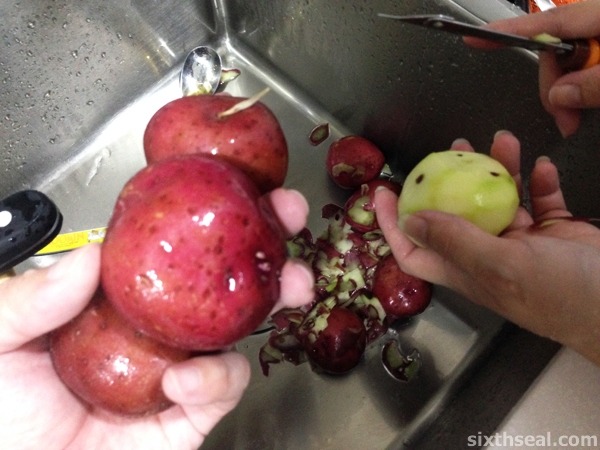
Red Pontiac Potato

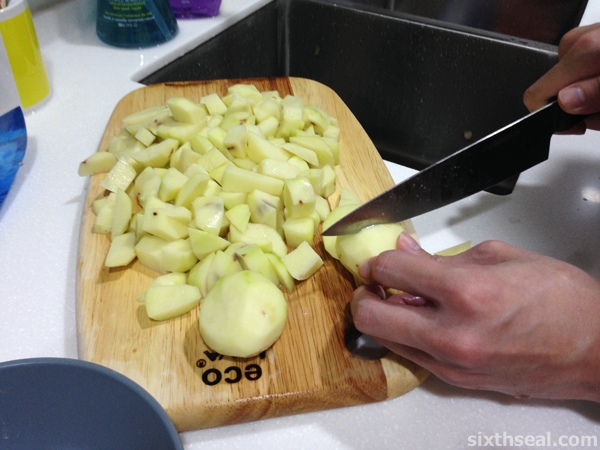
Meanwhile, I peeled the Red Pontiac potatoes for chopping into 2 cm chunks. Red potatoes are perfect for baking but due to it’s starch content, is not so suitable for frying. These aren’t the potatoes for French fries, but it’s good as mash.

Dicing Red Tomatoes

The red potatoes are then dumped into a pot of salted water and boiled for 15 minutes until soft.

Skinning Salmon

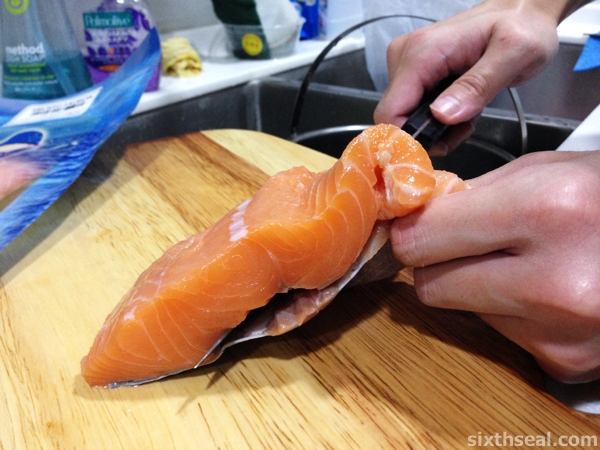
I started on the fresh salmon fillet after that – you need to skin it since the recipe calls for the fish to be skinned so the easiest way is to de-skin it is to run a sharp knife under it.

Cutting Fish

I chopped up the fresh salmon fillet into bite sized pieces and did the same for the smoked salmon and snow crab claw legs…

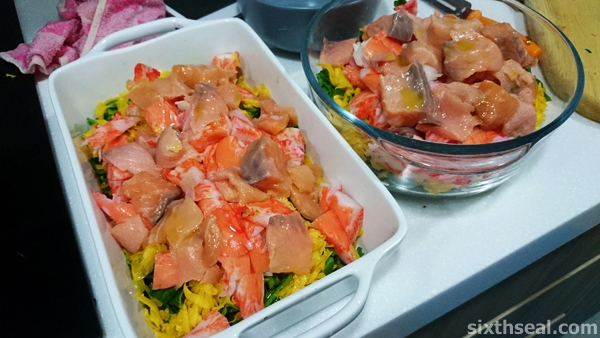
Fish Crab Pie

…before dumping everything into the baking trays.

Mixed Fish Pie

You just need to give it a good dousing of extra virgin olive oil and add some salt and black pepper before mixing *everything* thoroughly.

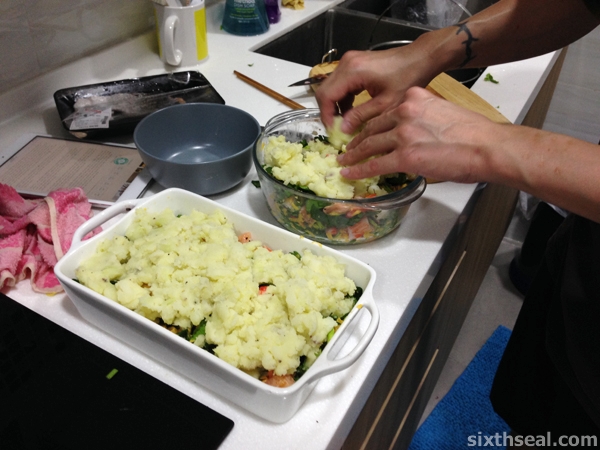
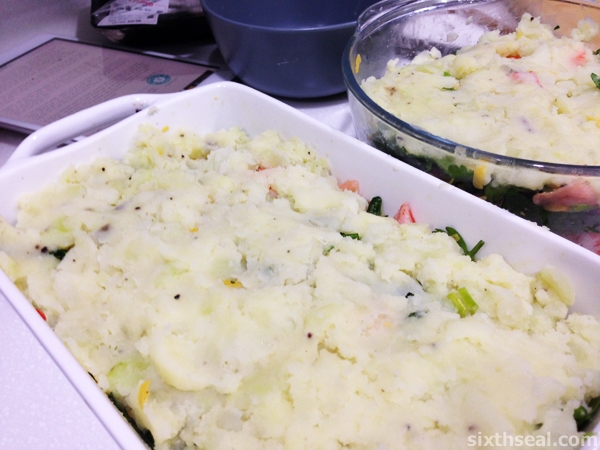
Fish Pie Topping

The red potatoes are mashed and then put on top of the fish pie as a topping. This is where I went wrong coz I used two baking trays and the potatoes were barely enough to cover both!

Potato Topping

I actually needed a deeper baking tray which would provide the same surface area for the potatoes but I really had to stretch the potatoes to cover both trays.

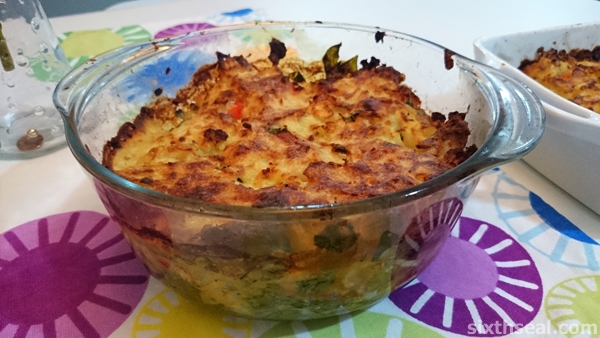
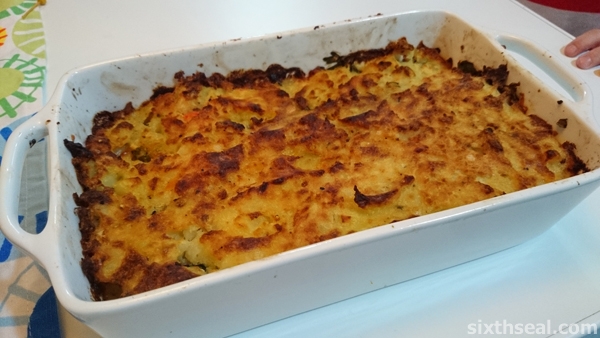
Baked Salmon Pie

I put both of the fish pies into the oven for 40 minutes and they came out perfect!

Fish Pie Baked

The kids both tried it but declared it to be too salty as I had forgotten smoked salmon is already seasoned and added too much salt to the recipe.

Baked Fish Pie

My better half also thought the same, and I had a huge thirst after eating all that due to the sodium.

Fish Pie Cooked

I think I’ll use cod next time instead of salmon, and hold back on the liberal handfuls pinches of salt. smirk

New Year Eve Dinner

Nevertheless, it was a great New Year’s Eve dinner together with the family. 🙂

Roasting our Christmas turkey with corn bread stuffing and demi-glace

Christmas Turkey

I got a beast of a bird this year for the annual Christmas roast turkey dinner!

Huge Frozen Turkey

It’s a huge 6.5 kg (14 pound) young turkey for RM 192.71. This is over twice as big as the turkey we roasted last year. I was actually torn between getting this and a capon (castrated rooster) so I asked the kids what they wanted.

Turkey Breast

It was a resounding vote for turkey coz they liked the turkey that I roasted last year for Christmas. smirk

Turkey Cuts

There’s no shortages for non-halal turkey this year so that’s a good thing for us. I have no idea what makes a turkey halal or non-halal (probably due to the way it’s slaughtered) but this was a different brand called Norbest from the US and there were large signs warning of it’s haram (forbidden) status to Muslims which I always found a little strange since Christmas is a Christian (or at least secular) holiday.

Defrosting Turkey

I’ve actually cooked with this particular brand of turkey before and since I had just 24 hours to get it right, I used the Fast Defrost method by dunking the entire turkey into water and changing the water every 4 hours.

Trussed Turkey

It was what I did last year too but on a more urgent time scale since this was a heavier bird. Haha.

Cornbread Turkey Stuffing

We also got a pack of demi-glace and corn bread stuffing for a more expedient roast (plus, these two taste really good).

Chopping Vegetables

I chopped up a cup of yellow onions and celery

Onion Celery

…and sautéed them in butter,

Turkey Stuffing

…before adding it to the corn bread stuffing and gravy.

Giblets Bag

Next it was time to clean the bird, take out the bag of giblets (this is arguably where the old school gamer term gibs originated from for those of us who played shooters like Doom, Quake and Unreal back in the days) and pat it dry.

Stuffing Turkey

I stuffed the cavity of the turkey with my newly made corn bread stuffing mix and (with some difficulty) got it into the preheated oven at 200 Celsius.

Turkey Stuffed

I covered the turkey with aluminium foil and took it off after 3 ½ hours to brown the top and here’s what my turkey looks like after 4 hours!

Turkey Oven

This turkey has a built-in meat thermometer that pops out when it’s done, although we used our own to check too:

Turkey Pop Out Device

I started the demi-glace while the turkey was resting and it was lovely – this is restaurant quality demi-glace, RM 14.95 for ½ cup but it’s awesome! It has reduced white wine inside and you can add your own wine in lieu of water for a tastier demi-glace (make sure to cook off the raw alcohol).

Demi Glace

My better half and the kids loved it!

Carving Turkey

The young but large turkey was carved up according to everyone’s preference – the smallest one wanted a drum while I had an entire leg, the biggest one wanted the huge wing and my better half got a slice of prime breast meat.

Little Kid Eating Huge Turkey

Christmas dinner is always my responsibility and I’m glad we had so much fun with our celebrations – it took me quite a bit of planning and shopping to get enough activities to keep the kids entertained. There’s Christmas crackers, eggnog, presents, and more – Christmas is definitely not over yet!

Merry Christmas everyone! 🙂

Cooking a 3-Course Meal with S&P Santan!

soup ceera

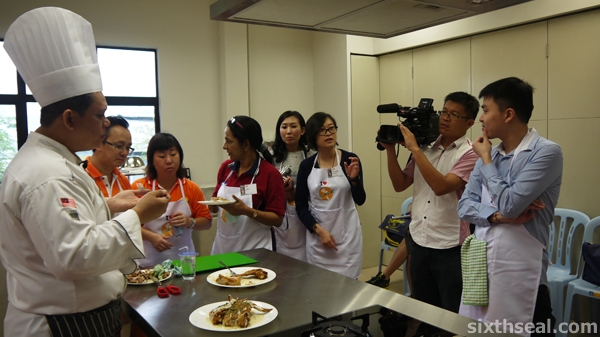
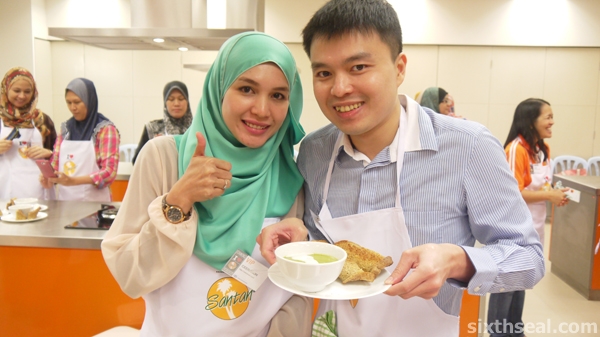
I was fortunate enough to be cooking a complete meal of three courses organized by S&P Santan in Sungai Buloh. The I <3 S&P Santan Cooking Workshop is helmed by Chef Andri Hadi – a very interesting character indeed!

chef andri hadi

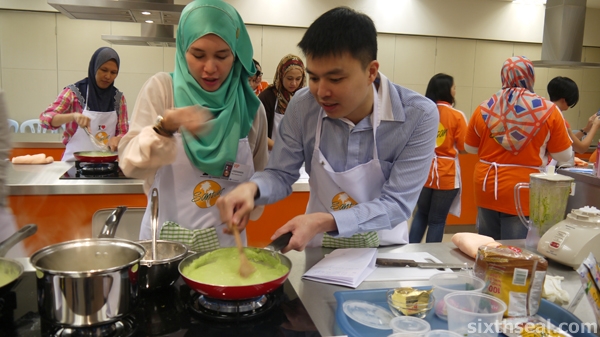
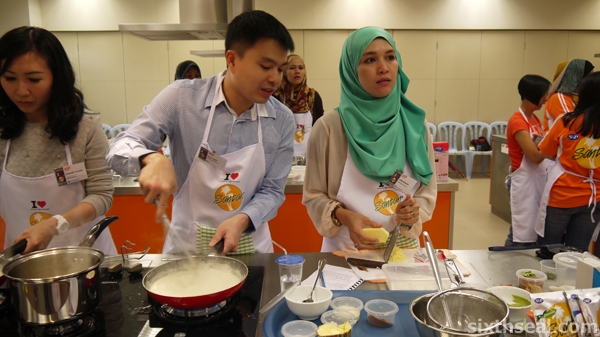
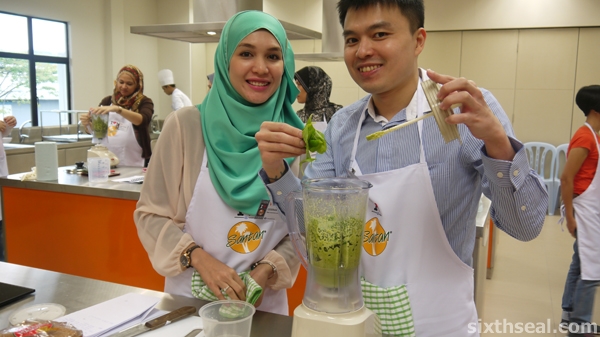
I was teamed up with Ceera Noh and I have to admit I couldn’t ask for a better partner. She has solid, practical skills as a mom and seasoned a lot of our dishes to perfection.

team

I was more focused on plating and I tried very hard not to let her down by doing it professionally.

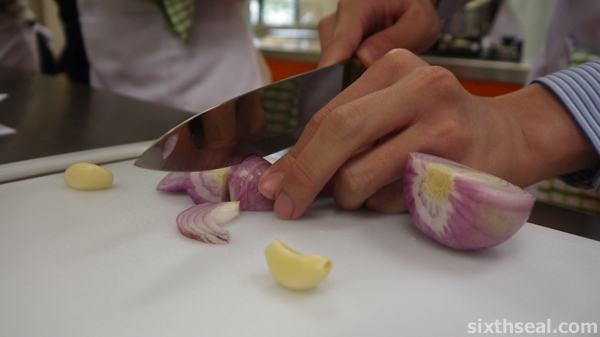
cutting onions

I dare say that our presentation was best – it wasn’t clownish and kid-like on one side of the spectrum it wasn’t sloppy on the other (did three plates for our main course before I was satisfied).

team awesome

The I <3 S&P Santan Cooking Workshop is actually a contest between all the participants. There were 5-6 teams of two in total. I humbly named us “Team Awesome”. smirk

Appetizer: Spinach Broccoli Coconut Soup

appetizer

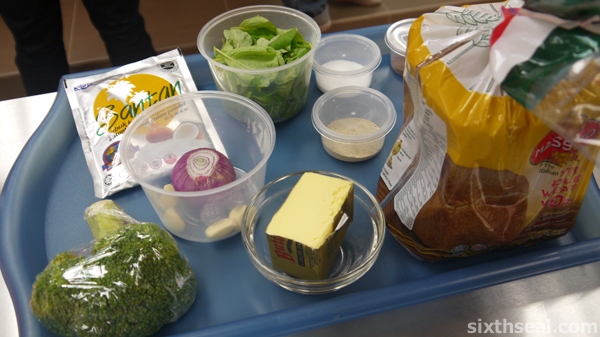
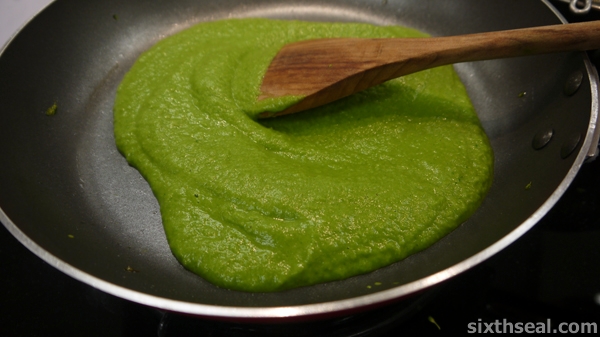
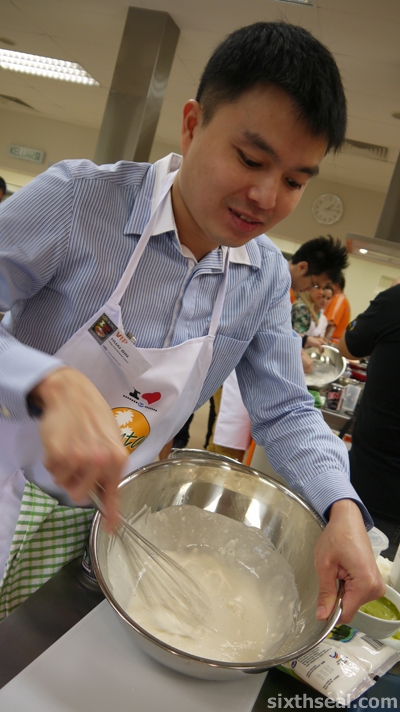
The first dish that we cooked. I sliced up the broccoli florets and garlic while Ceera did the vegetable soup stock. We didn’t cook the fresh baby spinach but blended it into the soup later, as the chef did.

ceera hb

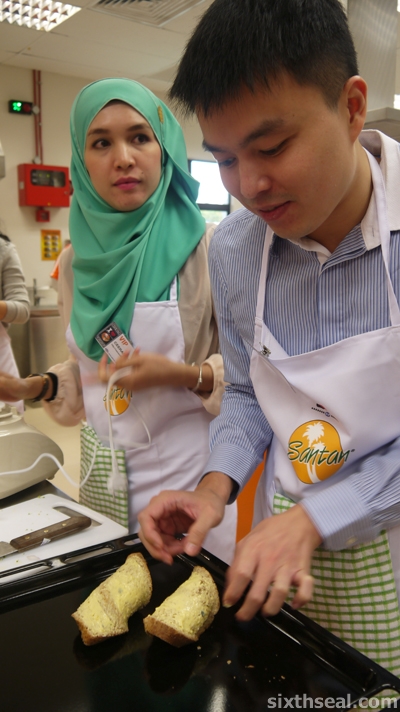
I also went up to do the Massimo Wheat Germ garlic bread.

butter garlic bread

It’s really easy, just butter one side with butter and twist it, sealing it in with another dab of butter.

spinach broccoli

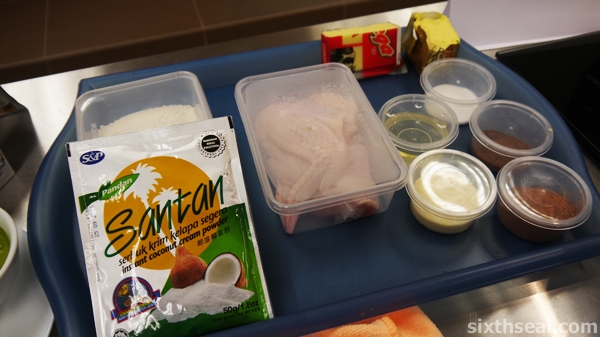
I love the ease of the S&P Santan Instant Coconut Cream Powder. It comes in 50 gram packs of Original, Omega 3 and Pandan and we used the first for this. You can dilute it with 1 cup of water for heavy coconut cream or 2 cups of thin coconut cream but for this recipe, we just poured it into the saucepan and seasoned it with salt, pepper and nutmeg. I really liked how versatile and convenient the product was.

cooking with ceera

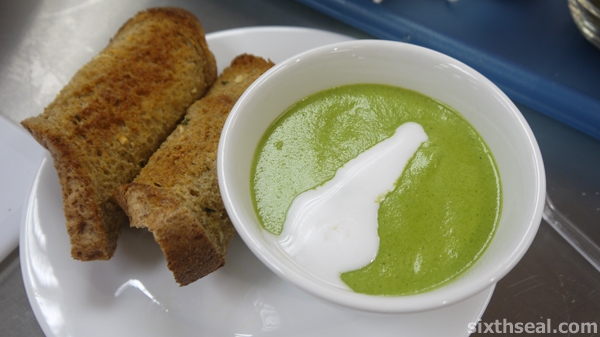
We worked pretty well as a team and since I proofed myself somewhat adept (at least I didn’t burn down the kitchen) – I plated up. Our spinach broccoli coconut soup is a real French style soup – thick and hearty.

layering soup

I floated a tablespoon of S&P Santan Coconut Milk on top for contrast and flavor.

spinach broccoli soup

It received pretty good reviews from the chef and heartened, we moved on to the next dish.

Entrée: Baked Cajun Chicken Wings

entree

This is something that both of us knew how to do and the chef did a demonstration while asking us to work at the same speed – no problems there.

fritter batter

We shared an oven with another group of two girls and thus we put in our chicken together. There is a great irony somewhere here.

cajun chicken

I carefully arranged my chicken wings so that the tips were facing *outside* on the baking tray. This is done so that the heat of the convection oven won’t burn the meat.

perfect wings

Unfortunately, we didn’t know that the oven hasn’t been pre-heated and when the chef came over to everyone’s station to look at their chicken, ours was the very best in the entire class. It’s browned to perfection!

cooking ceera

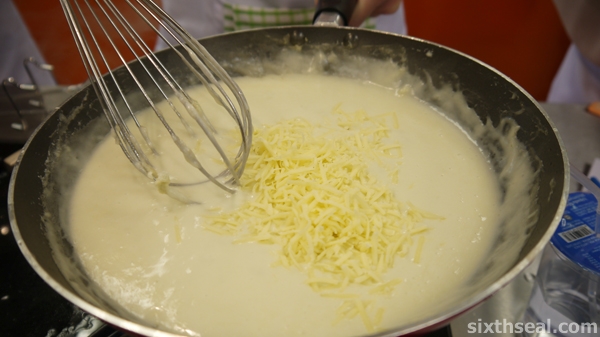
We made the Coconut Pandan Cheese Sauce with Blue Key Superfine Flour, S&P Pandan Santan Coconut Cream Powder and 2 tbsp grated cheddar cheese. Both Ceera and I tasted the sauce and it was good – I made sure that sufficient time has passed so that any raw flour has been “cooked out”.

coconut milk cheese

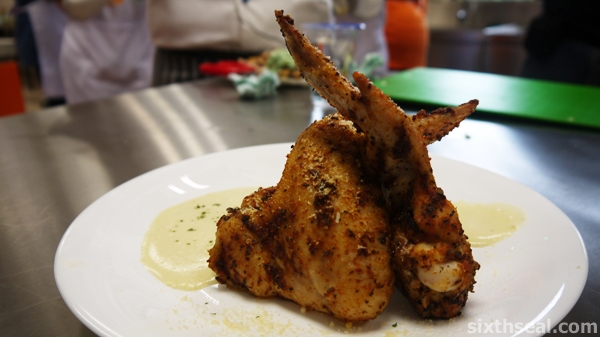
I plated the chicken in a smear of the coconut pandan cheese sauce and stood two chicken wings up, supported by each other.

same oven

…and when it came judging time, it turns out that our chicken was raw. -_-

chef andri

It needed 3 more minutes in the oven due to the lack of pre-heating (we both thought the other team had done it).

judging

Oh well.

cajun chicken wings

Here’s our dish!

Dessert: Cavendish Coconut Fritters

dessert

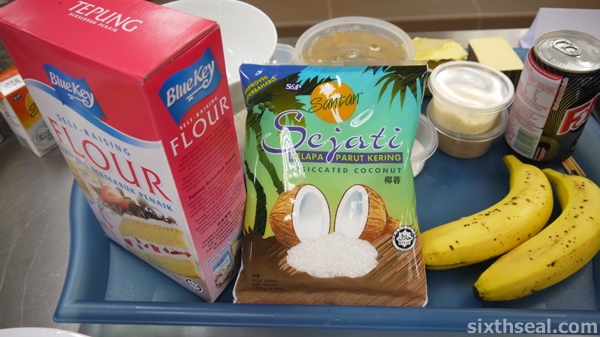
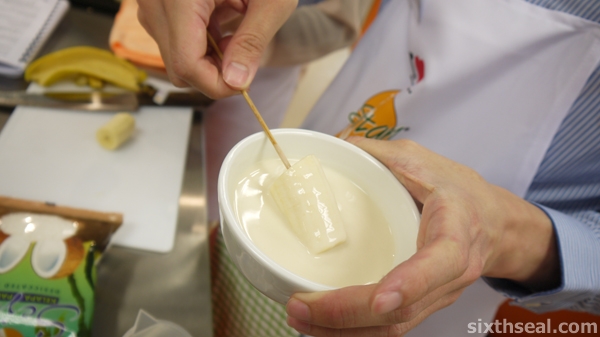
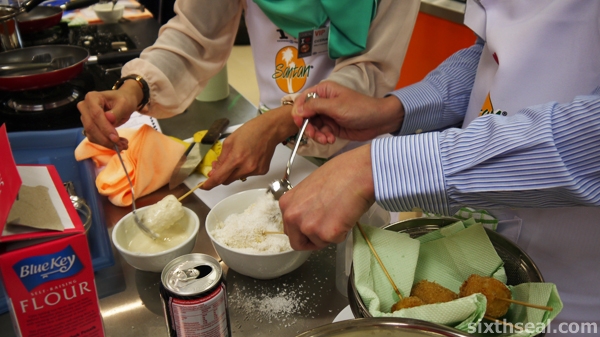
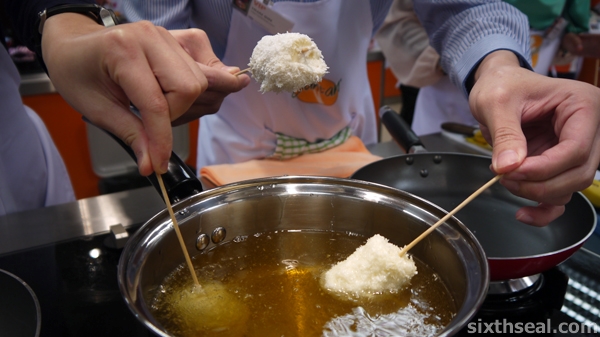
I learned a very nifty trick during the I Love S&P Santan Cooking Workshop. Banana fritters tastes a lot better if you dip it alternately into batter and desiccated coconut. We used 1 cup of S&P Santan Sejati Desiccated Coconut and 1 cup Blue Key Superfine Flour for the dry coating. The desiccated coconut really comes in handy as it has a longer shelf life and comes in a convenient pack.

bananas

We actually learned from the previous mistake and made sure to make two batches. I sliced up one banana for the first test batch while Ceera did the second batch.

coating fritters

Our Cavendish Coconut Fritters were deep fried for 2 minutes in boiling hot oil before we plated up in front of the judge.

deep fryers

I did the plating and I had planned to do a quenelle of vanilla ice cream to show off my skills.

banana fritters

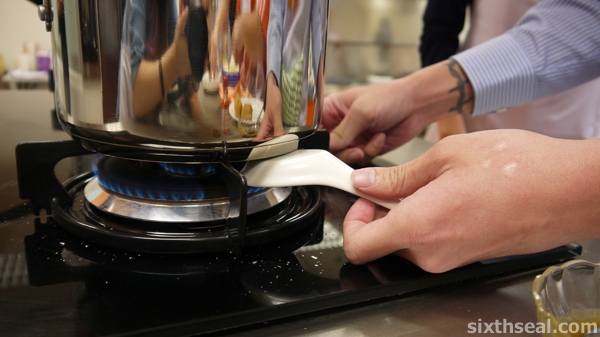
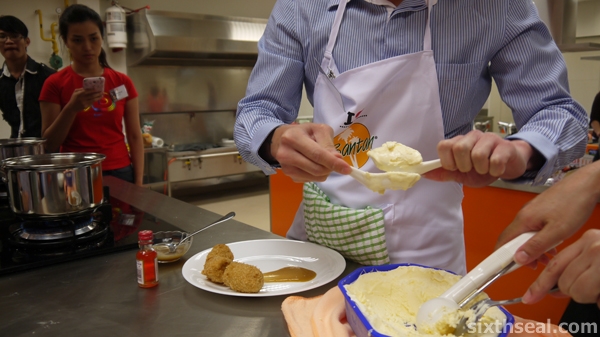
Unfortunately, the ice cream was way too solid and despite heating two ceramic Chinese soup spoons on the burner, I could barely make a passable quenelle. I’m glad I did it though, no one else did and I saw from the blank looks that not many knew what a quenelle is either (except for the chef, of course).

hot spoon

I also finished with a flair with some toasted desiccated coconut and a smear of caramel and passed it to the judge. We were the first team to finish.

quenelle

Although we didn’t win anything (the winner was a female duo from Weibo) it was fun to cook with someone with a Malay heritage and a practical background as opposed to my more recent and modern interpretation of cuisine. Ceera was the one who seasoned and tasted everything and I felt bad that we didn’t win.

cavendish fritters

Nevertheless, it was a fun morning and afternoon learning about the various uses of S&P Santan products. Coconut oil and milk is a source of healthy HDL cholesterol and has numerous health benefits. This is something that Australians and people from the United States are finding out and they’re using more coconut milk in their cooking. The S&P Santan products are easy to use and cater for health conscious consumers as they do not contain artificial preservatives and flavorings.

fritters

It’s a very trendy ingredient and I have a whole range of S&P Santan products at home now. I’ll share more when I cook soon!

keep calm

Do you have your own recipes using S&P Santan coconut milk? Share your recipes at the S&P Industries Facebook page and win more than RM 1,900 worth of prizes!
spinach soup

Thanks to S&P Santan and Chef Andri Hadi for a great time! A big thank you to FFM Marketing for providing the superb venue – I loved the clean and well-equipped kitchen islands. It’s open for rental too – contact marketing@ffmb.com.my or 03-61457888 for enquiries.

spinach leaves

Props to Denise and Michele for their tireless photography and cheers to my team-mate Ceera Noh for being awesome! 🙂

Flap Hops: Emu and kangaroo jerky buttermilk pancakes with homemade dark chocolate sauce and wildberry jelly

flap hops kangaroo emu pancakes

I have had this idea knocking (hopping?) in my head for a while. I’ll stop with the bad puns and say that this is a take on flap jacks – instead of the usual pancakes, it’s made using emu and kangaroo meat, thus it’s a flap hop. Geddit? smirk

buttermilk pancakes mix

I bought this gluten-free buttermilk pancake mix during my last trip to Sydney and haven’t used it. I could have made our own pancakes from scratch but since it was a Sunday morning, I thought I’ll just shake this bottle instead. Plus, I wanted to see how gluten-free pancakes made from rice/tapioca flour and potato starch stacks up with the real deal.

buttermilk pancakes kangaroo

You will need:

  • Buttermilk pancake mix
  • Emu jerky
  • Kangaroo jerky
  • Dark chocolate buttons for baking
  • Butter
  • Wildberry jam

buttermilk pancakes emu

I got the wildberry jam (or jelly, as Mel would call it) from an import grocery shop here a while ago – it’s a mixture of strawberries, blueberries and blackberries made by Hank’s Jam (also of Australian origin) and thought it’ll go well as an acidic counter-balance to the dark chocolate sauce.

emu kangaroo jerky

I did a few test batches of the buttermilk pancakes before finally settling on a size I wanted. Just before one side is done I inserted pieces of the emu and kangaroo jerky into the still-bubbling pancake mix.

melting chocolate

My better half also set up a bain-marie for melting the chocolate buttons. Keep in mind that when melting chocolate, the boiling water should never touch the bottom of the receptacle you put the chocolate buttons in. These are high quality dark chocolate buttons meant for baking – you can find them in any bakery provisions store. I also put in a dab of butter.

kangaroo emu jerky

After my buttermilk pancakes have set with the emu and kangaroo jerky inside, I flipped them over to brown the other side and added a smear of dark chocolate sauce on it.

chocolate smear

My dear also cut up some kiwifruits, which I added into the “crater” where I started the chocolate smear from.

emu kangaroo pancake

It was a very delicious breakfast that we made yesterday morning – I would have liked some sunny-side up eggs with it too but the kangaroo and emu jerky added that savory taste and the sweetness of the dark chocolate is balanced by the wildberry jam. 🙂

I baked my own Poppy Seed Bread with organic Macadamia Butter from scratch!

poppy seed bread

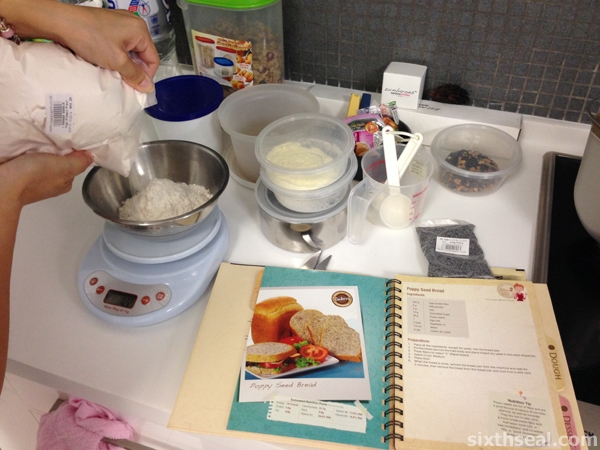
Yup, I went out and did a little shopping at the local baking supplies shop yesterday to make my own Poppy Seed Bread! This recipe requires:

baking supplies

  • High protein flour (250 g)
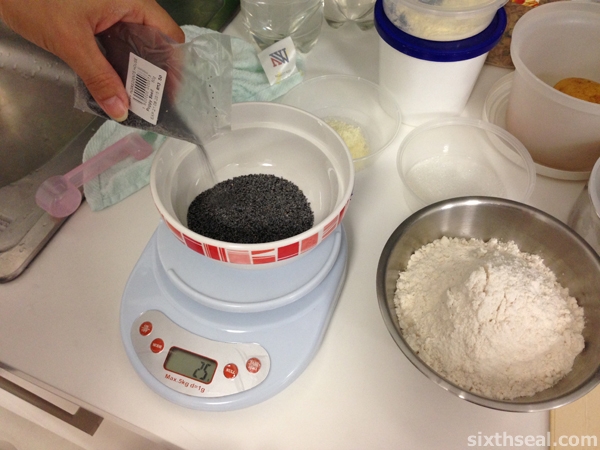
  • Poppy seeds (28 g)
  • Milk powder (6 g)
  • Salt (4 g)
  • Granulated sugar (12 g)
  • Egg yolk (1 yolk)
  • Vegetable oil (2 tbsp)
  • Water (170 ml)
  • Instant dry yeast (¾ tsp)

even bread

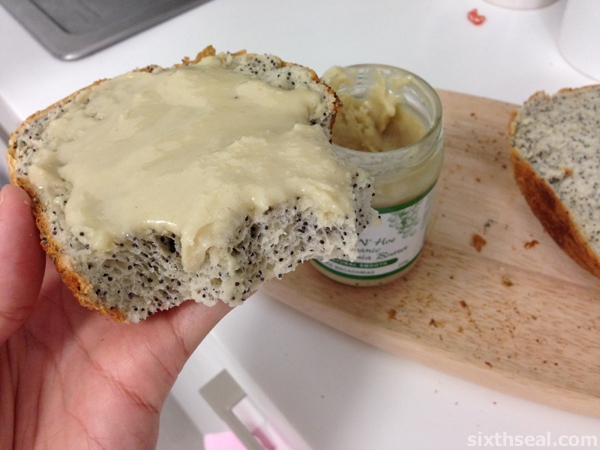
I had this freshly baked and still warm – the thick slices were slathered with organic macadamia butter (it’s just 100% crushed macadamia nuts) and it was so delicious!

taking loaf

(and it just took me 2 hours to bake)

baking water

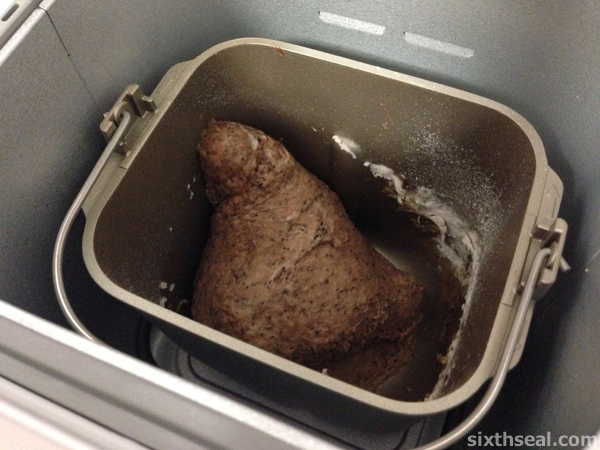
I did not need to knead or proof the dough coz I had a Panasonic Bread Maker. Haha! I just:

1. Dumped all the ingredients into the loaf shaped bread maker

yeast dispenser

2. Measured out the yeast and poured it into the automatic yeast dispenser

menu

3. Selected “Rapid Bread” and “Medium” crust

perfect bread

4. Sliced the bread

poppy seeds

It was sooo easy that we wanted to make a second batch immediately. However, one minor issue with the bread maker is that it’ll come out with a U50 error code if you try to do that without waiting 1 hour (officially) for it to cool down. However, I managed to achieve that in 20 minutes by putting it under a fan in a 16 degree Celsius room (my living room is air-conditioned).

egg yolk

I have always heard that baking was a very exact science and you cannot mess around with it. Ingredients are supposed to be measured out to the exact gram or milliliter – no more, no less. However, I wanted to make another Nutella loaf since I thought the kids will enjoy eating that. I also forgot to put in the salt (!!!) the second time around.

nutella

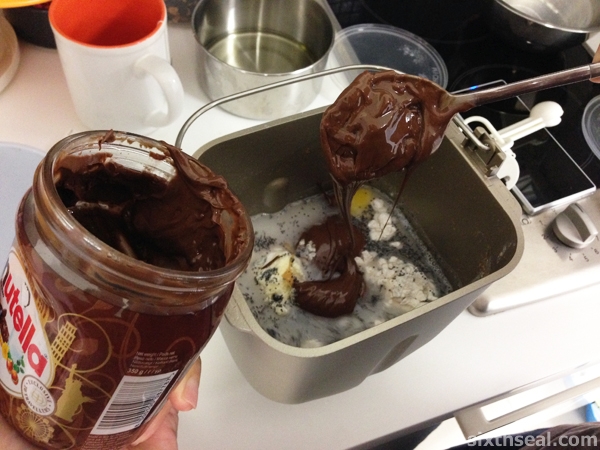
My better half told me that the bread will not rise, but the Panasonic Bread Maker prevailed! Even though yeast requires salt and sugar to proof, I used honey in lieu of the sugar in the second loaf and poured in 2 heaped tablespoons of Nutella. It really made the bread fragrant and taste of hazelnut.

knead nutella

Even better, the bread came out fine despite me forgetting the salt (and no, Nutella does not contain sodium) and I didn’t put any vegetable oil in (we used canola for the first batch) since I reckon it’ll have enough hazelnut oil to and I was right!

bake

The poppy seeds are spread so evenly throughout the bread too! It’s unlike other bread makers which can have uneven ingredient distribution. I really like the ambient temperature sensors of the Panasonic Bread Maker for optimal proofing too!

nutella bread

There’s nothing quite like eating freshly baked bread without any preservatives or artificial additives coz you control what you put in. It tasted absolutely fabulous!

It’s just so convenient to have my own Panasonic Bread Maker at home and we look forward to a lot of baking in the future. I love bread! I love eating it, I love baking it, and I love looking at it. You might call that a tad obsessive but I’ve even come up with lots of weird recipes for sandwiches. smirk

Molecular Gastronomy Experiments: Silkie Black Chicken “Soup” Jelly

black chicken jelly

Black chicken soup gellification. Yeah, this is a solid jelly black chicken “soup” I made for my dear! There’s nothing that sounds more appealing than suspending the beautiful black meat of the Silkie chicken in a jelly with wolfberries, dried scallops and other ingredients usually used in cooking this Chinese soup.

hb ling sick

I came across this idea when my better half had a sore throat and didn’t want to eat any solid food. It’s known as a curative food in traditional Chinese medicine.

silkie chicken

I’ll make her Silkie black chicken soup, with a twist! It’ll be *entirely suspended in clear agar* so you can see the distinctive black meat and black bones of the Silkie chicken!

silkie chicken jelly

You will need:

  • 1 whole black chicken
  • Goji berries
  • Dried scallops
  • Chinese dates
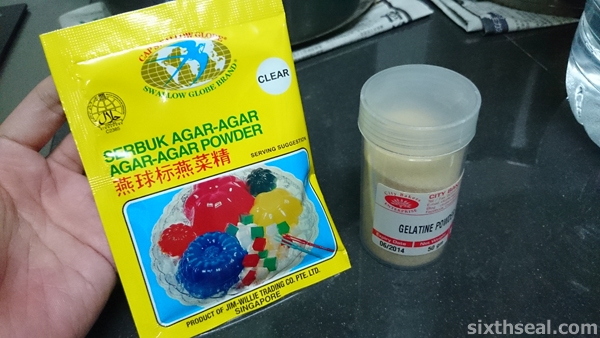
  • Agar or gelatin

silkie chicken flesh

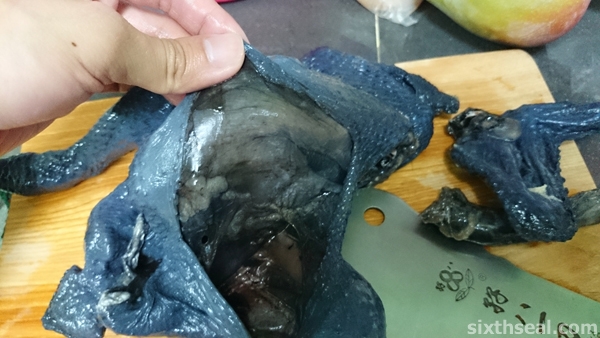
I bought one of the small Silkie chickens you can find in wet markets here. This is the famous black chicken (which is entirely black – bones, flesh, organs) that’s commonly sold here for soup although it can be cooked like a regular chicken. I know of other black chicken breeds out there – a USD 2,500 per chicken Ayam Cemani made the headlines last year, but the ones we get are Silkies (which has contrasting white feathers when alive).

silkie black chicken

You need to portion the chicken by cutting it up as you normally would – there’s eight edible portions (2 x drums, thighs, wings, breasts) plus the carcass. I wrote a guide on how to French cut a chicken last time for a poached chicken with beetroot and nectarine dish I made but you can cut this anyway you want since it’s going into a soup.

black bones

Do make a nice cut for the parts you want visible in the jelly though – I used a drum in one and a wing (minus drumette) with a chicken leg in another.

chicken toenails

Silkie black chickens are always sold whole here, and undressed, so remember to take the pieces of cartilage (?) off the feet. I don’t know what they are called, so I call them chicken toenails. smirk

silkie chicken soup jelly

I put a 1 litre pot of water to the boil and added in all the goji berries, Chinese dates, dried scallops etc. You can also add ginger if you like.

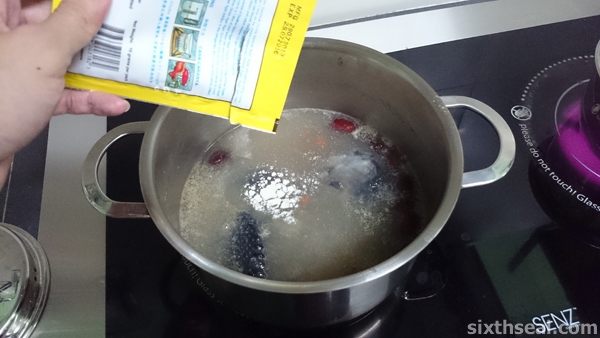
silkie chicken soup

Once the water is boiling, I added in the pieces of chicken and set the timer for 30 minutes. That’s all you need for the black chicken soup – it’s ready to drink (and I did take some out so she can have the soup first).

agar gelatin

Next up, comes the fun modernist cooking bit – gellification! I used agar instead of gelatin since I wanted it to set only when it has totally cooled. I used clear agar but you can try out other colors like blue or green to play tricks with your mind while eating – it’s flavorless anyway, but I reckon clear would showcase the beautiful black chicken and bright red goji berries well.

agar

I poured the agar into the black chicken soup and carefully stirred it before portioning it out. It’s important to remember that the dates, scallops, and goji berries will set so you can actually move it around since the viscosity of the liquid has changed slightly.

black chicken soup

I arranged it so that it’ll come out in one square and one round mould.

setting chicken soup agar

…and my dear accidentally drank one of the agar-infused bowls while it was cooling coz I asked her to finish the soup. Haha! Oops! 😉

black chicken agar

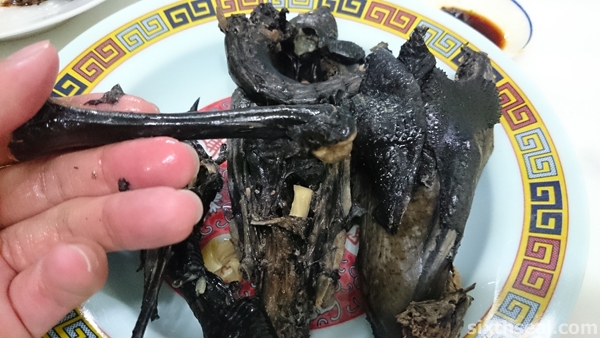
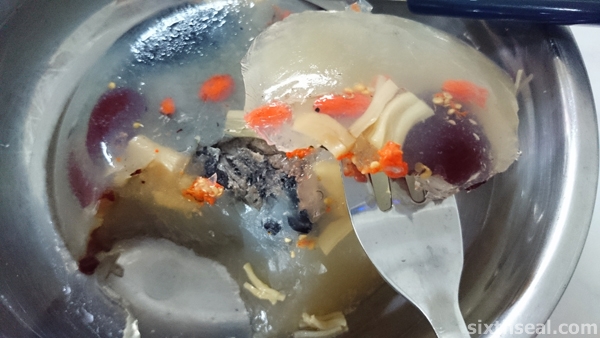
No worries, I still had one and here’s how it turned out after putting it in the fridge for 2 hours to set the agar. It can be helpful if you have sore throat since a cold jelly is probably easier to eat than anything else.

jelly black chicken

I thought it was nice but I could have improved on the dish since my dear had cooked porridge so ideally my next version would look like this:

black chicken jelly draft

Yes, I drew it on a napkin.

jelly chicken soup

It’s fun to incorporate easy molecular gastronomy and modernist cooking ideas to even the most traditional dishes to spice it up! 😀

Gordon Ramsay’s duck breast with Madeira jus, tomatillo apple cranberry chutney and parsnip purée

gordon ramsay duck breast

This is possibly the best tasting dish I’ve created to date! I found a recipe for Gordon Ramsay’s duck breast and tried to replicate the main components down to the dot (including the parsnip puree) while modifying some aspects (used tomatillo to add some balance to the sweet chutney).

duck breasts spiced

The duck breast is a beautiful piece of meat. I really like cooking with it, and I think this is the best way to savor the cut. I’m not a huge fan of traditional Chinese BBQ duck and never knew duck breast could taste this awesome until I did this. I was so engrossed in cooking that I didn’t notice I got rendered duck fat (yum!) on the camera lens so some of the later photos are a bit smudgy. The recipe is modified from Red Online.

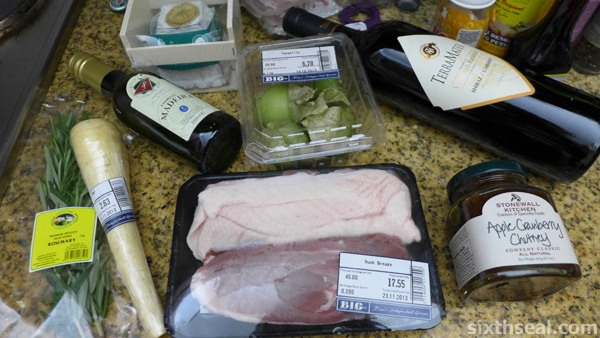
gordon ramsay duck ingredients

You will need:

  • 2 duck breasts
  • Fresh tomatillos
  • Cranberry chutney
  • Parsnips
  • Heavy cream
  • Fresh milk
  • Goat cheese
  • Rosemary
  • Madeira wine

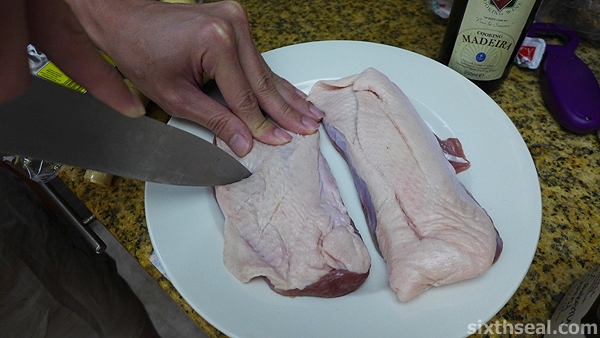
scoring duck breasts

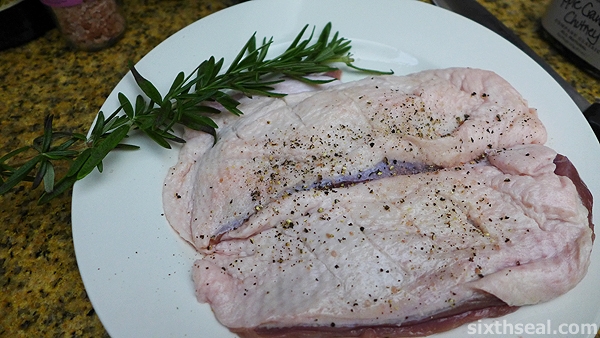
The duck breast needs to be scored for better cooking and I did three (3) quick and light incisions into the skin – barely hitting the meat below.

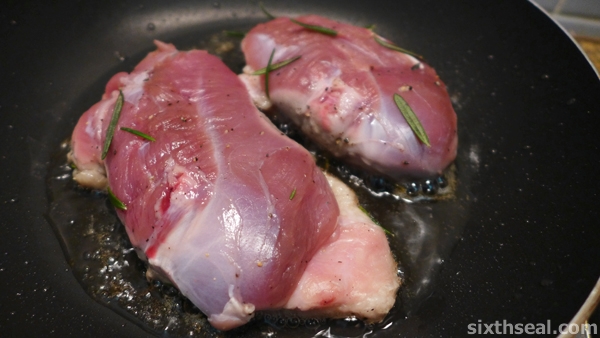
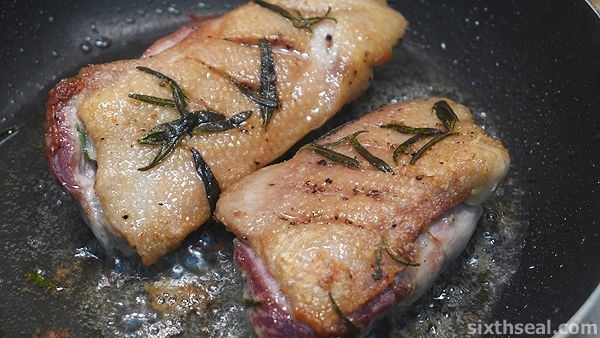
I did not use *any* butter or olive oil. I just slapped the duck breast skin side down on the pan and kept the heat consistent. You’ll be amazed by how much oil the skin produces!

rendering duck fat

The tasty skin from the duck breast renders into delicious duck fat. You can get an insane amount of the stuff – probably 6-7 tablespoons of duck fat from 2 medium breasts alone! There’s nothing quite like duck fat rendering – it smells positively mouth-watering.

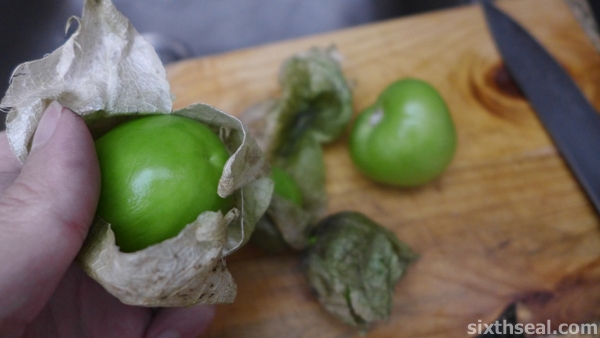
tomatillos

I actually bought the tomatillos to make salsa verde but I thought it’ll be perfect to put an acidic twist, which was supposed to be from the zest and juice of an orange. The original recipe by Gordon Ramsay also calls for port and cranberry jelly which I substituted with Madeira wine and Cranberry Apple Chutney.

BTW, if you think that the tomatillos looks a lot like cape gooseberry (sold as physalis here) that’s coz they come from the same family!

ramsay duck recipe

The duck breasts are really easy to cook – after about 10 minutes on low heat with the skin side down, the fat has mostly rendered – flip them over and lightly brown the other side for a couple of minutes and leave it to rest.

madeira wine deglaze

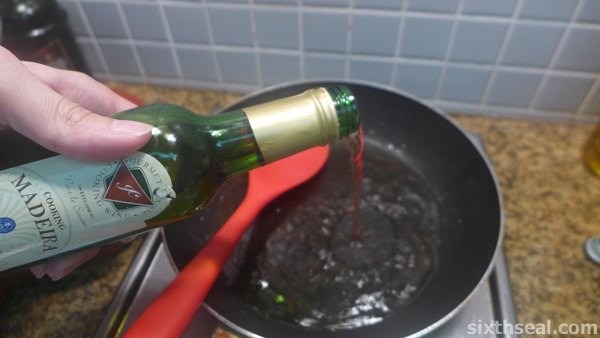
The Madeira wine is used to deglaze the pan. It’s a cooking term that means “scrape the crap from your pan with a liquid while keeping the heat on and keep the liquid + crap”. smirk

parsnip puree

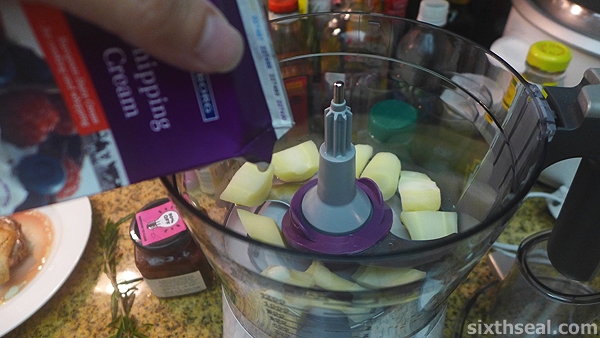
Meanwhile, I had cut my parsnips into small chunks, steamed them and peeled it to be ready for the food processor – in reverse order. Add some heavy cream and put it on high for a couple of seconds. I also added some fresh milk and then puréed the parsnips some more. You can make the parsnip puree creamier by sieving it though some fine mesh before serving.

apple cranberry chutney

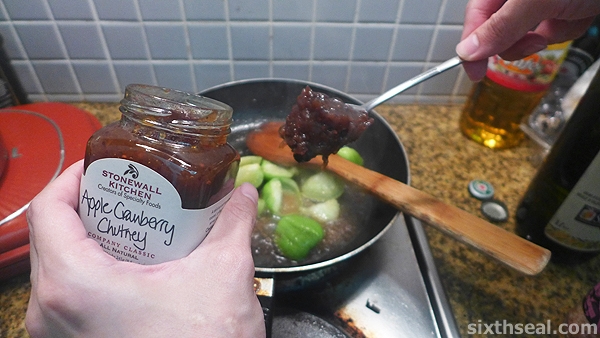
Back to the sauce, I added chopped tomatillos, cranberry and apple chutney and Madeira wine to deglaze the pan. I let this bubble for about 10 minutes to extract the flavor from the tomatillos, tasted it and pronounced it good!

butter chutney

However, I thought it would be *better* with some butter so I put in a generous slice of butter and the Madeira jus was ready to be poured on top of the rested duck!

gordon ramsay duck

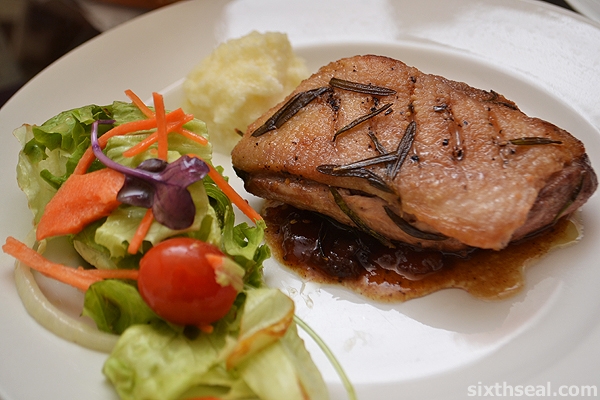
I sliced one duck breast for my dear and kept mine whole. I wanted my duck breast to be served on top of the Madeira jus with cranberry apple chutney and tomatillos so I plated my dish with the duck sitting on top of the sauce.

pan fried duck

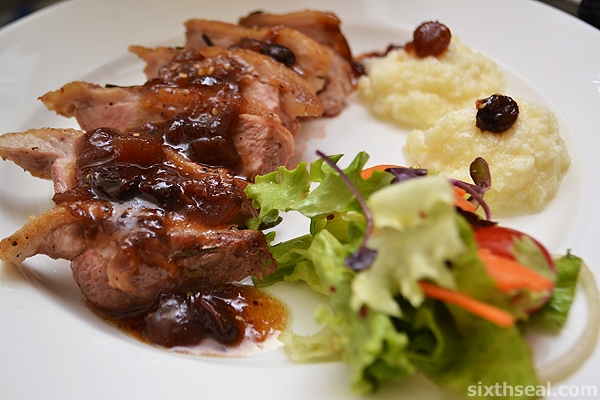
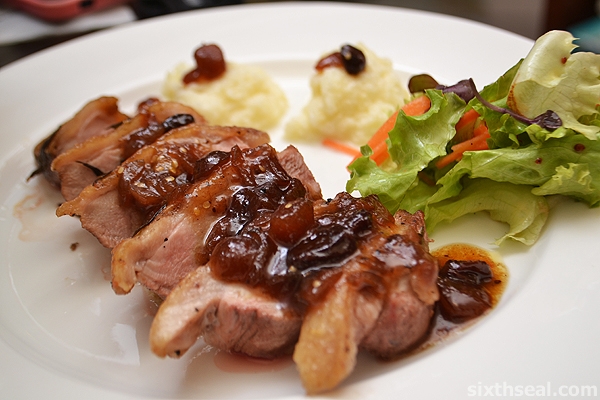
My dear wanted hers sliced so that’s what I did and spooned the sauce over the duck. I also added some salad and edible flowers in addition to the parsnip purée on the side. I’m told that this is my best dish to date and I quite like it as well!

duck breast sliced

The duck breast tastes deliciously rich and the sweet-acidic Madeira jus complements it perfectly. The parsnip purée is ingenious too since the dish would be way to heavy with potatoes. I’m really keen to cook this again, it’s surprisingly easy and the rendered duck fat can be kept and used for other things (they actually sell duck fat in some gourmet groceries).

How to Make Stuffed Artichokes

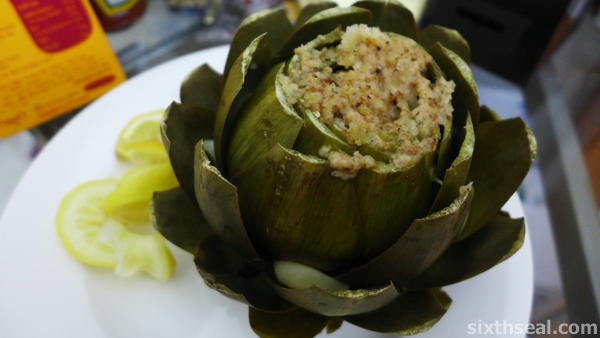
stuffed artichoke

Stuffed artichokes are actually quite easy to do once you’ve prepared the artichoke. The cutting of thorns and getting the choke out of the artichoke is the difficult part. Now you just have to stuff and cook it!

Artichokes can be eaten just steamed/boiled with butter and that is a fine way to eat it.

stuffing artichoke

However, I decided to stuff my artichoke for a better dish to present to my dear and this is the stuffing I used:

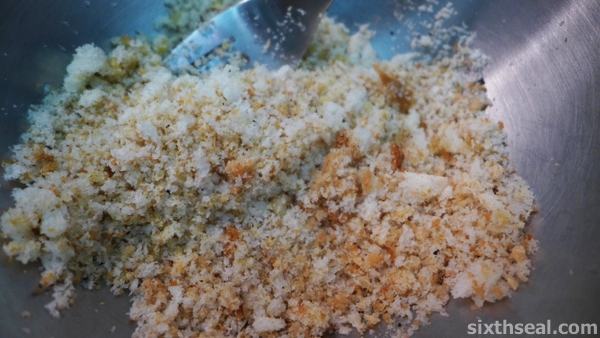
  • Breadcrumbs (stale from artisan bread – refrigerated)
  • Grated Parmesan cheese
  • Lemon zest
  • Olive oil
  • Pepper
  • Salt
  • Lemon juice

stuffing for artichokes

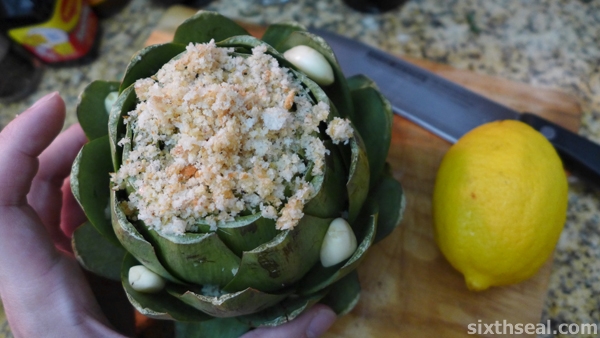
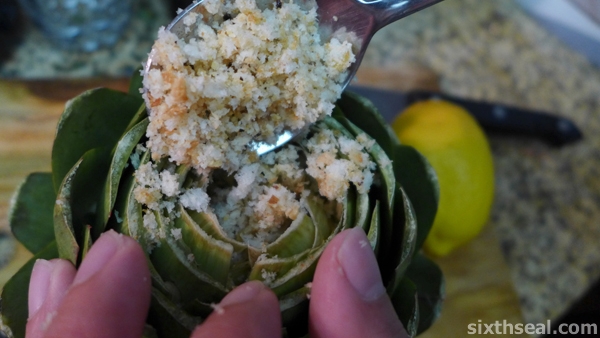
You want the consistency of the stuffing to be slightly moist, so what I did was to pour the breadcrumbs into a bowl and then mix in the rest of the ingredients, slowly adding olive oil until it’s slightly moist.

breadcrumbs artichoke

If you’re wondering what lemon zest is, it’s the peel of the lemon that’s been grated. I know, I just found out too. smirk

boiling artichokes

Stuff the inside of the artichoke with this prepared stuffing and also get the stuffing into the petals at the side so it’s even.

cooking stuffed artichokes

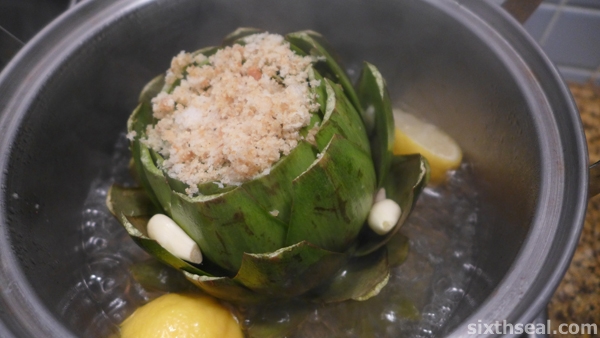
I also added some whole garlic into the petals coz I heard it undergoes a transformation that makes it delicious (it doesn’t).

basil leaves stock

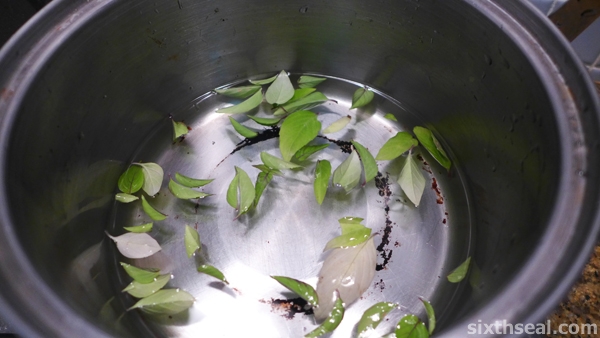
Next, I prepared water that goes about 1/4 up the height of the artichoke and saturated it with basil leaves from our own herb garden.

cooking stuffed artichoke

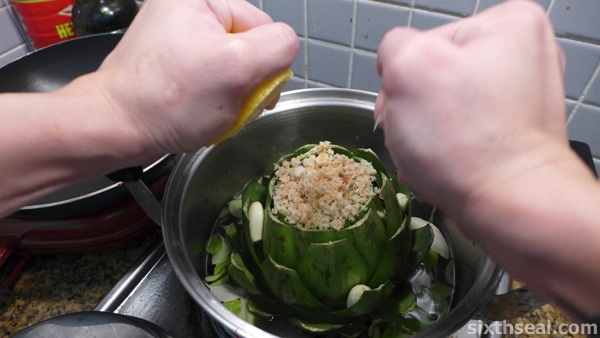
I put the stuffed artichoke in the basil filled liquid (make sure it’s *standing up*) and squeezed one (1) whole lemon all around it before throwing in the lemons.

stuffed artichokes

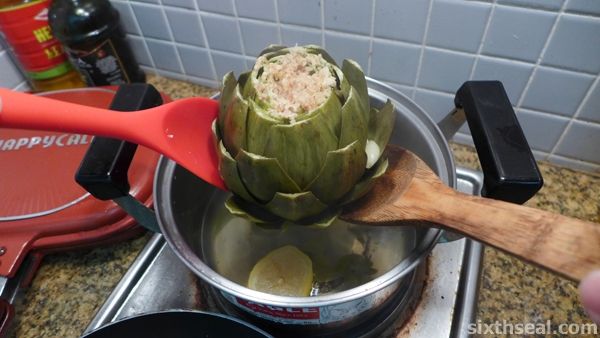
The pot is put on a slow boil with the lid on for about an hour. Mine was a fairly huge artichoke so it took me about 1 hour 15 minutes. You’ll know it’s ready when the petals are tender.

eating artichoke petals

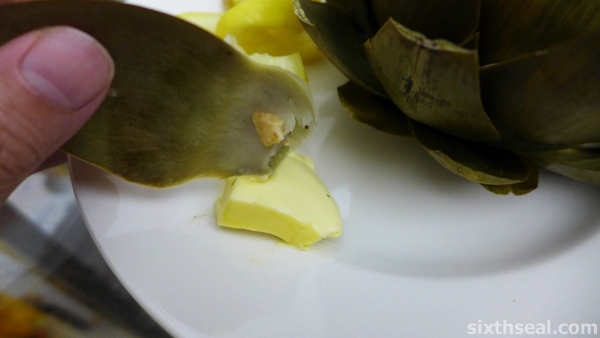
The eating of an artichoke is quite interesting and fun! I had this with my better half and we took turns peeling off the artichoke petals…

gripping artichoke petals

…and dabbing it in butter before squeezing the good stuff out with your teeth.

artichoke petals

This is actually quite a fun way to eat! You have to grip the artichoke petal between your teeth with the fleshy end down (the part you peel from the artichoke) and pull it through your teeth!

eating artichoke

I can see why they put artichokes in the aphrodisiac category! 😉

Guide to cooking an artichoke

preparing artichoke

I had a lot of fun doing this step-by-step guide to cooking and eating an artichoke. It’s an unusual vegetable which a lot of people avoid due to the difficulty in preparing it. It’s actually not that hard, you just need a sharp pair of kitchen scissors and *a lot of lemons*!

removing artichoke spines

The first one is to snip off the spines of the globe artichoke and the latter is to prevent the rapid oxidization (artichokes almost turn immediately brown when you cut into it).

You will need:

  • 2-3 lemons
  • Sharp kitchen scissors
  • Slicing knife
  • A sturdy metal spoon

eating artichokes

The artichoke we got cost RM 24.69. It’s RM 45.90 per kg and I calculate that each petal costs over RM 1! That’s coz the grocery sells the artichoke with a huge stem (which you can’t really eat).

cutting artichoke thorns

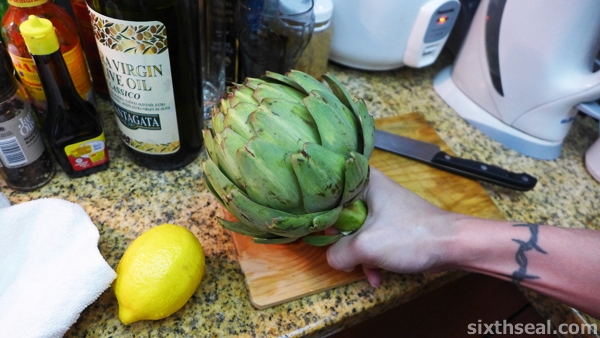
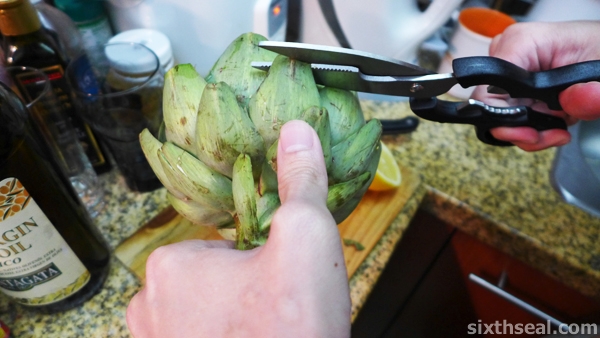
The first thing you do is to snip off the sharp spines in the individual petals on the artichoke. Just use your kitchen scissors to cut it off so a flat edge is formed.

artichoke lemons

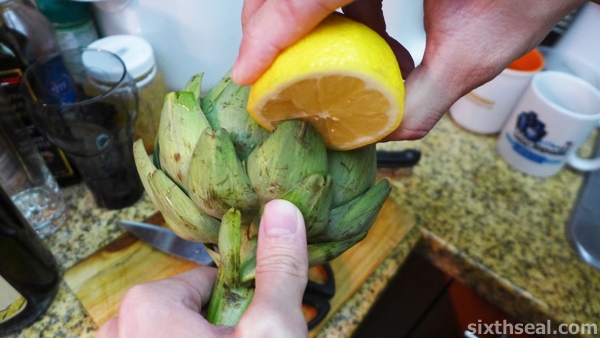
You will need to squeeze lemon juice (or rather dip the lemon half into the cut petal) as soon as you snip the thorns off. This is to prevent it from turning brown. Get those lemons ready!!! smirk

artichoke stem

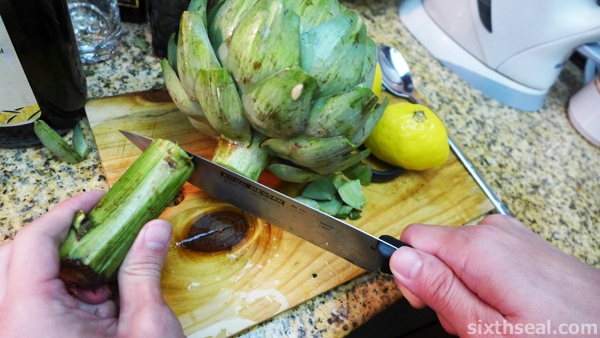
Once you have worked over the entire green artichoke and removed all the thorns, it’s time to cut off the stem. You need to get the stem level to the artichoke or about 1 inch from the end, depending on the recipe.

cutting artichoke

I think the stalk on my artichoke was a good 3-4 inches. It makes it look pretty, like a flower, but most people don’t eat the stem.

opening artichoke

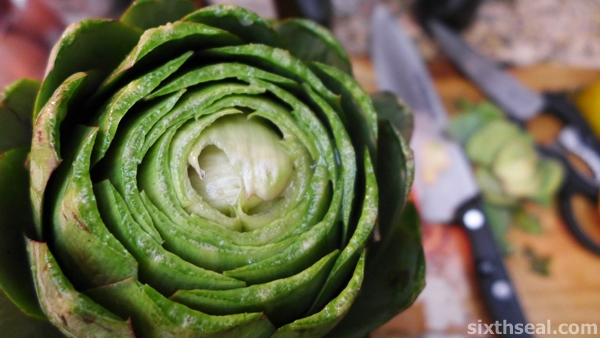
Now that everything is done, you need to remove the choke in the artichoke – use a sharp knife to slice 3/4 of an inch off the top of the artichoke. Remember to squeeze lemon juice all over the artichoke when you do this to prevent oxidization.

removing artichoke

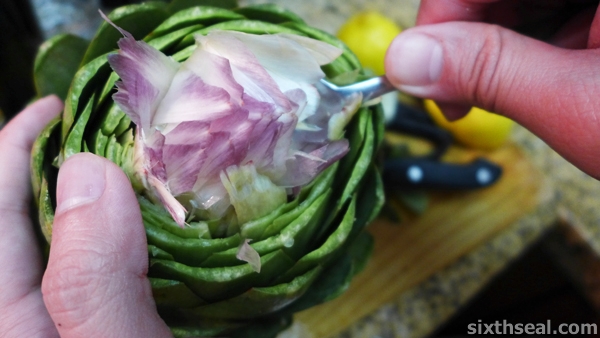
The next part is where your study metal spoon comes in…you need to use it to dig into the artichoke so you remove the choke. Think of it as using the spoon to eat a particularly hard frozen iced confectionery. That’s the same motion you should be using. Dig down and remove!

removing choke

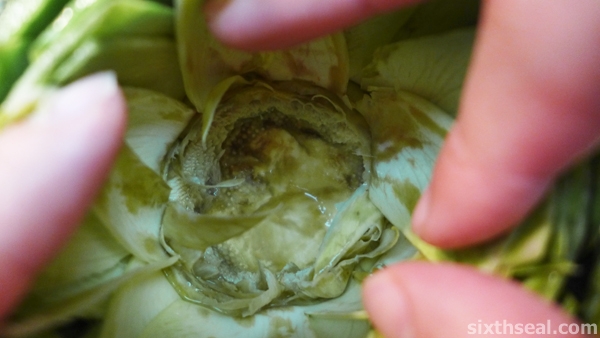
Some people can remove it with one dig but I never could. That’s not important, the important thing is to get the entire choke out since that’s totally inedible. It’s the pink/purple interior of the artichoke that comes with fibres that looks like asbestos.

artichoke choke fibers

I’m kidding, I don’t know what asbestos fibers look like but I imagine it’s similar to these! It’s almost feather like to the touch and you have to remove every single bit of the choke.

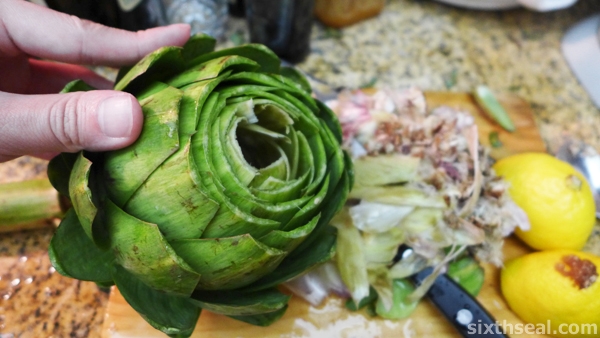
cleaning artichoke

Make sure your artichoke is clean and free of the choke by a simple visual inspection (you can leave the heart in – that’s edible) and it’s ready to cook! You now have a clean artichoke!

dressed artichoke

I did a stuffed artichoke from this with breadcrumbs and garlic – I’ll put that up soon! 🙂

Related Posts Plugin for WordPress, Blogger...